ByshantanuJanuary 2, 2013How to fix master boot record in Windows 8 This post contains the steps to fix the Master Boot Record ( MBR ) of your Windows 8…Windows 8
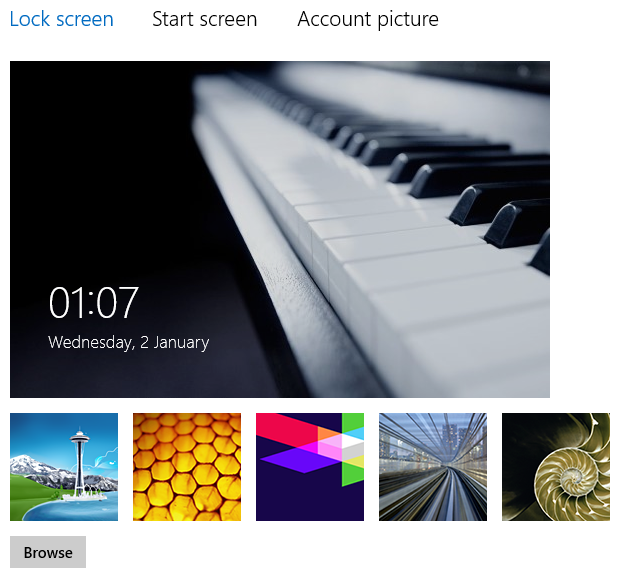
ByshantanuJanuary 1, 2013Fix : Unable to change Lock screen Picture / stuck user account picture in Windows 8 This article will help you fix an issue with windows 8, where you cannot change the Lock screen…Windows 8
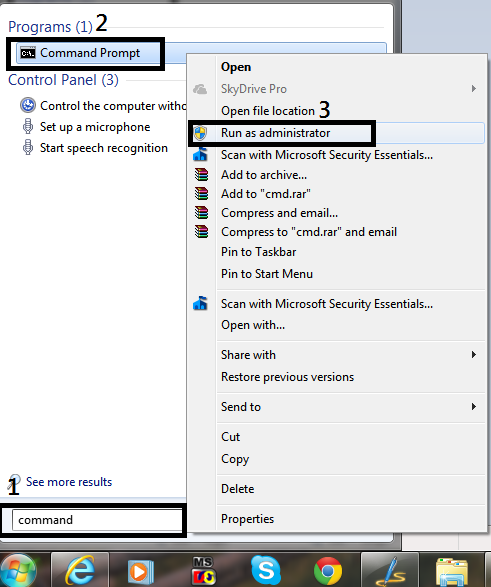
ByshantanuJanuary 1, 2013How to Open Command prompt with administrator privileges Windows 8 On the desktop Press Windows Logo Key + X Click on Command Prompt (Admin) Windows…Windows 7Windows 8Windows VistaWindows XP
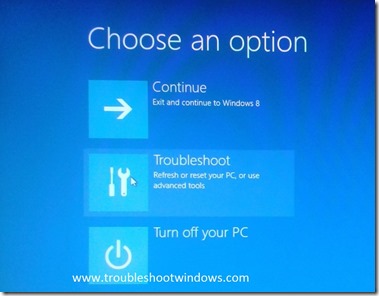
ByshantanuDecember 26, 2012Using recovery options quickly in Windows 8 After reading this article you will be able to use recovery options in windows 8. Recovery options are…Windows 8
ByshantanuDecember 26, 2012Fix : unable to sign in to windows 8 PC with Microsoft account This post produces some possible solutions to a problem with your windows 8 PC, where you cannot log…Windows 8
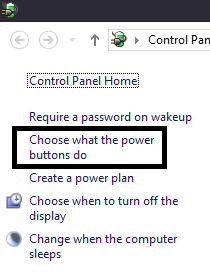
ByshantanuDecember 17, 2012Fix : Windows 8 Shutdown / Restarts if left IDLE After reading this post you will be able to fix an issue where your windows 8 computer might…Windows 8
ByshantanuDecember 6, 2012Video Tip: How to Use Refresh Your PC feature in Windows 8 The Video tip in this post contains steps for using Refresh Your PC feature in Windows 8. Refresh…Windows 8
ByshantanuDecember 3, 2012Video Tip: How to quickly open apps in Windows 8 This short tip explains the quickest way to open applications , program settings, files etc. on your Windows…Windows 8
ByshantanuNovember 27, 2012Fix : cannot turn off password protected sharing in Windows 8 , 7 , Vista This post will help you fix a problem with your Windows 7 , Windows 8 or Windows Vista…Windows 7Windows 8
ByshantanuNovember 25, 2012Fix : Windows Update fails / hangs in Windows 8 After reading this post you will be able to troubleshoot issues with Windows Update in Windows 8. The…Windows 8
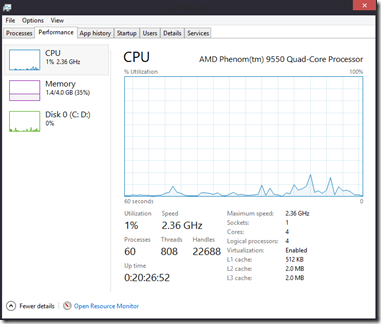
ByshantanuNovember 25, 2012Understanding the re-imagined Task Manager in Windows 8 This post focuses on the new and reimagined task manager in Windows 8. Microsoft has reimagined Windows, everything in…Windows 8
ByshantanuNovember 22, 2012Fix : Windows 8 Stuck at boot screen after setting up Hyper-V This post will help you fix an issue with your Windows 8 PC. This problem occurs after you…Windows 8