ByshantanuFebruary 28, 2013Fix : Recycle bin icon stuck to full or empty / not refreshing in Windows Vista & XP This post will help you fix a problem with your Windows based PC, where the recycle bin icon…Windows Vista
ByshantanuFebruary 24, 2013Review: Stellar Phoenix Windows Data Recovery for Windows 8 , 7 , Vista , XP Where there is Data, there is Data Loss. Whether it is due to a virus attack, software corruption…Windows 7Windows 8Windows Vista
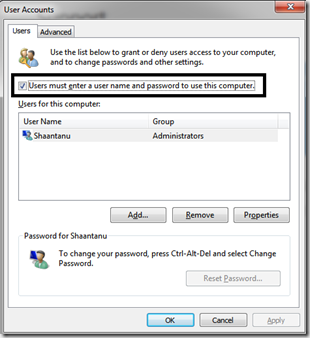
ByshantanuFebruary 15, 2013How to turn off USB ports / Pen Drive / USB storage in Windows 8 , 7 , Vista , XP This post will help you Turn off USB ports on your computer by a fairly simple trick. There…Windows 7Windows 8Windows VistaWindows XP
ByshantanuFebruary 12, 2013How to : Get Back / Enable Quick Launch in Windows 7 This post will help you get the old quick launch menu in Taskbar. The new Taskbar in Windows…Windows 7
ByshantanuFebruary 5, 2013Fix : Hard disk suddenly shows Raw partition, not accessible in Windows 8 , 7 , Vista , XP Windows cannot access this drive, do you wish to format it, is the message that you will receive when…Windows 7Windows 8Windows Vista
ByshantanuJanuary 27, 2013Fix : Folder view resets in Windows / Lost folder view settings in Windows 7 ,Vista This post will help you in fixing an issue with your Windows PC, where your customized folder view…Windows 7Windows VistaWindows XP
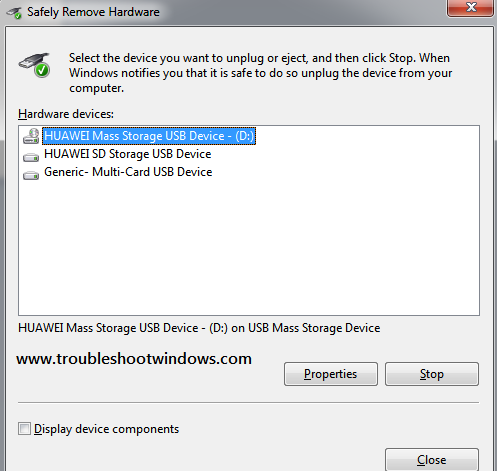
ByshantanuJanuary 22, 2013Fix: Safely remove hardware icon missing / dialog box not showing in Windows 7 , Vista This post will help you fix an issue where the safely remove hardware icon is missing from taskbar…Windows 7Windows Vista
ByshantanuJanuary 17, 2013Fix : Cannot play video in Internet Explorer / Internet explorer crashes on playing video After reading this post you will be able to fix an issue with your Internet Explorer, where Internet…Editorials
ByshantanuJanuary 15, 2013Fix : Interactive Logon Process Initialization Failure This post will help you fix an issue with your Windows 7 computer, where your computer might give…Windows 7
ByshantanuJanuary 13, 2013Fix : Keyboard Mouse not working after login in Windows 8 , windows 7 , Vista & XP This post will help you fix / troubleshoot an issue with your Windows PC, where, after login or…Windows 7Windows 8Windows VistaWindows XP
ByshantanuJanuary 4, 2013Fix : Windows 8 showing blank screen at startup / not starting after sudden or improper shutdown This post will help you troubleshoot / fix a problem with your Windows 8 PC where you are…Windows 8
ByshantanuJanuary 3, 2013Fix : Cannot turn on Windows Firewall in Windows 8 This post will help your troubleshoot a problem with Windows 8, where you cannot turn on Windows Firewall.…Windows 8