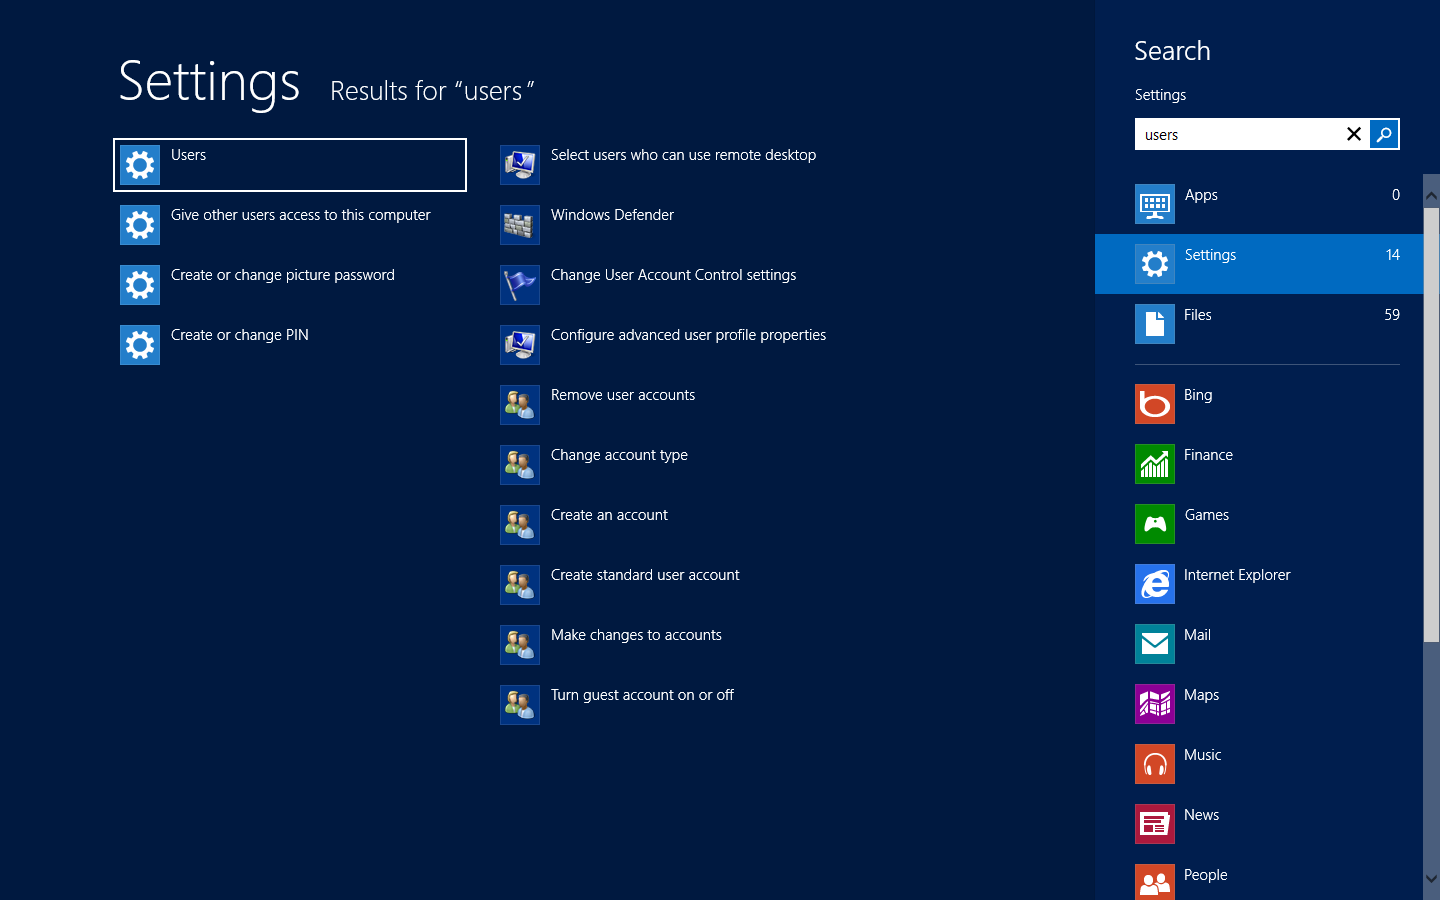
ByshantanuNovember 27, 2012Fix : cannot turn off password protected sharing in Windows 8 , 7 , Vista This post will help you fix a problem with your Windows 7 , Windows 8 or Windows Vista…
ByshantanuNovember 25, 2012Fix : Windows Update fails / hangs in Windows 8 After reading this post you will be able to troubleshoot issues with Windows Update in Windows 8. The…
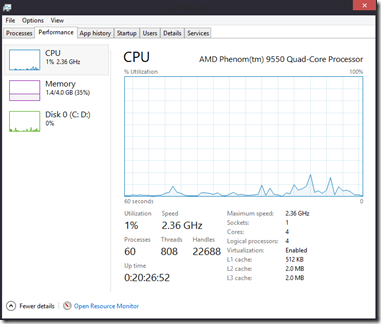
ByshantanuNovember 25, 2012Understanding the re-imagined Task Manager in Windows 8 This post focuses on the new and reimagined task manager in Windows 8. Microsoft has reimagined Windows, everything in…
ByshantanuNovember 22, 2012Fix : Windows 8 Stuck at boot screen after setting up Hyper-V This post will help you fix an issue with your Windows 8 PC. This problem occurs after you…
ByshantanuNovember 12, 2012Handy Keyboard shortcuts for Windows 8 Windows 8 is proving out to be a great & responsive operating system. It’s an operating system that…
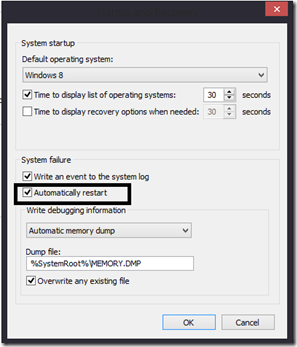
ByshantanuNovember 9, 2012How to disable automatic system restart on system failure in windows 8, 7, vista, XP This post will help you disable Automatic Restart on System Failure in Windows 8, 7, Vista & XP.…
ByshantanuNovember 8, 2012Fix: Mouse / Touchpad pointer jumps while typing in Windows 8, 7 ,Vista, XP After reading this post you should be able to fix a problem where your mouse or touchpad pointer…
ByshantanuOctober 31, 2012How to create a USB / CD / DVD Recovery Repair media in Windows 8 After reading this post, you will be able to create a recovery media in Windows 8. This media…
ByshantanuOctober 30, 2012Refresh your PC : Windows 8 Feature make your Installation new again This post explains a new feature in Windows 8, that enables the users to refresh their PC to…
ByshantanuOctober 29, 2012How to add another or non Microsoft email account in Windows 8 mail app This article focuses on the users who wish to add / configure another email account in windows 8…
ByshantanuOctober 28, 2012Fix : Clock watchdog timeout stop / blue-screen error in Windows 10 | 8 |8.1 After reading this post you will be able to fix a STOP error or better known as BSOD…
ByshantanuOctober 28, 2012Fix : Windows 8 UI / Metro Apps shows splash screen but won’t launch After reading this post you will be able to fix an issue where none of your Windows 8…