Category: Windows 10

Troubleshooting, tips, tricks & feature reviews of Windows 10

  • How to Speed Up Windows 10 laptop Without Software

    How to Speed Up Windows 10 laptop Without Software

    Is your Windows 10 laptop feeling sluggish? Over time, even the fastest machines can slow down. While many paid software solutions promise to optimize your PC, you can achieve significant improvements using only built-in Windows features. This guide will walk you through various methods to boost your laptop’s performance without spending a dime or installing any third-party applications.

    Understand Why Your Laptop Slows Down

    Before diving into solutions, it’s helpful to understand why Windows 10 laptops might slow down. Common culprits include:

    • Too many startup programs: Programs launching automatically when you boot up consume valuable RAM and CPU resources.
    • Insufficient storage: A nearly full hard drive or SSD (Solid State Drive) can severely impact performance.
    • Outdated drivers: Graphics or chipset drivers that aren’t current can lead to inefficiencies.
    • Excessive temporary files: These leftover files from Browse or software installations can accumulate and hog space.
    • Visual effects: Windows 10’s aesthetic features can be resource-intensive.
    • Power settings: Your laptop might be configured for power saving, which often compromises performance.
    • Malware or viruses: While this guide focuses on non-software solutions, it’s important to acknowledge that malicious software can drastically slow down your system. Regularly running Windows Defender is crucial.

    By addressing these areas, you can make a noticeable difference in your laptop’s speed.

    1. Disable Unnecessary Startup Programs

    Many applications are configured to launch automatically when you turn on your laptop. While some are essential, others merely consume resources and slow down your boot time and overall responsiveness.

    To manage startup programs:

    • Right-click on the Taskbar (the bar at the bottom of your screen) and select Task Manager.
    • Alternatively, press Ctrl + Shift + Esc to open Task Manager directly.
    • Click on the “Startup” tab.
    • You’ll see a list of applications and their “Startup impact.”
    • Identify programs that you don’t need to run immediately when you log in. Common culprits include messaging apps, download managers, and cloud storage clients.
    • Right-click on the program you want to disable and select “Disable.” Don’t worry, this doesn’t uninstall the program; it just prevents it from starting with Windows. You can still open it manually.

    Historically, managing startup programs has been a key optimization technique. In older Windows versions like Windows XP and Windows 7, users often relied on the msconfig utility. Windows 10 has integrated this functionality directly into the Task Manager, making it more accessible.

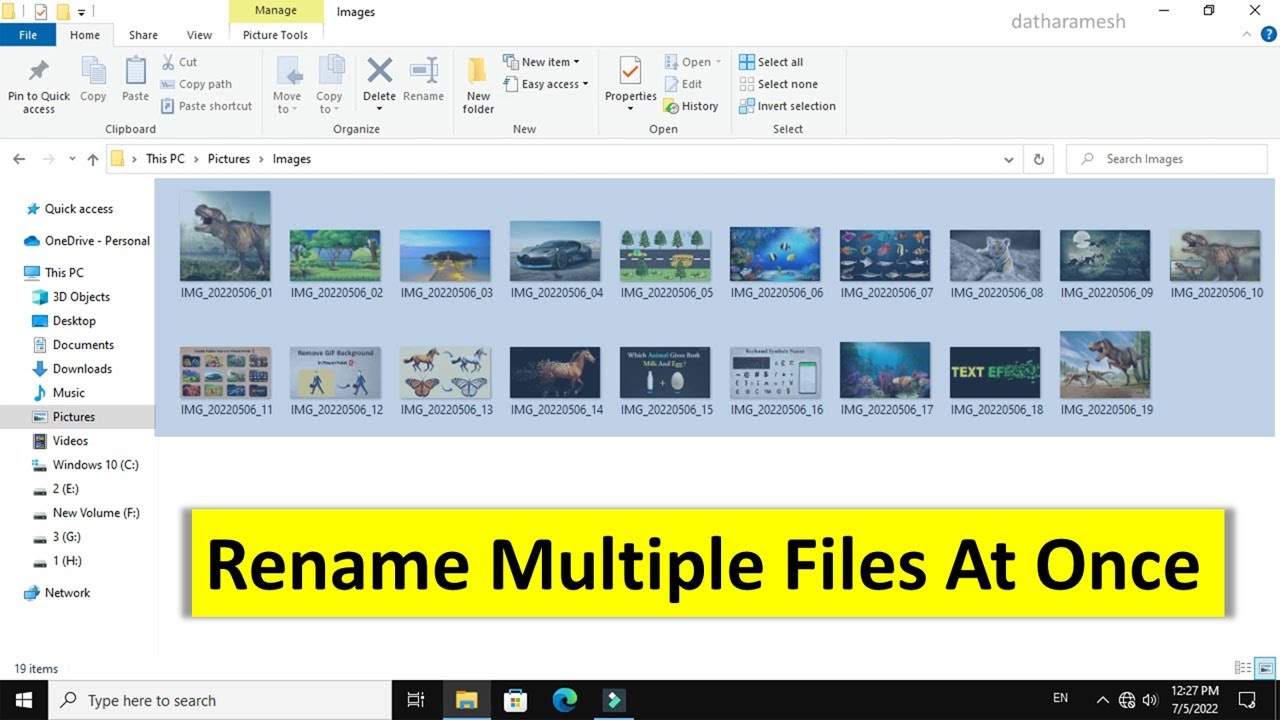
    1. Clean Up Your Hard Drive

    A cluttered hard drive can significantly slow down your system, especially if you’re nearing its capacity. Disk Cleanup is a built-in Windows utility designed to remove temporary files, system files, and other unnecessary data.

    To use Disk Cleanup:

    • Type “Disk Cleanup” into the Windows search bar (bottom-left of your screen) and select the application.
    • Choose the drive you want to clean (usually C: for your main system drive) and click “OK.”
    • Windows will scan for files that can be removed.
    • Check the boxes next to the types of files you want to delete. Common options include “Temporary Internet Files,” “Temporary files,” “Recycle Bin,” and “Downloads.”
    • For a deeper clean, click “Clean up system files.” This allows you to remove previous Windows installations, Windows Update temporary files, and other large system-related clutter. This is particularly useful after major Windows updates.
    • After selecting the files, click “OK” and then “Delete Files” to confirm.

    Regularly cleaning your drive ensures your system has enough free space to operate efficiently. Solid State Drives (SSDs), while faster than traditional Hard Disk Drives (HDDs), also benefit from having adequate free space to perform optimally due to how they manage data.

    1. Adjust Visual Effects for Best Performance

    Windows 10 features many visual effects, such as animations, shadows, and transparency, which enhance the user experience. However, these can consume system resources and slow down older or less powerful laptops.

    To adjust visual effects:

    • Type “Adjust the appearance and performance of Windows” into the Windows search bar and select the result. This opens the Performance Options window.
    • Under the “Visual Effects” tab, you have several options:
      • “Let Windows choose what’s best for my computer”: This is the default setting.
      • “Adjust for best appearance”: Prioritizes visual fidelity over performance.
      • “Adjust for best performance”: Disables most visual effects for maximum speed. This is often the most impactful setting for older machines.
      • “Custom”: Allows you to manually select which visual effects to keep or disable.
    • For the most significant speed boost, select “Adjust for best performance.”
    • Click “Apply” and then “OK.”

    While your Windows 10 interface might look less flashy, you’ll likely notice a considerable improvement in responsiveness.

    1. Manage Background Apps

    Even when you’re not actively using them, many apps continue to run in the background, consuming battery life, data, and system resources.

    To control background apps:

    • Go to Settings (click the Start button and then the gear icon).
    • Click on “Privacy.”
    • Scroll down the left-hand menu and select “Background apps.”
    • You can toggle off “Let apps run in the background” entirely, or selectively disable individual apps that you don’t want running in the background.
    • Review the list and turn off any apps you don’t need to receive notifications from or update in the background.

    This step can significantly free up RAM and CPU cycles, leading to a snappier experience.

    1. Disable Notifications and Tips

    Windows 10 can be quite chatty with notifications and tips. While some are helpful, constant pop-ups can be distracting and use minor system resources.

    To manage notifications:

    • Go to Settings > “System” > “Notifications & actions.”
    • You can toggle off “Get notifications from apps and other senders” entirely, or selectively turn off notifications for specific apps.
    • Also, consider turning off “Get tips, tricks, and suggestions as you use Windows” under the “Notifications” section.

    Reducing unnecessary notifications can contribute to a smoother user experience and marginally better performance.

    1. Adjust Power Settings

    Your laptop’s power plan significantly impacts its performance. By default, many laptops are set to a “Balanced” power plan, which aims to conserve battery life. Switching to a “High performance” plan will prioritize speed over power efficiency.

    To change power settings:

    • Type “Choose a power plan” into the Windows search bar and select the result. This opens the Power Options window in the Control Panel.
    • You’ll typically see options like “Balanced (recommended)” and possibly “Power saver.”
    • Click “Show additional plans” to reveal “High performance.”
    • Select “High performance.”
    • If you’re on a desktop PC, or have your laptop constantly plugged in, this is a highly recommended setting. Be aware that on a laptop running on battery, this will drain the battery faster.

    This setting ensures your CPU and other components are always operating at their full potential, rather than throttling back to save power.

    1. Run System Maintenance Troubleshooter

    Windows 10 includes various troubleshooters that can automatically detect and fix common problems. The System Maintenance troubleshooter specifically looks for issues that can slow down your PC, such as unused files and broken shortcuts.

    To run system maintenance:

    • Type Troubleshoot settings” into the Windows search bar and select the result.
    • Click on “Additional troubleshooters.”
    • Scroll down and find “System Maintenance.”
    • Click on “Run the troubleshooter.”
    • Allow the troubleshooter to scan for and attempt to resolve any issues it finds.

    While this might not always yield dramatic results, it’s a good habit to incorporate into your routine as it can fix underlying issues you might not be aware of.

    1. Optimize Drives (Defragmentation for HDDs / TRIM for SSDs)

    Over time, files on a traditional Hard Disk Drive (HDD) can become fragmented, meaning parts of a file are scattered across different physical locations on the disk. This forces the read/write head to move more, slowing down data access. Defragmentation reorganizes these fragments for faster access.

    For Solid State Drives (SSDs), fragmentation isn’t an issue in the same way. Instead, SSDs rely on a command called TRIM to manage data efficiently and maintain performance. Windows 10 automatically optimizes drives, but you can manually check its status.

    To optimize your drives:

    • Type “Defragment and Optimize Drives” into the Windows search bar and select the application.
    • Select your drive (e.g., C: drive).
    • Click “Optimize.” Windows will indicate if the drive needs optimization and proceed accordingly.
    • The “Current status” column will show the last optimization date.

    For HDDs, regular defragmentation is beneficial. For SSDs, ensure that the “Status” indicates “OK (TRIMmed)” and that the drive is being optimized regularly.

    1. Uninstall Unused Programs

    Every program you install takes up storage space and can sometimes leave behind remnants that affect performance, even if they aren’t actively running. Regularly uninstalling software you no longer use is a good practice.

    To uninstall programs:

    • Go to Settings > “Apps” > “Apps & features.”
    • Scroll through the list of installed applications.
    • Click on any program you no longer need and select “Uninstall.”
    • Follow the on-screen prompts to complete the uninstallation process.

    This frees up valuable disk space and ensures no unnecessary processes are running in the background.

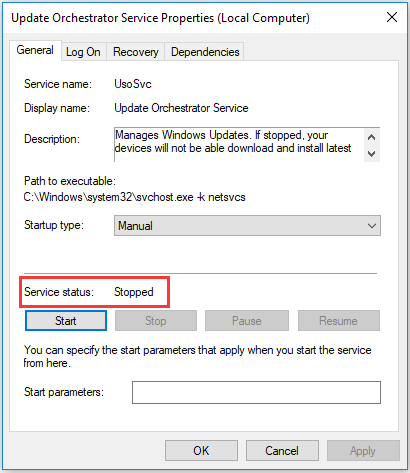
    1. Update Your Windows 10

    Keeping your Windows 10 operating system updated is crucial for performance, security, and stability. Microsoft frequently releases updates that include performance improvements, bug fixes, and new features.

    To check for updates:

    • Go to Settings > “Update & Security” > “Windows Update.”
    • Click on “Check for updates.”
    • Download and install any available updates. You may need to restart your laptop.

    Neglecting updates can leave your system vulnerable and prevent it from benefiting from the latest optimizations.

    1. Disable Search Indexing (Advanced)

    Windows Search creates an index of files on your drive to make searching faster. While generally beneficial, this indexing process can consume CPU and disk resources, especially on older HDDs. If you rarely use Windows Search or experience significant slowdowns, you can disable it.

    To disable search indexing:

    • Open “This PC” (or “My Computer”).
    • Right-click on your C: drive (or any drive you want to affect) and select “Properties.”
    • Under the “General” tab, uncheck the box that says “Allow files on this drive to have contents indexed in addition to file properties.”
    • Click “Apply.”
    • When prompted, choose to apply changes to “drive, subfolders, and files.” This process can take some time.

    Be aware that disabling indexing will make Windows Search slower. Weigh the performance gain against your reliance on search functionality. For SSDs, the impact of indexing is often negligible due to their inherent speed.

    Conclusion

    By consistently applying these straightforward, built-in methods, you can significantly improve the speed and responsiveness of your Windows 10 laptop without resorting to third-party software. Regular maintenance is key. Think of it like keeping your car tuned up – small, consistent efforts prevent larger problems down the road. Start with the easiest methods and work your way through them to find the combination that works best for your specific machine.

    FAQ

    Q1: Will disabling visual effects make my laptop look bad?

    Disabling visual effects will make Windows 10 look less flashy, removing animations, shadows, and transparency. While some users might prefer the aesthetics, the primary goal is performance improvement. You can always revert the settings if you don’t like the change.

    Q2: Is it safe to disable startup programs?

    Yes, it is generally safe to disable most startup programs. Disabling an application from starting with Windows does not uninstall it. You can still launch the program manually whenever you need it. Be cautious only with programs you’re unsure about, especially those listed as system processes.

    Q3: How often should I run Disk Cleanup or optimize my drives?

    For Disk Cleanup, a monthly routine is often sufficient, or whenever you notice significant slowdowns after heavy usage or large updates. For drive optimization, Windows 10 typically runs this automatically. You can check its schedule in the “Optimize Drives” utility. For HDDs, quarterly manual defragmentation can be beneficial if automated tasks are not keeping up.

    Q4: Will changing my power plan affect my laptop’s battery life?

    Yes. Setting your power plan to “High performance” will prioritize speed and responsiveness, which will typically lead to a faster drain on your laptop’s battery compared to “Balanced” or “Power saver” modes. If you’re running on battery, consider switching back to a more power-efficient plan.

    Q5: Can old drivers slow down my Windows 10 laptop?

    While this guide focuses on methods without installing new software (which often includes driver updates), outdated drivers can absolutely slow down your laptop. Graphics drivers, chipset drivers, and network drivers, if very old, can cause instability and performance issues. Typically, Windows Update will handle essential driver updates. For more specific driver issues, you might need to visit your laptop manufacturer’s website or the component manufacturer’s website (e.g., NVIDIA, AMD, Intel) to manually download and install the latest drivers. This would involve installing new software, which falls outside the scope of this specific “no software” guide.

  • How to Rename Multiple Files at Once in Windows

    How to Rename Multiple Files at Once in Windows

    Organizing digital files can be a tedious task, especially when you have hundreds or thousands of photos, documents, or other items with inconsistent naming conventions. Manually renaming each file is inefficient and time-consuming. Fortunately, Windows offers several powerful methods to rename multiple files at once, from built-in File Explorer features to command-line tools and third-party utilities. This guide will walk you through each method, helping you streamline your file management.

    Why Batch Rename Files?

    Batch renaming is essential for:

    • Organization: Create consistent naming for related files (e.g., “Vacation-001.jpg”, “Vacation-002.jpg”).
    • Searchability: Make files easier to find by adding relevant keywords.
    • Consistency: Standardize filenames across different projects or collections.
    • Cleanup: Remove unwanted prefixes, suffixes, or characters from filenames.
    • Workflow Efficiency: Save significant time compared to manual renaming.

    Before You Start: Best Practices

    • Backup Important Files: Before performing any bulk renaming, especially with command-line tools or third-party software, it’s highly recommended to create a backup of the files or the folder. This ensures you can revert to the original state if something goes wrong.
    • Test on a Small Batch: If you’re unsure about a renaming rule, test it on a small, disposable set of files first.
    • Understand Wildcards: In command-line tools, * represents any sequence of characters, and ? represents any single character.

    Method 1: Using Windows File Explorer (Simple & Quick)

    This is the easiest method for basic sequential renaming or applying a common name with a number.

    Step-by-Step:

    1. Open File Explorer: Navigate to the folder containing the files you want to rename.
    2. Select the Files:
      • To select all files in the folder, press Ctrl + A.
      • To select specific files, hold down the Ctrl key and click on each file you want to include.
      • To select a contiguous group, click the first file, then hold Shift and click the last file.
    3. Initiate Rename: Right-click on one of the selected files and choose “Rename” from the context menu, or simply press the F2 key on your keyboard.
    4. Type the New Name: The name of the file you right-clicked (or the last one selected) will become editable. Type the base name you want for your files (e.g., “Project Photo”).
    5. Apply Renaming: Press Enter.
      • Windows will automatically apply the new base name to all selected files and append a sequential number in parentheses (e.g., “Project Photo (1).jpg”, “Project Photo (2).jpg”, and so on).
    6. Undo (if needed): If you make a mistake, immediately press Ctrl + Z to undo the renaming.

    Limitations: This method only allows adding a sequential number at the end of the filename and doesn’t offer advanced options like replacing text or changing extensions.

    Method 2: Using PowerRename (Microsoft PowerToys) (Advanced GUI)

    PowerRename is a powerful utility included in Microsoft PowerToys. It offers search-and-replace functionality, regular expression support, and numbering options with a graphical interface. It’s ideal for more complex renaming tasks without diving into command lines.

    What You’ll Need:

    • Microsoft PowerToys installed on your Windows PC. You can download it from the Microsoft Store or GitHub.

    Step-by-Step:

    1. Install and Enable PowerRename:
      • Download and install Microsoft PowerToys.
      • Open PowerToys Settings (usually from the system tray).
      • Go to the PowerRename tab and ensure “Enable PowerRename” is toggled On.
      • You can configure options like “Use regular expressions” and “Enumerate items” here.
    2. Select Files in File Explorer: Navigate to your folder and select the files you wish to rename, just as you would for Method 1.
    3. Open PowerRename: Right-click on the selected files and choose “PowerRename” from the context menu.
    4. Configure Renaming Rules: The PowerRename window will open, showing a preview of your files.
      • Search for: Enter the text you want to find in the filenames.
      • Replace with: Enter the text you want to replace it with.
      • Use regular expressions: Check this box if you want to use regex patterns for powerful search and replace (e.g., ^IMG_ to remove “IMG_” from the start).
      • Case sensitive: Check this if you want the search to distinguish between uppercase and lowercase.
      • Match all occurrences: Replaces all instances of the search text, not just the first.
      • Apply to: Choose whether to apply changes to “Filename only,” “Extension only,” or both.
      • Enumerate items: Check this to add sequential numbering (e.g., “filename (1)”, “filename (2)”). You can customize the numbering format.
      • Text formatting: Change case (lowercase, uppercase, title case).
      • Include files/folders/subfolders: Control what gets renamed.
    5. Preview and Apply:
      • As you type, the “Renamed” column will show a live preview of the new filenames. Review this carefully.
      • Once satisfied, click the “Rename” button.
    6. Undo (if needed): PowerRename often offers an undo option within the tool or allows standard Ctrl+Z in File Explorer immediately after the operation.

    Method 3: Using Command Prompt (CMD) (Basic Text Operations)

    The Command Prompt offers basic but effective batch renaming using the ren (or rename) command, especially with wildcards.

    What You’ll Need:

    • Your Windows PC with Command Prompt.

    Step-by-Step:

    1. Open Command Prompt:
      • Press Win + R, type cmd, and press Enter.
      • Alternatively, type cmd in the Start menu search bar and select “Command Prompt.”
    2. Navigate to the Folder: Use the cd (change directory) command to go to the folder containing your files.
      • Example: If your files are in C:\Users\YourName\Documents\Photos, type:
      • cd C:\Users\YourName\Documents\Photos
      • If the path contains spaces, enclose it in quotation marks: cd “C:\My Documents\Old Photos”
    3. Perform Renaming:
      • To replace part of a filename (wildcard *):
        • Example: Change all files starting with “IMG_” to “Vacation_”.
      • ren IMG_*.jpg Vacation_*.jpg

    This command will rename IMG_123.jpg to Vacation_123.jpg.

      • To change file extensions:
        • Example: Change all .txt files to .log.
      • ren *.txt *.log
      • To add a prefix/suffix (more complex with ren): This is generally easier with PowerShell or dedicated tools. For ren, you’d typically need a batch script for more complex patterns.
      • To add sequential numbers (not directly supported by ren for true sequential numbering): The ren command with ? wildcards can replace characters, but not easily insert sequential numbers. For true sequential numbering, PowerShell or File Explorer are better.
    1. Confirm and Execute: Press Enter after typing the command. The changes will be applied instantly.
    2. Undo (Difficult): There is no direct “undo” command in CMD for ren. This is why backups are crucial when using command-line tools.

    Method 4: Using PowerShell (Powerful & Flexible)

    PowerShell offers much more advanced and flexible batch renaming capabilities than Command Prompt, using cmdlets like Get-ChildItem and Rename-Item combined with scripting logic.

    What You’ll Need:

    • Your Windows PC with PowerShell (pre-installed on modern Windows versions).

    Step-by-Step:

    1. Open PowerShell:
      • Press Win + X and select “Windows PowerShell” or “Windows PowerShell (Admin).”
      • Alternatively, type powershell in the Start menu search bar.
    2. Navigate to the Folder: Use the cd command to navigate to your folder (same as in CMD).
      • Example: cd “C:\Users\YourName\Documents\Family Photos”
    3. Perform Renaming (Examples):
      • Add a prefix to all files:

    PowerShell

    Get-ChildItem -File | Rename-Item -NewName {“Project_” + $_.Name}

    This renames photo.jpg to Project_photo.jpg.

      • Add a suffix before the extension:

    PowerShell

    Get-ChildItem -File | Rename-Item -NewName {$_.BaseName + “_Edited” + $_.Extension}

    This renames image.png to image_Edited.png.

      • Replace text in filenames:

    PowerShell

    Get-ChildItem -File | Rename-Item -NewName {$_.Name -replace “OldText”, “NewText”}

    This replaces “OldText” with “NewText” in all filenames. The -replace operator supports regular expressions for advanced patterns.

      • Add sequential numbering:

    PowerShell

    $i = 1; Get-ChildItem -File | ForEach-Object {Rename-Item $_ -NewName (“Photo-{0:D3}{1}” -f $i++, $_.Extension)}

    This renames files to Photo-001.jpg, Photo-002.jpg, etc. ({0:D3} pads the number with leading zeros to three digits).

      • Change file extension:

    PowerShell

    Get-ChildItem -Filter “*.txt” | Rename-Item -NewName {$_.BaseName + “.log”}

    This changes .txt files to .log.

    1. Confirm and Execute: Press Enter after typing the command. PowerShell commands are executed immediately.
    2. Undo (Difficult): Like CMD, PowerShell doesn’t have a built-in undo for Rename-Item. Careful planning and backups are essential.

    Insight: PowerShell is incredibly powerful due to its scripting capabilities and ability to pipe commands (|). It allows for very specific and complex renaming rules.

    Method 5: Using Third-Party Bulk Renamer Utilities (Feature-Rich)

    For the most advanced and visual batch renaming options, third-party utilities offer extensive features, often with live previews and undo functions.

    Popular Free Tools:

    • Bulk Rename Utility: Extremely powerful and feature-rich, but its interface can be overwhelming for beginners. It offers almost every renaming option imaginable.
    • Advanced Renamer: A user-friendly option with many features for renaming files and folders.
    • ReNamer: Another flexible and powerful tool for various renaming tasks.

    Step-by-Step (General for Most Tools):

    1. Download and Install: Download your chosen utility from its official website. Follow the installation instructions.
    2. Add Files: Open the utility. You’ll typically have an option to “Add Files,” “Add Folder,” or drag and drop files into the program’s window.
    3. Configure Renaming Rules: This is where these tools shine. You’ll find sections or modules for:
      • Text replacement (simple or regex)
      • Adding prefixes/suffixes
      • Adding sequential numbers (highly customizable)
      • Changing case (uppercase, lowercase, title case)
      • Removing characters by position or pattern
      • Using EXIF data (for photos) or ID3 tags (for music) for renaming.
      • Timestamp manipulation.
    4. Preview Changes: Most good utilities provide a live preview showing the original name and the new name before applying changes. This is a crucial safety feature.
    5. Apply Changes: Once you’re satisfied with the preview, click the “Rename,” “Start Batch,” or “Apply” button.
    6. Undo (if available): Many dedicated tools offer an “Undo” feature, which is a great safety net.

    Batch renaming files in Windows can significantly improve your digital organization. Whether you prefer the simplicity of File Explorer, the advanced capabilities of PowerRename, the precision of PowerShell, or the comprehensive features of a third-party utility, there’s a method suitable for every need. Always remember the importance of backups before making bulk changes to your file names.

  • How to reset Windows 10 password without losing data

    How to reset Windows 10 password without losing data

    Forgetting your Windows 10 password can be a frustrating experience, especially when you need to access important files. I’ve “encountered” this situation with many users, and the immediate concern is often whether they’ll lose their precious data. The good news is that Windows 10, as of April 2025, offers several methods to reset your password without losing any of your personal files. This guide will walk you through the step-by-step process for both Microsoft accounts and local accounts, ensuring you regain access to your computer quickly and safely.

    Step 1: Determine Your Account Type – Microsoft Account or Local Account

    The password reset process differs depending on whether you use a Microsoft account or a local account to log in to Windows 10.

    • Microsoft Account: If you log in using an email address (like Outlook, Hotmail, or Gmail) and password, you’re likely using a Microsoft account.
    • Local Account: If you log in using a username and password that you specifically created for your computer, and it’s not tied to an email address for login, you’re likely using a local account.

    Knowing your account type is the first crucial step.

    Step 2: Resetting a Microsoft Account Password (April 2025)

    If you’ve forgotten your Microsoft account password, the easiest way to reset it is through Microsoft’s online recovery process.

    1. On the Login Screen, Click “I forgot my password”: When you see the Windows 10 login screen, click on the “I forgot my password” link below the password field.
    2. Enter Your Microsoft Account Email Address or Phone Number: You’ll be asked to enter the email address or phone number associated with your Microsoft account. Type it in and click “Next.”
    3. Verify Your Identity: Microsoft will offer several ways to verify your identity. Choose the option that works best for you. Common options include:
      • Get a code via email: A verification code will be sent to the alternate email address you provided when setting up your account.
      • Get a code via phone: A verification code will be sent to the phone number associated with your account.
      • Use an authenticator app: If you have the Microsoft Authenticator app set up, you can use it to verify your identity.
    4. Enter the Verification Code: Once you receive the code, enter it in the designated field and click “Next.”
    5. Create a New Password: You’ll now be prompted to create a new password for your Microsoft account. Choose a strong and unique password that you haven’t used before. Enter it in both fields and click “Next.”
    6. Follow the On-Screen Instructions: Microsoft might ask you to take additional security measures, such as updating your security information. Follow the prompts to complete the process.
    7. Log In with Your New Password: Once the password reset is complete, you can log in to your Windows 10 computer using your new Microsoft account password.

    This is the most straightforward method for resetting a forgotten Microsoft account password without losing any data.

    Step 3: Resetting a Local Account Password Using Security Questions (If Set Up – April 2025)

    If you are using a local account and you set up security questions when you created the account, you can use them to reset your password.

    1. On the Login Screen, Click “Reset password”: If you enter an incorrect password multiple times on the Windows 10 login screen, you might see a “Reset password” link appear below the password field. Click on it.
    2. Answer Your Security Questions: You’ll be asked to answer the security questions you set up for your local account. Type in the answers carefully (they are usually case-sensitive) and click the arrow button.
    3. Create a New Password: If you answer the security questions correctly, you’ll be prompted to create a new password for your local account. Enter your new password in both fields and click the arrow button.
    4. Log In with Your New Password: Once the password reset is complete, you can log in to your Windows 10 computer using your new local account password.

    Important Note: This method only works if you set up security questions for your local account beforehand. If you didn’t, you’ll need to use one of the other methods.

    Step 4: Resetting a Local Account Password Using a PIN (If Set Up – April 2025)

    If you’ve set up a PIN for your local account, you can often use it to sign in even if you’ve forgotten your password. Once logged in, you can then change your password.

    1. On the Login Screen, Look for PIN Sign-in Options: On the Windows 10 login screen, look for different sign-in options. You might see an option to sign in with your PIN.
    2. Enter Your PIN: If you remember your PIN, enter it to log in to your computer.
    3. Change Your Password: Once logged in, go to Settings > Accounts > Sign-in options. Under the “Password” section, click “Change” and follow the on-screen instructions to set a new password for your local account.

    This is a convenient way to reset your password if you remember your PIN.

    Step 5: Resetting a Local Account Password Using Another Administrator Account (If Available – April 2025)

    If you have another administrator account on your Windows 10 computer that you know the password for, you can use it to reset the password for the locked account.

    1. Log In with the Other Administrator Account: Restart your computer and log in using the other administrator account.
    2. Open Computer Management: Right-click on the Start button and select “Computer Management.”
    3. Navigate to Local Users and Groups: In the Computer Management window, expand “Local Users and Groups” in the left-hand pane and click on “Users.”
    4. Right-Click on the Locked Account: In the right-hand pane, find the user account for which you want to reset the password, right-click on it, and select “Set password…”
    5. Proceed with Password Reset: You’ll see a warning message. Click “Proceed.”
    6. Enter and Confirm the New Password: Enter the new password you want to set for the account in both fields and click “OK.”
    7. Log Out and Log In with the Reset Password: Log out of the current administrator account and you should now be able to log in to the previously locked account using the new password you just set.

    This method requires having another administrator account with a known password on the computer.

    Step 6: Using a Password Reset Disk (If Created Previously – April 2025)

    If you had the foresight to create a password reset disk for your local account in the past, you can use it to reset your password.

    1. On the Login Screen, Click “Reset password”: Similar to using security questions, if you enter an incorrect password multiple times, a “Reset password” link might appear. Click on it.
    2. Follow the Password Reset Wizard: The Password Reset Wizard will appear. Click “Next.”
    3. Select Your Password Reset Disk: Choose the drive letter corresponding to your USB drive or floppy disk that you used to create the password reset disk. Click “Next.”
    4. Enter a New Password: You’ll be prompted to enter a new password for your local account. Enter it in both fields and click “Next.” You can also choose to create a new password hint.
    5. Click “Finish”: Once the process is complete, click “Finish.” You can now log in to your Windows 10 computer using the new password you just set.

    Important Note: This method only works if you created a password reset disk before you forgot your password.

    My Personal Insights on Windows 10 Password Resets (April 2025)

    I’ve assisted many users with forgotten Windows passwords, and the key takeaway is that the process varies significantly depending on whether you’re using a Microsoft account or a local account. For Microsoft accounts, the online recovery is generally reliable. For local accounts, having security questions or a password reset disk set up beforehand is incredibly helpful. If those options aren’t available, having another administrator account is the next best solution. Remember that all these methods aim to help you regain access without losing your valuable data.

  • How to Fix No Display Computer Screen Goes Black/Hangs/Blinks?

    How to Fix No Display Computer Screen Goes Black/Hangs/Blinks?

    Are you trying to fix the No Display Computer Screen Goes Black/Hangs/Blinks issue on Windows? Well, we’re here today with a detailed guide on different methods you can follow to fix the issue.

    What Causes a No Display Computer Screen Goes Black/Hangs/Blinks Issue on Windows?

    If you’re using a Windows computer and you suddenly see a black screen, it can be frustrating and worrying. There are a number of reasons why this might happen, such as:

    • Faulty or outdated graphic/display driver.
    • Virus/ related Malicious software.
    • Faulty hardware.

    How to Fix  No Display Computer Screen Goes Black/Hangs/Blinks issue on Windows?

    Fix-No-Display-Computer-Screen-Goes-Black-Hangs-Blinks-Windows

    Based on the above-mentioned causes of a black screen/display not working issue, below are some of the methods you can follow to fix No Display Computer Screen Goes Black/Hangs/Blinks issue on Windows?

    Method 1: Restart Your Computer

    Well, just like the tech jokes that you hear around, restarting your computer can solve lots of issues, much more than you think. So, in case the No Display Computer Screen goes Black issue is something new that you’re facing, then restarting your computer is the first thing you shouild try.

    You can also try modifying the “Turn OFF the Display” setting on your computer. To do the same, follow the steps below:

    1. Go to the Start menu on your computer and search for “Power Settings”.
    2. Within Power Settings, click on “Edit Power Plan”.
    3. Ensure that the “Turn Off the Display” setting is set to “Never”. This will prevent the display from turning off when the computer is in use.

    Method 2: Update Graphics Driver On Your Computer

    Outdated or corrupted graphics drivers can cause a black screen. To update the graphics card, go to the manufacturer’s website and download/install the latest driver for the graphics card that’s installed on your computer.

    If you’re not sure about the graphics card installed on your computer, you can follow these steps:

    1. Press the “Windows” key + “X” key to launch a pop-up menu bar. Within this menu bar, click on the option that says “Device Manager”.
    2. Within the Device Manager window that appears, expand the “Display adapters” option to find the graphics card installed on your computer.

    Method 3: Scan for Virus/Malware Infection

    The issue you’re facing could also be a result of a virus/malware infection on your computer. Newer Windows versions have inbuilt Windows Defender which can help you run a full virus/malware scan on your Windows computer.

    You can read our detailed article on how to keep your Windows 10/11 computer safe with Windows Defender features.

    Method 4: Hardware Issues

    The No Display Computer Screen Goes Black/Hangs/Blinks could also be a reason of faulty hardware on your computer. Take your computer to an authorized service center near you to get the hardware components checked and to troubleshoot the issue you’re facing professionally.

    Final Words

    We’ve tried to include some of the easiest and highly probable ways to fix the No Display Computer Screen Goes Black/Hangs/Blinks issue that you’re facing in this article.

    In case some other solution apart from the ones mentioned in this article helped you to fix the issue, do mention them in the comments below to help out other readers.

  • How to Upgrade to Windows 11 From Windows 10 Right Now

    How to Upgrade to Windows 11 From Windows 10 Right Now

    Windows 11 is the latest version of the operating system for computers by Microsoft and the operating system was announced in the month of June last year. Microsoft started to roll out the operating system in the month of October last year and now it is available on millions of computers around the globe. However, if you didn’t update the Windows 11 operating system yet on your computer then this article is meant for you as today we will guide you the way to upgrade to Windows 11 from Windows 10 right now.

    Before we getting into the procedure to upgrade Windows 11 from Windows 10, you need to know that the company has updated the system requirements for the operating system. You need to have the system requirements to install the Windows 11 operating system smoothly on your computer. You can check out the minimum system requirements to have Windows 11 on your computer below.

    System requirements for Windows 11


    • Processor: 1 gigahertz (GHz) or faster with 2 or more cores on a compatible 64-bit processor or System on a Chip (SoC)
    • Memory: 4 GB RAM
    • Storage: 64 GB or larger storage device
    • System firmware: UEFI, Secure Boot capable
    • TPM: Trusted Platform Module (TPM) version 2.0
    • Graphics card: DirectX 12 compatible graphics / WDDM 2.x
    • Display: > 9″ with HD Resolution (720p)
    • Internet connection: Microsoft account and internet connectivity required for setup for Windows 11 Home

    If your system is having the above mentioned features when you are good to install and use the new Windows 11 operating system.

    Highlights of Windows 11

    Windows 11 has been introduced with several changes in different sections. One of the highlighting elements of the latest version of the Windows operating system is the support for the Android applications. This means you can able to experience the Android applications on your computer but the same is not available in all the parts of the world at this moment of time.

    Microsoft has also made changes in the user interface of the operating system as well and you will find the Taskbar at the centre position of the screen. Windows 11 is also coming with new animations and sounds as well. The company has adopted more modern approach in the designing setup of the operating system.

    The developers of the operating system have also focused on the privacy and gaming section as well. It is also coming with a new tool that will enable you to type with your voice anywhere on any screen.

    Now let’s dive into the article to check out the ways to upgrade Windows 11 from Windows 10.

    Method 1. Upgrade to Windows 11 via Windows Update

    This is the simplest way to get upgraded to Windows 11 from Windows 10 and the same can be done using the Windows Update section which is available inside the Settings.

    You need to open settings on your computer and then simply click on the Update & Security. If your computer is supporting the operating system then you will see the “Upgrade to Windows 11 is ready”. If it is not showcasing then you need to force your computer to get the update. Once your computer finds the update for you, you just click Download and Install.

    After that, you need to click Download and install then Accept the license agreement. Your computer will take some time to download and install the new version of the Windows operating system for you and after that, you just restart your computer to get the Windows 11 operating system on the board.

    Method 2. Upgrade to Windows 11 With Upgrade Assistant

    First of all, you need to visit the Windows 11 download page by heading over the link. Then you need to click Download Now under Windows Installation Assistant and the installation assistant will download.

    Now open the newly downloaded Windows 11 Installation Assistant and click Accept and Install. This will take several minutes to get the operating system downloaded and install it on your computer.

    After that, you need to restart your computer when prompted and this procedure will again take several minutes and the same will also restart your computer a couple of times to complete the installation procedure.

    So this is how you can able to upgrade to Windows 11 from Windows 10 operating system. If you find any problems then share the same in the comments section below and we will be happy to help you.

  • Fixed – Windows 10 Update Assistant Is Already Running

    Fixed – Windows 10 Update Assistant Is Already Running

    The Windows 10 Update Assistant is one of the crucial tools by Microsoft as the tool enables users to update the operating system and the tool will confirm that the device has the necessary hardware and software to run the new version of the operating system smoothly on any device.

    Some users claim the programme constantly restarts itself, forces the installation of Windows 10 when users don’t want it to, and gives them the error message “Windows 10 Update Assistant is already running.” This article will provide solutions to such kind of issues. This can also occur if you intend to use the tool but instead receive this error message.
    This tool is simple to use. To download and install the most recent version of Windows 10 on your computer, use the Windows 10 Update Assistant tool that Microsoft created. With the help of this tool, you can update Windows 10 with new features while maintaining the security of your computer.

    By ensuring that users have the proper hardware and software for the upcoming version of Windows 10, Windows 10 Update Assistant upgrades the operating system.

    The Windows 10 Update Assistant, however, occasionally also causes some issues. When users don’t want it to and run into the error “Windows 10 Update Assistant is already running,” the Windows 10 Update Assistant always restarts itself and forces the installation of Windows 10.

    Do you understand how to resolve the problem that the Windows 10 Update Assistant is currently experiencing? You can actually try the following fixes to get rid of the Windows 10 Update Assistant is already running popup.

    The solution to the Windows 10 Update Assistant is already running error is demonstrated in the section that follows:

    1. Remove the Windows 10 Update Assistant

    You have the option of uninstalling Windows 10 Update Assistant to resolve the problem of it already running.
    Steps are given below:

    1.1 Start the Control Panel.

    1.2 After that, to proceed, click Programs > Uninstall a programme.

    1.3 Click Windows 10 Update Assistant in the pop-up window’s menu and select Uninstall to proceed.
    After completing all the steps, the Windows 10 Update Assistant has been successfully uninstalled, and the error that it is currently running has also been fixed.

    2. Shut down the Update Orchestrator service.

    You can also try stopping the Update Orchestrator Service if the error message “Windows 10 Update Assistant is already running” persists. Here is the steps.

    2.1 To open the Run dialogue, simultaneously press Windows and R.

    2.2 Enter msc in the box after that, and then click OK to proceed.

    2.3 Scroll down to Update Orchestrator Service in the Services window and double-click it.

    2.4 To change the status of the Service, click Stop next.

    2.5 To save the changes, click Apply and OK after that. After completing each step, restart your computer to see if the error that Windows 10 Update Assistant is currently running has been resolved.

    3. Stop and restart the Windows 10 Update Assistant

    You can keep shutting down Windows 10 Update Assistant if you want to block it. On this method, the Windows update service can be continuously terminated whenever it is active.

    Here is the steps.

    3.1 Launch Notepad.

    3.2 Then duplicate the next script.
    @echo off

    :Loop

    taskkill /im Windows10UpgraderApp.exe /f

    taskkill /im SetupHost.exe /f

    goto Loop

    3.3 Save the document as a bat next.

    3.4 Run it as administrator after that. The Command Prompt will then appear once and disappear.

    3.5 Make sure the file is hidden after that.

    In conclusion, this post has introduced 3 solutions for the Windows 10 Update Assistant is running error. Try these fixes if you experienced the same issue. You can share any more effective solutions to this error in the comment section.

  • Fix Qt5Widgets.dll missing or not found error on Windows 11/10

    Fix Qt5Widgets.dll missing or not found error on Windows 11/10

    Your computer which is powered by Windows 10 or Windows 11 may be causing an issue with the Qt5Widgets.dll missing or not found error and that is mainly because of the incorrectly installed operating system. Dynamic Link Libraries, or DLLs, are the shared libraries used by Microsoft Windows. Not all DLL files can be implemented without an.exe extension, and DLL files are just as significant as files with that extension. When we are running a programme, we frequently experience the qt5widgets.dll missing or not found error.

    The Qt Company Ltd. created the Qt5Widgets.dll file, which is a C++ application development framework for Windows OS. Several companies that depend on it won’t start if it disappears or doesn’t load.

    We advise to Restoro PC Repair Tool to repair a variety of PC issues:

    Common computer errors will be fixed by this software, which will also safeguard you against data loss, malware, hardware failure, and optimise your PC for optimum performance. In 3 simple steps, you can now fix PC issues and remove viruses:

    • Download the patented technologies-based Restoro PC Repair Tool.
    • To find Windows issues that might be causing PC issues, click Start Scan.
    • To address problems affecting the performance and security of your computer, click Repair All.
    The.exe extension is required for the implementation of all DLL file archives and is equally important to EXE files.
    Other programmes can use the functions or instructions in the dynamic link library. DLL files enable access to code and data needed for some applications to operate, saving disc space.
    The benefit is that apps use a shared DLL to store data instead of files, which speeds up your computer’s performance.

    How can I resolve the not found qt5widgets.dll problems?

    1. Manually download and install qt5widgets.dll

    1.1 Based on the language and architecture (64- or 32-bit) of the problematic programme, select the appropriate version of qt5widgets.dll and download it.

    1.2 To the C:WindowsSystem32 folder, copy the DLL file.

    1.3 Then select Run as administrator from the Run menu after typing Command Prompt in the search box on the Start menu.

    1.4 Press Enter after entering the following command.
    “regsvr32 qt5widgets.dll”.

    The qt5widgets.dll file is available online, where you can manually search for, download, and install it. Use the procedures listed above to locate the right file if you’re unsure which version to use.

    2. Automatically resolve the DLL error

    A third-party PC repair tool called Restoro will look for any problematic or corrupted programmes or files. The appropriate version of them will then be downloaded and installed to address the problems.

    Additionally, this application will fix DLL problems like the qtwidgets.dll not found error. In addition to repairing errors, it can improve PC performance.

    3. Run a malware check on your computer

    3.1 Type Windows Security into the search box after clicking the Windows icon.

    3.2 Select threat & virus protection.

    3.3 Pick Quick scan.
    Malware or malicious software can occasionally damage DLL files and cause qt5widgets.dll not found errors.

    4. Make use of System File Checker (SFC)

    4.1 Type Command Prompt into the search box after clicking the Windows icon, then choose Run as administrator.

    4.2 Hit Enter after entering the following command.
    “sfc / scannow”

    Use the sfc / scannow command, which automatically scans and fixes protected Windows system files, to resolve the DLL missing or not found error. The system will check after you type the command; damaged files will be identified and fixed.

    5. Perform a System Restore

    5.1 First, open the Run dialogue box by pressing Windows + R.

    5.2 Enter rstrui and then press OK.

    5.3 Choose a point of recovery Click Next once you’re certain the qt5widgets.dll file was valid.

    System Restore is a very useful feature for resolving various Windows errors, including the qt5widgets.dll error.
    Your computer will boot up with the restored version of Windows, and the problem will be resolved.

    It is also worth noting that the methods discussed in this article can resolve issues with Genshin Impact qt5widgets DLL, qt5widgets.dll Filmora X, and qt5widgets.dll missing.

    The qt5widgets.dll is missing error can occur for a variety of reasons. You can solve this problem using the solutions listed above.

    Furthermore, if you’re looking for qt5widgets.dll download for Windows 7, as well as qt5widgets.dll Windows 10 fixes, the methods listed above can still be used.

    Scan your system for malware to solve your problem. You can use System File Checker (SFC) to repair the missing qt5widgets.dll file and restore Windows.

    In the comments section below, please let us know which method you used to resolve the qt5widgets.dll is not found error.

    This is how you can able to fix the problem on your computer and if you find any problems then do let us know in the comments section below and we will be happy to help you. Having said that, if this article helps you then don’t forget to share with your near and dear ones.

  • How to remove Windows Spotlight Learn about this picture Desktop icon in Windows 11

    How to remove Windows Spotlight Learn about this picture Desktop icon in Windows 11

    Windows spotlight is an amazing feature by Microsoft as the same showcases beautiful background images on your laptop or desktop but the same is coming with the learn about the picture feature and the same will offer more detailed information about an image that is displayed. However, if you are someone who don’t like the learn feature then you can easily disable the same. We will show you how to remove the Windows Spotlight ‘Learn about this picture’ desktop icon in Windows 11 in this article.

    Previously, you could only turn on or enable Windows Spotlight on the lock screen, but Microsoft has released a new feature for Windows 11 that allows you to display Windows Spotlight backdrops on the desktop. You could find this icon annoying and there is no easy way to get rid of it. Therefore, you can utilise a Registry method described in this post if you wish to delete or hide this Windows Spotlight desktop icon.

    A Learn about this picture icon is also added to the desktop’s top right corner when you select Windows Spotlight to display the desktop backdrops on your Windows 11 machine. This icon may be moved to any location on the desktop, and you can use it to go to the next image.

    Everything is great, everything functions, and it appears to be a standard desktop icon. However, unlike other desktop icons, the Windows Spotlight desktop icon cannot be deleted, deleted with the Shift+Del hotkey, copied, pasted, or moved to a folder. Therefore, the Registry method given to this article can be tried by people who desire to remove the Windows Spotlight desktop icon.

    Get rid of Windows Spotlight Learn about this picture desktop icon’s details

    The Registry should be backed up before employing this Registry trick so that it may be restored if necessary. After doing that, proceed as follows:

    • You need to open Windows Registry Editor.
    • After that, select the NewStartPanel key.
    • Make a DWORD value of type “{2cc5ca98-6485-489a-920e-b3e88a6ccce3}”
    • Add 1 to the Value data.
    • Refresh your page.

    Now let’s check the steps in more detailed manner.

    1. To begin with, launch Windows Registry Editor using the Search box in Windows 11 or 10. Regedit can simply be entered by typing it and pressing the Enter key.

    2. Select the NewStartPanel key in Registry Editor, which is located under the HKEY CURRENT USER root key. The path looks like this:

    HKEY_CURRENT_USER\Software\Microsoft\Windows\CurrentVersion\Explorer\HideDesktopIcons\NewStartPanel

    3. Now expand the New menu on the right-click context menu of the NewStartPanel, select the DWORD (32-bit) Value option, and click OK. That DWORD value should then be renamed to “{2cc5ca98-6485-489a-920e-b3e88a6ccce3}”.

    4. To access its edit box, double-click on that value. Enter 1 in the Value data field after the box has been opened. To continue, click OK.

    5. Finally, open the context menu on your Windows 11 desktop and choose Refresh from the context menu or the F5 hotkey. The Windows Spotlight symbol will disappear after refreshing the desktop.

    Repeat the above instructions, but this time remove the value “2cc5ca98-6485-489a-920e-b3e88a6ccce3” to make the Learn about this picture icon appear on the desktop once more.

    This is the sole built-in method available as of right now for getting rid of the Windows Spotlight symbol off the desktop of Windows 11. We might be able to achieve that with upcoming releases by utilising the Settings app or another method as well. Use this Registry trick until then.

    How can desktop icons be hidden in Windows 10?

    There are a few normal alternatives available to you to hide desktop icons on a Windows 10 or Windows 11 PC. They are:

    • making use of the desktop context menu
    • Group Policy Editor
    • Desktop Icon Setup.

    The Desktop Icon Settings option allows you to hide/unhide icons for the Recycle Bin, This PC, user folder, Network, and other desktop items, whereas the first two options enable you hide all desktop icons (including desktop shortcuts).

    We believe now you can easily do the job and if you find any doubts then do let us know in the comments section below. If you find this useful then don’t forget to share this article with your near and dear ones and keep browsing for more tips and tricks.

  • How to Dual Boot Windows 10 and Windows 11

    How to Dual Boot Windows 10 and Windows 11

    It has long been customary to dual-boot several Windows versions. On the same hard drive of a PC or laptop, it enables you to experience both recent and outdated versions of Windows.

    By using dual booting, you can test out Windows 11 without wiping Windows 10. Dual-booting legally and without breaking Microsoft’s terms of service does require a separate licence and account for each of the two Windows operating systems.
    Now Lets look how to simultaneously boot Windows 10 and Windows 11 and the steps are shown below.

    Dual-booting Windows 10 and Windows 11: How to Do It

    A few things are required in order to dual booth Windows 10 and Windows 11. You must possess both a current Windows 11 licence and a current Windows 10 licence. A single usage of each licence is permitted. Windows 10 is likely to remove an original equipment manufacturer (OEM) licence from your computer, and Windows 11 will request a product key during setup. You’ll also need to have a different Microsoft account for each operating system since Windows 11 now requires you to have one as part of the setup for the Home Edition. Although you can attempt using the same one, having different accounts is recommended. This makes it easier to distinguish between any conceivable app downloads and other app licences connected to your accounts. You can always make a second Microsoft Account for nothing in order to test out Windows 11 and then delete it after everything is set up.

    You must be familiar with disc management tools, have a USB drive with a minimum capacity of 16 GB, and have access to the internet in order to download Windows 11 in order to dual boot. The prerequisites for Windows 11 must also be met. Without registry tweaks, dual booting is not possible if your computer is incompatible.

    1. Get Windows 11

    You must download Windows 11 in order to begin. Visit the Microsoft website to do this. Select Create Windows 11 Installation Media, then download the application. Upon starting it, select Use the recommended options for this PC. Click Next after selecting USB flash drive. A USB drive must be plugged in. Click Next after selecting your drive from the list. Your computer will make a bootable copy of Windows 11.

    2. Get ready to divide your main Windows 10 hard drive.

    You must navigate to Windows 10’s Disk Management for this second step. Use the Start Menu to find it and launch it. It will be Create and format hard disc partitions that you wish to choose. When you do, locate the OS drive, which is labelled C, and open it. Given that it is partitioned as NTFS, you should be aware that this is your OS drive. Shrink Volume can be selected by right-clicking the drive.

    3. Reduce the Windows volume.

    After clicking Shrink Volume, let Windows check your drive before proceeding. The drive can then be reduced in size in MB at that point.

    Remember that 1,000 MB is equal to 1 GB. So, at least 64,000 MB are required for Windows 11. We advise reducing your drive’s size to roughly that level. For our demonstration, we reduce to 100,000 MB. Use the Shrink button to accept the shrink.

    4. Make a fresh volume.

    It will take some time to reduce your volume, and it can appear that your computer has stalled, so don’t panic. When it’s finished, a new Unallocated space with a grey background will appear. When you do, right-click the blank area and select New Simple Volume.

    Give it a new drive letter (D is what we’ve chosen), then click Next. The volume can also be labelled. Ours is designated Windows 11. Keep everything in its current state and check that it resembles the scene in our photo above. Finally click the finish button.

    5. Turn off Bitlocker encryption and quick startup

    You must disable Bitlocker encryption and Fast Startup in Windows 10 after creating a new volume. By doing so, you can access your computer’s BIOS and switch between the two operating systems when it boots up.

    Search for Power in the Windows 11 Start Menu and select Power and Sleep Settings to do this. Next, select Additional Power Settings by scrolling down. Then choose What Does the Power Button Do? option.menu item. Toggle the checkbox for Fast startup to off, then click Change options that are temporarily unavailable. To finish, click Save changes.

    Find Bitlocker in the Start Menu and select Manage Bitlocker from the results. Device encryption must be turned off in Windows 10 Home.

    6. Boot your computer from the Windows 11 Bootable drive.

    After that, boot your computer from the bootable drive you just created. Typically, you may do this by pressing the F12 key on your laptop or keyboard after turning it on and selecting the name of your USB drive from the list of alternatives. Specific instructions varies based on the computer’s manufacturer. HP, Dell, and Lenovo have provided some instructions.

    7. Set up Windows 11

    When the Windows 11 installer has finished loading, select Next, then Install Now. Setup will begin, and you should select Custom. If no drives appear, enter your PC’s BIOS and set the SATA controller to compatibility/IDE/Standard Mode. After that, select the partition that you previously sized and named as Windows 11 and click Next. After that, Windows will be installed.

    8. Dual booting

    After you’ve installed everything, Windows will urge you to choose an operating system. Choose between Windows 10 and Windows 11 every time you boot your PC. You can also change the date and time right here.

    You must, however, first activate Windows 11 with a new product key. To do this, go to Activation Settings and then Change Product Key. To pair Windows with a key rather than your Microsoft Account, enter a new product key.

    Also, ensure that Fast Startup is disabled. Simply search for Edit Power Plan and then pick Power Options, as you did in Windows 10 Step 5.

    This prevents the deactivation of your Windows 10 installation. Otherwise, your skills may be restricted. At any time, you can choose your operating system from the dual boot option.

  • How to use Microsoft Edge Drop to Share files in Windows 11/10

    How to use Microsoft Edge Drop to Share files in Windows 11/10

    Microsoft Edge is the powerful and built-in web browser for Windows 11 and Windows 10 operating systems and the same is coming with a clean UI along with efficient performance. Microsoft Edge is also coming with a feature called the Microsoft Edge Drop and the same is capable to exchange files and personal notes on a Windows 11/10 PC. You can use this capability to share nearly any form of file (ISO, PDF, EXE, APK, TXT, audio-video files, etc.) from a Windows 11/10 PC and then use the Edge browser to download shared files to another device and vice versa. Aside from that, you can use its UI to send notes or personal messages to your devices.

    Before you use this Microsoft Edge Drop feature, consider the following things to learn more about it:

    • To share files, you must sign in to the Edge browser using your Microsoft account. You must also login in to other devices using the same Microsoft account to download the shared files.
    • Drop does not include any additional storage space or use a different cloud service. Instead, it makes use of the connected Microsoft account’s OneDrive storage space to share files and notes.
    • There is no exclusive size limit for sharing files because it is totally dependent on OneDrive’s free storage space and file size limit.
    • Your shared files are saved in your OneDrive account in a folder called Microsoft Edge Drop Files.
    • You can view the files you downloaded from Drop from the following location or folder on your Windows 11/10 computer:
    C:\Users\%username%\Downloads\Edge Drop Downloads

    Let’s have a look at how to use this feature:

    To begin, you must update Microsoft Edge to receive this functionality. This new feature has begun to be rolled out to users. If you haven’t received it yet, you’ll have to wait till you do.

    1. Enable or activate Microsoft Edge Drop.

    • Start the Microsoft Edge browser.
    • To open the Settings and More window, use the Alt+F hotkey combination.
    • Select the Settings tab.
    • Navigate to the Appearance category on the left side of the Settings window.
    • Turn on the Drop button in the right section.
    When you do this, the Drop icon will be added to the Extensions toolbar in the top-right corner of the Edge browser.

    2. Use Microsoft Edge Drop to share files and notes.

    Let’s look at how to exchange files and notes using Microsoft Edge Drop after you’ve enabled it:

    • Open the Extensions toolbar and select the Drop icon.
    • It will launch with an interface or panel that resembles a chat app on the right section. It contains a Refresh icon that may be used when shared files and notes are not displayed and a More icon that displays your OneDrive storage capacity (free and occupied), the opportunity to free up storage, etc.
    • Use the blue “Plus” button at the bottom of the screen to exchange files. Your computer’s files can be added with this. On its interface, files can also be dropped by drag-and-drop. Additionally, select “Write a note to yourself” from the text area to send a note or message.
    • To share the files, press the Enter key or click on the Send icon.

    You can also remove a specific file and take a note if necessary. To do so, use the Delete option from the three horizontal lines icon provided for a file or note.

    3. Using Microsoft Edge Drop, download any files you share.

    After successfully uploading and sharing files from one device, you can effortlessly download the files to another. To achieve this, go to the instructions given below:

    • Launch Microsoft Edge.
    • To access the same Microsoft account you used to share the files, sign in with it in the Edge browser.
    • Go to the Edge browser’s Settings page.
    • Choose the category of Appearance.
    • Take advantage of the Drop toggle
    • To open its interface, select the Drop icon from the Extensions toolbar.
    • From your primary device, you will be able to see all of the shared documents and notes. There will be a Sent time and a Download option provided for each file. Once you select that, Edge Drop will download those files to your computer.
    You can reach the download site or open the file straight from the Drop interface once it has been downloaded. You can utilise the Open, Open in folder (to access the download folder), Copy, and Delete options for each file as needed.

    So that’s how the Drop function in Microsoft Edge works to exchange files and personal notes.

    If it uses your OneDrive storage space to store and exchange files, you might be questioning whether such a function is necessary. The solution is that you don’t have to repeatedly log in to the desktop software, open the OneDrive online app, or add another account to OneDrive specifically to view shared files. Using this feature would make it easier to send notes (to remind you of anything important connected to a shared file) and share files to yourself across all of your devices.

    Can files be shared across Windows 10 and 11?

    Yes, you can transfer files across Windows 10 and Windows 11 in a variety of ways. Here are some of these alternatives:

    • Use various websites that let you share files for free. With these services, you may move big files between platforms with just a web browser.
    • Utilizing OneDrive
    • Utilize LAN to transfer files between computers
    • use the Microsoft Edge Drop function.

    How can I make file sharing available in Windows 11?

    The built-in file sharing function known as Nearby sharing is part of the Windows 11/10 operating system. It enables you to wirelessly or Bluetooth share files, photographs, documents, and other content with adjacent devices. On Windows 11/10 PCs, Nearby sharing is simple to enable and use.

    You may enable or disable Nearby sharing in Windows 11 by going to the System section of the Settings app. Use the Action Center to activate Nearby sharing in Windows 10. When it is finished, open File Explorer and choose the file you wish to share. Use the Share tab then, and follow the on-screen instructions. To share a file, you may also use the Share option found in the right-click context menu.

    That’s it! This is how you can use the Microsoft Edge Drop feature and do let us know your thoughts on the new feature in the comments section. We recommend you to stay tuned with us for more interesting tips and tutorials.