Have you ever wondered about how to keep your computer safe using Windows Security?
In this article, we take you through a guide on the configurations and settings you can do, to utilize the Windows Security app and keep your computer safe from offline and online threats.
Are you facing Windows No Sound problems? Check out our guide on how to fix the No Sound problem in Windows.
What is Windows Security in Windows 10/11?
“Windows Security” is an in-built application that you can see in both the Microsoft Windows 10 and 11 versions.
The purpose of this application from Microsoft is to keep your computer secure from any malicious threats and other security concerns without having to install and use any additional third-party tools.
Once enabled, the Windows Security application continuously scans your PC for any security threats, notifies you about the same in real time, and takes appropriate measures to remove such files from the PC.
What is Windows Defender?
If you’ve checked out the Windows Security features on your computer, then you might have also noticed a feature called Windows Defender.
Windows Defender is nothing but an in-built antivirus tool that is part of the features offered by Windows Security.
In the initial Windows 10 versions, this same feature was called Windows Defender Security Center.
In case any third-party antivirus app already runs on your computer, then Windows Defender will automatically turn OFF.
Also, in case you uninstall the third-party antivirus on your PC, then Windows Defender will turn back ON automatically as well.
What Are the Main Features of Windows Security?
Windows Security is the built-in security feature in the Windows operating system. Some of its main features include:
- Antivirus and anti-malware protection: Windows Security includes real-time protection against viruses, malware, and other threats. It can automatically scan your system and remove any threats that it finds.
- Firewall: Windows Security includes a firewall that monitors and controls the incoming and outgoing network traffic based on predetermined security rules.
- Network protection: Windows Security can help protect your system from threats that are transmitted over a network, such as malicious websites or unsecured Wi-Fi networks.
- Device security: Windows Security can help protect your system from unauthorized access and tampering by requiring you to sign in with a password or another authentication method.
- Security updates: Windows Security automatically installs the latest security updates from Microsoft to help protect your system from the latest threats.
- Security history: Windows Security keeps a record of past security events, such as threats that were detected and removed, so that you can review them and see how well your system is protected.
- App & browser control: Windows Security includes controls for managing the security of apps and browsers on your system, including setting up and managing parental controls.
- Device performance & health: Windows Security can help you diagnose and fix issues that may be affecting the performance and health of your systems, such as outdated drivers or low disk space.
How to Keep Your Computer Safe using Windows Security for Windows 10/11?
Below are some methods you can follow to keep your computer safe using Windows Security for Windows 10/11.
Perform a Periodical Quick Scan/Full Scan of your PC
To perform a periodic quick scan or full scan of your PC on Windows 10/11, follow these steps:
- Open Windows Security by going to Start > Settings > Update & Security > Windows Security.
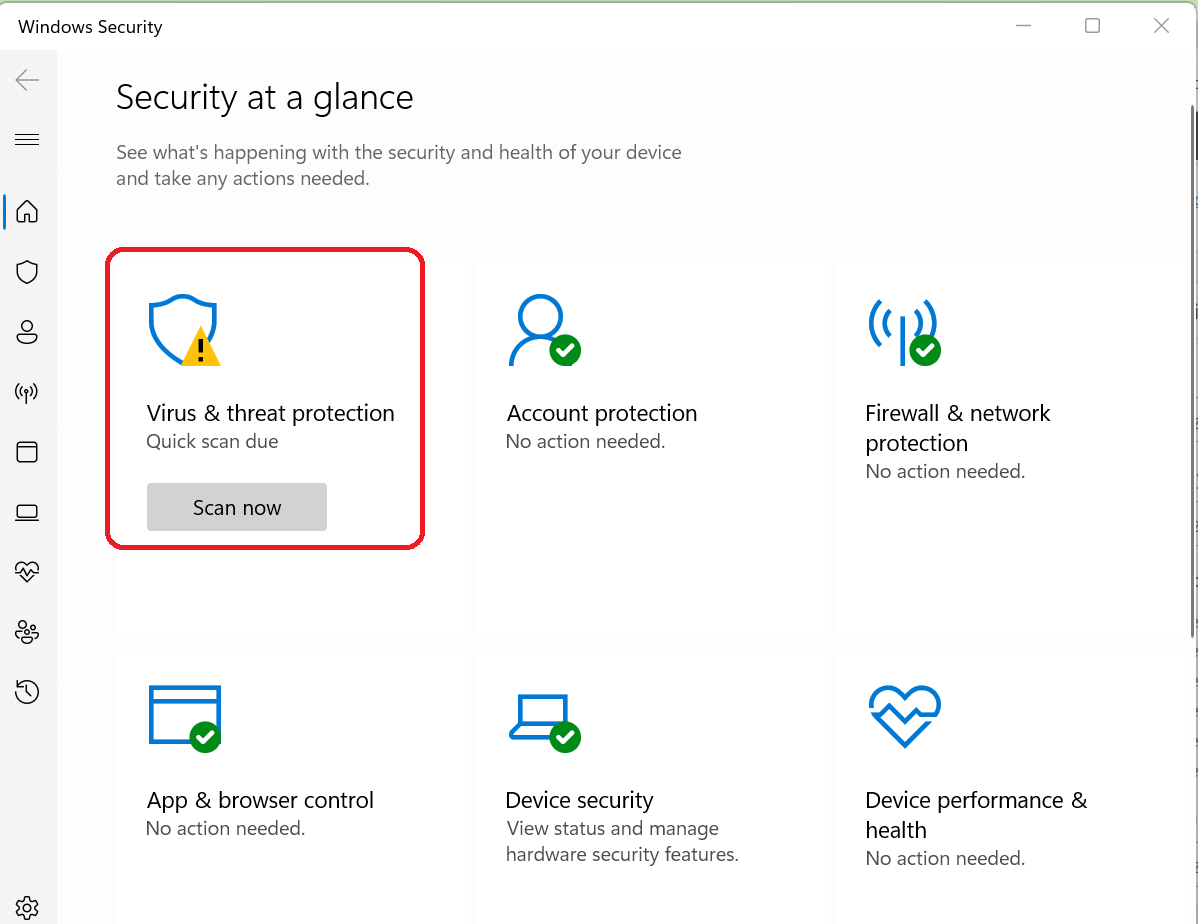
- On the Windows Security page, click on “Virus & threat protection” on the left side of the screen.
- On the Virus & threat protection page, click on “Scan options” and select either “Quick scan” or “Full scan”.
- Click on “Scan now” to start the scan. Windows Security will automatically scan your system for viruses and other threats.
- Wait for the scan to complete. If any threats are detected, Windows Security will display a list of them and offer options for removing them.
- Once the scan is complete, you can view the scan results by clicking on “See full history” on the Virus & threat protection page.
Enable Anti-Ransomware using Windows Security on Windows 10/11
To enable anti-ransomware using Windows Security on Windows 10/11, follow these steps:
- On the Windows Security page, click on “Virus & threat protection” on the left side of the screen.
- On the Virus & threat protection page, click on “Manage ransomware protection” on the right side of the screen.
- On the Manage ransomware protection page, turn on the “Controlled folder access” switch. This will enable anti-ransomware protection for your system.
- You can also customize the settings for controlled folder access by clicking on “Allow an app through Controlled folder access” and adding or removing apps from the list of allowed apps.
- Once you have enabled and customized controlled folder access, click on “Save” to apply the changes.
Keep Your Computer Safe using Windows Security By Enabling Microsoft Defender Firewall.
To enable Microsoft Defender Firewall on Windows 10/11, follow these steps:
- On the Windows Security page, click on “Firewall & network protection” on the left side of the screen.
- On the Firewall & network protection page, click on “Allow an app or feature through Windows Defender Firewall” on the right side of the screen.
- On the Allowed app page, scroll down to the bottom of the list and click on “Change settings”.
- In the Windows Defender Firewall window, make sure that the “Windows Defender Firewall” switch is turned on for both private and public networks.
- You can also customize the settings for specific apps by clicking on “Allow an app or feature through Windows Defender Firewall” and adding or removing apps from the list.
- Once you have enabled and customized the settings for Windows Defender Firewall, click on “OK” to apply the changes.
Enable Reputation-based Protection on Windows
To enable reputation-based protection on Windows 10/11, follow these steps:
- On the Windows Security page, click on “App & browser control” on the left side of the screen.
- On the App & browser control page, click on “Reputation-based protection settings” on the right side of the screen.
- In the Reputation-based protection settings window, turn on the “Block apps that have a low reputation score” switch. This will enable reputation-based protection for your system.
- You can also customize the settings for reputation-based protection by clicking on “Change settings” and selecting the level of protection that you want.
- Once you have enabled and customized reputation-based protection, click on “Save” to apply the changes.
Enable Application Guard for Microsoft Edge Browser
To enable Application Guard for the Microsoft Edge browser on Windows 10/11, follow these steps:
- On the Windows Security page, click on “App & browser control” on the left side of the screen.
- On the App & browser control page, click on “Exploit protection settings” on the right side of the screen.
- In the Exploit protection settings window, scroll down to the “Attack surface reduction” section and turn on the “Application Guard for Microsoft Edge” switch. This will enable Application Guard for Microsoft Edge.
- You can also customize the settings for Application Guard by clicking on “Configure application guard settings” and selecting the options that you want.
- Once you have enabled and customized Application Guard, click on “Save” to apply the changes.
Set up Exploit Protection on Windows 10/11
To set up exploit protection on Windows 10/11, follow these steps:
- On the Windows Security page, click on “App & browser control” on the left side of the screen.
- On the App & browser control page, click on “Exploit protection settings” on the right side of the screen.
- In the Exploit protection settings window, scroll down to the “Exploit protection” section and click on “Exploit protection settings”.
- In the Exploit protection settings window, select the options that you want to apply to your system. You can choose to apply the default settings or customize the settings for each category.
Enable Core Isolation on Windows using Windows Security
Enabling Core Isolation can help protect your system against threats that exploit memory vulnerabilities. To enable Core Isolation on Windows using Windows Security, follow these steps:
- On the Windows Security page, click on “Device security” on the left side of the screen.
- On the Device security page, click on “Core isolation details” on the right side of the screen.
- In the Core isolation details window, turn on the “Memory integrity” switch. This will enable Core Isolation on your system.
- You can also customize the settings for Core Isolation by clicking on “Configure memory integrity” and selecting the options that you want.
- Once you have enabled and customized Core Isolation, click on “Save” to apply the changes.
Set up Parental Control and Track Devices on Windows
To set up parental control and track devices on Windows 10/11, follow these steps:
- Open the Windows Security app by going to Start > Settings > Update & Security > Windows Security.
- On the Windows Security page, click on “Family options” on the left side of the screen.
- On the Family options page, click on “Manage family settings online” and sign in with your Microsoft account.
- On the Microsoft family page, click on “Add a family member” and enter the email address of the family member that you want to add.
- Once the family member has accepted the invitation, you can set up parental controls for them by clicking on their name and then on “Screen time”.
- In the Screen time settings, you can set limits for the amount of time that the family member can use the device, as well as the hours and days when they are allowed to use it.
- You can also set up content filters to block access to inappropriate websites, apps, and games.
- To track a family member’s device, click on their name and then on “Location”. You can then see the current location of the device on a map, as well as the history of its location.
Note: The parental control and device tracking features of Windows Security are only available to Microsoft family members. You will need to create a Microsoft family and add your family members to use these features.
How to Disable Windows Security?
To disable Windows Security on Windows 10/11, follow these steps:
- Open the Windows Security app by going to Start > Settings > Update & Security > Windows Security.
- On the Windows Security page, click on “Virus & threat protection” on the left side of the screen.
- On the Virus & threat protection page, click on “Manage settings” on the right side of the screen.
- In the Manage settings window, turn off the “Real-time protection” switch. This will disable real-time protection for your system.
- You can also disable other security features, such as Firewall and network protection, by going to the corresponding sections on the Windows Security page and turning off the switches for those features.
- Once you have disabled the security features that you want, click on “OK” to apply the changes.
Note: Disabling Windows Security may make your system vulnerable to viruses and other threats. It is not recommended to disable Windows Security unless you have a specific reason to do so. If you encounter any issues with Windows Security, you can try changing the settings or reinstalling it instead of disabling it.
Final Words
We have tried to cover all the important aspects of Windows Security in the easiest way possible.
Have any doubts?
Feel free to ask us your questions in the comments below and we will definitely help you out.
Leave a Reply