Blog

  • How to export or backup your registry in Windows 10

    How to export or backup your registry in Windows 10

    This post will tell you How to backup or export your Windows Registry in Windows 10. Having a backup of Windows Registry is very essential and sometimes proves vital when troubleshooting Windows problems. Follow this step by step guide with pictures to backup Windows registry | Export Windows Registry.

    Follow the steps below:

    • Press Windows logo key + X to bring up the power menu in Windows 10

    power menu windows 10

    • Now, Press A
    • Click on Yes, when prompted (This opens up an elevated command prompt)
    • Type in Regedit

    regedit_command_elevatedo

    • Now, Click on Computer

    registry_backup

    • Go to the File menu & Click on Export

    registry_export

    • Browse to your desired backup location
    • Type in a desired backup name
    • Make sure to select ALL at the bottom
    • Click on save

    registry_export_save

    If you have any questions or comments, please use the comments box.

  • How to fix Duplicate Drive Letter entry in Windows 10

    How to fix Duplicate Drive Letter entry in Windows 10

    After reading this article you will be able to fix a problem ( more of an inconvenience) with Windows 10, where when you open Windows explorer, the left hand navigation pane shows you multiple entries for the same drives. This looks cluttered and confuses the user. Though, its technically not a problem, but might prove to be a hassle.

    Follow the steps below to fix Duplicate Drive letter entry Windows 10

    Before following this post, I would recommend that you backup your registry or setup a system restore point. If you are not sure how to set a system restore point follow this post. If you wish to backup your registry in Windows 10, click here.

    Assuming that you have backed up your Registry and set a system restore point by now, let’s start:

    The duplicate entries in Windows 10 explorer should look something like this:

    duplicates

    To fix:

    • Press Windows Logo key + X to bring up the power menu in Windows 10
    • Now, Press A & Click on Yes to the prompt that appears.
    • In the Command prompt, type REGEDIT and press enter.
    • The Registry editor will open with elevated privileges

    regedit

    • Now, navigate to HKEY_LOCAL_MACHINE\SOFTWARE\Microsoft\Windows\CurrentVersion\Explorer\Desktop\NameSpace\DelegateFolders

    regedit1

    • Now, Right click the key under DelegatedFolders, that looks like the one below:

    regedit2

    • Press Delete & confirm with yes when prompted.
    • Now, If you are running Windows 10 64 bit, you need to again navigate to:
    • HKEY_LOCAL_MACHINE\SOFTWARE\Wow6432Node\Microsoft\Windows\CurrentVersion\Explorer\Desktop\NameSpace\DelegateFolders
    • Delete the key as you did in the steps above.
    • Now, Restart your computer & check if the issue has been resolved or not.
    • For me, it did.

    noduplicate

    If this method worked for you or if you have any follow questions or comments, please use the comment box to write to me.

  • Fix : The product key you entered did not work 0xc004f050

    Fix : The product key you entered did not work 0xc004f050

    After reading this post, you will be able to fix an error while entering your Windows 10 product key at the time of product activation. While there are multiple error codes that might be associated with the said error. Few of them are listed here and most of those can be fixed by following the steps in this post.

    Error codes – 0xC004F050 or 0x80041023

    0xc004f050

    While you may also get error code 0xC004F012 or 0xC0020036, but those are covered in the post : Fix : Windows is not activated 0xC0020036 in Windows 10.

    So, let us come to why this error occurs. The most common cause for this error is a corrupt license. What times means is that your Windows license registry has failed to provide a valid call to your operating system to confirm the authenticity of your product.

    This might happen right after a major upgrade to your operating system, due to some misplaced system files or ultimately a virus (including all sorts of ‘wares’)

    How do you fix it?

    Method 1: System file checker


    • Press Windows logo key + X ( opens power menu in Windows 10)
    • Click on Windows PowerShell (Admin)
    • And click on Yes when prompted
    • Now within PowerShell type in SFC/ SCANNOW
    • Let the process finish and restart your computer
    • Check if this solved your problem,
    • If not, move on to Method 2

    Method 2 : Rebuild Activation Repository

    • Go to X:\Windows\System32\SPP\Store\2.0
    • locate the file called Tokens.dat
    • Rename the file to anything like token_old.dat
    • Now, open your start menu and type in Command prompt
    • Right click Command prompt in the search results and click on Run as Administrator
    • Now, click on Yes, when prompted
    • Now, in the command prompt you just opened type in
    • net start sppsvc
    • Press Enter – “This will start the software protection service”
    • Then, type in
      cscript.exe slmgr.vbs /rilc
    • The command will take some time to execute. Wait for it to finish.
    • Now, Restart your computer
    • Now, click on start and type in Activation Settings
    • Click on Activation Troubleshooter
    • Follow the steps and thereafter restart your computer

    This should solve the issue. If not, please use the comment section to write and tell me about it. I will try and help you out.

  • How to make a virtual switch in Windows 10

    How to make a virtual switch in Windows 10

    This post helps you create a virtual switch in Windows 10. A virtual switch is used to enable the virtual machines to communicate with your physical network. A Virtual switch is mandatory for any Virtual Machine to communicate with the network, so it’s a bridge between your VM & Network. Below are the steps to create a network switch.

    • Open up the Hyper-V manager
    • hyper-v4
    • Type Hyper-V manager in the start screen | Start menu
    • Now, Click on the server name on the Left hand side pane
    • hyper-v5
    • Then, Click on Virtual Switch Manager
    • Now, Click on New Virtual network switch
    • SM1
    • Click on External
    • Click on Create Virtual Switch
    • Now, Give a name to your switch
    • Click on Apply
    • SM2
    • You will get a notification like the one shown below
    • SM3
    • Click on Yes
    • Changes will be applied
    • To check whether your virtual switch is working or not,
    • Right Click, the Network icon in your taskbar
    • SM4
    • Click on Open Network and Sharing Center
    • SM5
    • You should see the name of your virtual switch listed here.


    Hope this post helps, your comments & suggestions, if any, can be shared through the comments section.

  • Fix : Http error uploading media in WordPress

    Fix : Http error uploading media in WordPress

    This post will help you fix an error while you try to insert an image or any media in a WordPress post using your browser. Though, this error might be due to a temporary http request mishandling by your hosting server, it might as well be due to memory constraints within your WordPress installation.

    Let us try and fix this issue with the steps mention herein.

    Fix: http error while uploading images to a WP post

    httperrorwp

    Method 1 : Change the memory limit in your WordPress configuration

    Required : An FTP client and a text editor
    While I prefer using CoreFTP and notepad or notepad++, any FTP client or editor will do the job.

    • Login to your FTP server
    • Locate “wp-config.php” file
    • Right click the file and click on edit
    • memory_limit
    • Insert the code as highlighted in the image above

    define( ‘WP_MEMORY_LIMIT’, ‘256M’ );

    Save the file and overwrite it, if prompted.

    Method 2: Logout and Log back in

    • Log out of your WordPress
    • Log in again
    • Try to upload the image to check if it works

    Hope this solves the issue, if not please use the comment or contact section to contact me and I will try my best to solve it for you.

  • Windows 10 : How to restore a checkpoint

    Windows 10 : How to restore a checkpoint

    After reading this post you will be able to restore a checkpoint that you made earlier. Checkpoints are a feature of Windows 10 hyper-V, where you can very conveniently undo the changes made to a Virtual machine. It’s something like system restore, but deals with a rather different model, known as standard checkpoints & Production checkpoints. Learn how to create a checkpoint in Windows 10 using this post. Now, below is the method to Restore this checkpoint:

    • Open Hyper-V manager
    • Go to the Start menu | start screen
    • Type Hyper-V manager
    • hyper-v4
    • Now, Select the server from the left hand pane
    • Start any of your VM that you previously created a Checkpoint on
    • Now,
    • Click Action menu at the top
    • Click on revert
    • Click on Revert
    • VC8
    • By doing this your VM will now revert to the state in which you created a checkpoint
    • vc10
  • Fix : Namespace error with gpedit.msc Windows 10

    Fix : Namespace error with gpedit.msc Windows 10

    This post concentrates it’s focus on an issue that comes when either you have a computer that’s running Windows 10 RTM (Build 10240) or you have upgraded your computer to Windows 10 version 1511 (Build 10586). In both of these scenarios, you might receive an error “Namespace ‘Microsoft.Policies.Sensors.WindowsLocationProvider’ is already defined as the target namespace for another file in the store.  when you try to run gpedit.msc & try to click on either User or computer configuration. You might not get this issue if you are upgrading from Windows 7, Windows 8.1 directly to Windows 10 version 1511 & skipping Windows 10 RTM. I recently faced this issue when visiting a Microsoft conference at Hyderabad and thought to post a solution to it.

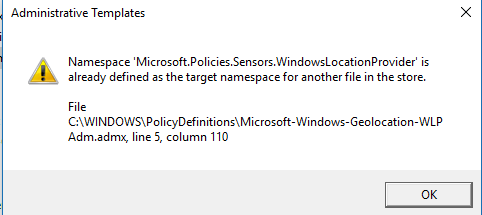
    The screenshot of the example looks like this:

    namespace windows location gpedit error

    The error reads:

    Namespace ‘Microsoft.Policies.Sensors.WindowsLocationProvider’ is already defined as the target namespace for another file in the store.
    File
    C:\WINDOWS\PolicyDefinitions\Microsoft-Windows-Geolocation-WLPAdm.admx, line 5, column 110

    This usually happens when the the files “Microsoft-Windows-Geolocation-WLPadm.admx” & “LocationProviderADM.admx” present in C:\Windows\PolicyDefinitions\ and “Microsoft-Windows-Geolocation-WLPAdm.adml” and “LocationProviderADM.adml” present in C:\Windows\PolicyDefinitions\en-us gets rewritten or corrupted during up gradation.

    Below are the steps to Fix: Namespace error with gpedit.msc Windows 10

    Solution: Delete these files mentioned above

    First Step: Taking ownership of all these files:

    • Press Windows logo key + X ( To open power menu in Windows 10)
    • Press A & click on yes when prompted
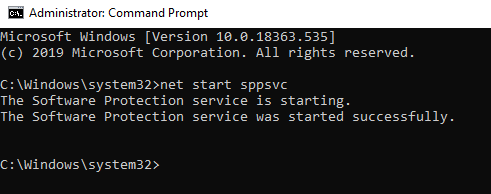
    • This will open the command prompt with elevated privileges
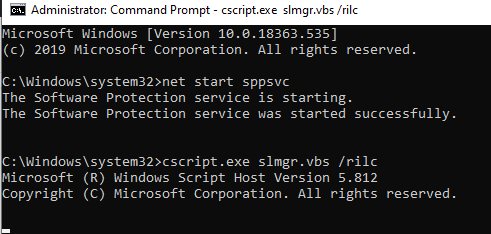
    • Now, type in these four commands one by one. Press Enter after each one of them to execute

    takeown /F ” C:\Windows\PolicyDefinitions\Microsoft-Windows-Geolocation-WLPAdm.admx” /A  

    takeown /F ” C:\Windows\PolicyDefinitions\en-US\Microsoft-Windows-Geolocation-WLPAdm.adml” /A

    takeown /F ” C:\Windows\PolicyDefinitions\LocationProviderADM.admx” /A

    takeown /F ” C:\Windows\PolicyDefinitions\en-US\LocationProviderADM.adml ” /A

    ownership microsoft geolocation policy store

    policy location adml admx delete

    • Now, Change permissions
    • Go to C:\Windows\PolicyDefinitions
    • Find the file LocationProviderADM.admx and Microsoft-Windows-Geolocation-WLPAdm.admx
    • Right Click the file & Click on Properties
    • Go to the security tab

    taking ownership

    • Click on Administrators
    • Click on edit
    • Now, again click on administrator
    • Check the checkbox that says full control
    • Click on Apply and ok
    • Now, repeat this step for the remaining three files
    • Now, delete all four files
    • Done
    • Try opening gpedit.msc

    Hope this helped you, if you have any questions or suggestions, please feel free to write to me.

  • Using Windows 10 update troubleshooter

    Using Windows 10 update troubleshooter

    This post will help you use the in built feature of Windows 10 to troubleshoot problems / issues related to Windows update in Windows 10. Generally, Windows update works to get you recommended updates without any critical issues, but sometimes due to different problems, related to network or connectivity, some updates might not install properly or the Windows update service itself might hang or get affected. For such a case Microsoft has programmed a functionality in Windows 10, that’s called the Update Troubleshooter.

    Below are the steps to use Usinng Windows 10 Update Troubleshooter

    • Go to the Cortana Search
    • Type Troubleshooting & Click on Troubleshooting as shown in the Screenshot below

    cortana search

    • Now, Troubleshooting options will open within control panel
    • On the Left hand pane, Click on View all

    control panel troubleshoot

    • Now, from the list select the last option
    • That says, Windows update
    • This option will start the Windows update troubleshooting functionality that has been integrated into Windows 10.

    update_troubleshooter_windows10

    • In this Wizard,
    • Click on Advanced,
    • Then, click on Apply Repair Automatically
    • Click on Run as administrator
    • Click on Next.

    windows_update_troubleshoot

    as admin repair

    detecting_problems

    This will Start the Troubleshooting process and will automatically fix the issues, if any, with your Windows update module.

    Hoping that this step-by-step guide for using Windows 10 update troubleshooting was useful for you. If you have any questions or comments, please feel free to use the comments box to send across your query to me, I will answer it as soon as possible.

  • Create Restore point & restore Windows 10

    Create Restore point & restore Windows 10

    This post is specifically intended for Windows 10 users. This post will help you Create restore point & Restore Windows 10. By default, System restore is not enabled in Windows 10. Though, its a very useful feature, there are other diagnostics and recovery options built in to Windows 10 that normally does the work just fine. But just in case, System Restore sometimes is a life saver. So, this post is a step-by-step tutorial with pictures to help you out in turning system restore on, setting a restore point and if needed, restoring your computer to an earlier date in Windows 10 where everything used to work fine.

    Follow the steps below To turn System Restore ON:

    • Click on Cortana search or start menu
    • Type Restore

    cortana search

    • Click on Create a restore point
    • Now, as you will see system restore is OFF on all drives.
    • Click on Local Disk (C: ) or any other drive that says SYSTEM in front of it
    • Click on Configure

    system restore on

    • Now, Click on Turn on system protection
    • Specify  the amount of space you wish to allocate to system restore, typically 10% should do.
    • Click on Apply & OK

    system restore configuration

    This Turns your System Restore on.

    To create a Restore Point:

    • Click on Create

    create or restore

    • Now, Specify a name
    • Click on create

    restore point name

    • You will see something like in the screenshot below
    • and then a confirmation

    creating restore point

    restore point successfully created

    • Click on Close

    Now, If you wish to Restore your computer to an earlier time.

    • Click on System Restore
    • Follow the method described here (Click Here)

    restore

  • Watch Build 2016 Stream live

    Watch Build 2016 Stream live

    Live Streaming[schema type=”event” evtype=”Event” url=”http://build.microsoft.com” name=”Microsoft Build 2016 Live” description=”Microsoft Build 2016 conference live” sdate=”2016-03-29″ stime=”12:00 pm” edate=”2016-03-31″ duration=”12:00″ ] Microsoft Build 2016 Live Conference is here !  After Q1 being at its end phase, Google announcing Android N & Apple Launching a new smartphone, Microsoft had to bring something to the table. Windows 10 has been amongst the biggest of software launches for Microsoft, and with Windows 10 Mobile coming to Windows 8.1 based smartphones, a new more productive era of deliverance is taking shape.

    Microsoft is expected to deliver uniformity & unifying platforms. This can be seen with recent events such as the openness event. Build 2016 is expected to involve something of this sort. With that new & more interactive live tiles are expected to be featured.

    Watch the Build 2016 conference stream live here from here : Troubleshoot Windows