Author: Akhil Pulotil

  • How to open EMZ files in Windows 10

    How to open EMZ files in Windows 10

    For those among you searching for the easiest ways on how to open EMZ files in Windows, today we bring a detailed article on the same.

    The EMZ file format is a commonly used format out there, especially among graphic artists, designers, etc.

    Therefore, it is essential that people who work with the EMZ file format have software installed on their Windows machine that can open the file type.

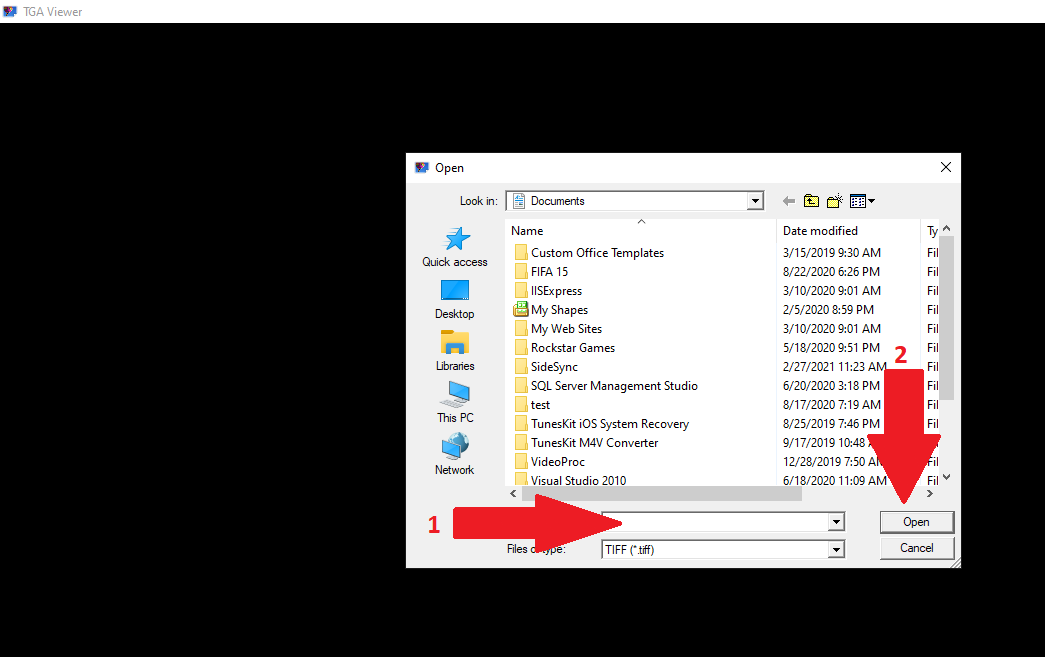
    Also Read —> How to Open TGA Files on Windows 10?

    What is the EMZ File Format?

    Before we take you through the various methods to open the EMZ file format, let us explain to you what the file format is actually used for.

    As we mentioned in the introduction, the EMZ file format is basically used by designers, graphic artists, and similar people who work with digital art content.

    Speaking in detail, the EMZ file format consists of basically an EMF file (Enhanced Metafile) compressed using the GZIP algorithm, thus converting the EMF file to an EMZ file.

    Files with EMZ extension usually consist of EMF data that is compressed, thus allowing to save space which makes it easier to share the files across devices and use them in other projects.

    How to Open EMZ Files in Windows 10?

    As we have explained to you what an EMZ file is, it is now time to tell you how to open EMZ files in Windows 10.

    Below are the various methods that you can follow to open files with the EMZ extension on desktops and laptops powered by the Windows 10 operating system.

    Method 1: Open EMZ Files using Microsoft Word

    Microsoft Word is one of the best software to open EMZ files.

    Most people will already have the Microsoft Word software installed on their computers, thus making it an easy option to open EMZ files.

    Below are the steps to follow to open EMZ files using Microsoft Word on Windows 10.

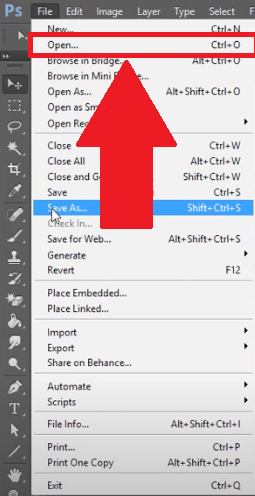
    1. Launch the Microsoft Word software on your computer.
    2. On the top menu bar, click on the “Insert” tab.
    3. Now, click on the “Picture” option.
    4. Select the EMZ file that you wish to open and then click on “Insert”.how-to-open-EMZ-files-in-Windows-10
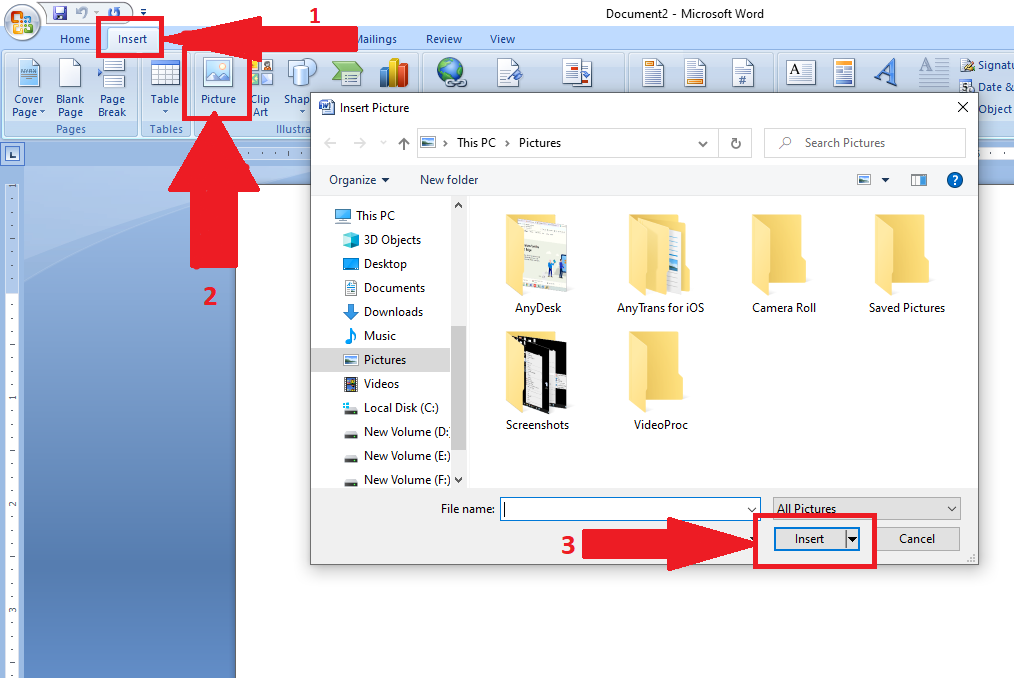
    5. Microsoft Word will now open the selected EMF file.

    You can also open EMZ files on other Microsoft software such as Microsoft PowerPoint and Microsoft Visio using the above steps.

    Method 2: Open EMF Files using Adobe Illustrator

    Adobe Illustrator is quite a popular software used by graphic designers and digital artists.

    You can also use the Adobe Illustrator software to open EMF files as well.

    Below is how you can open EMF files on systems powered by Windows 10.

    1. Launch the Adobe Illustrator software on your computer. If the software is not already on your computer, download it from here.
    2. Navigate to the EMF file that you wish to open.
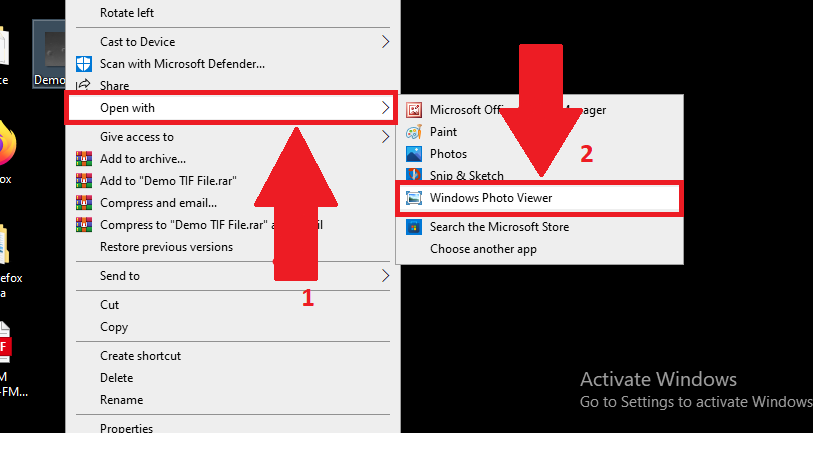
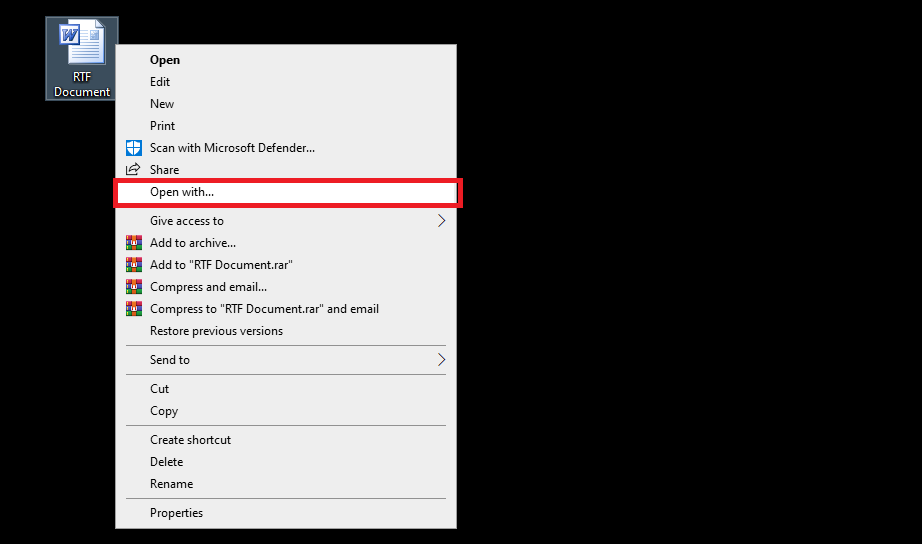
    3. Right-click on the file and click on the “Open With” option.
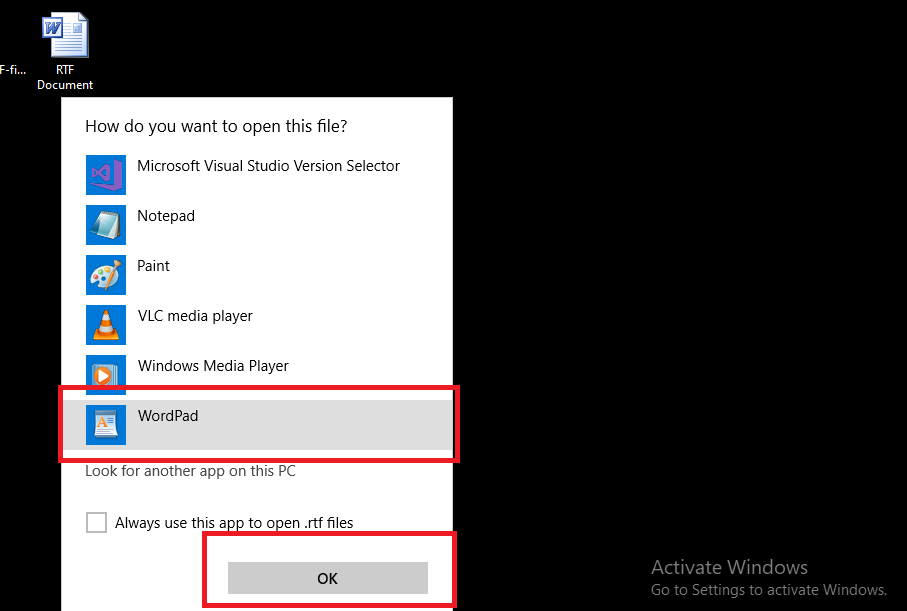
    4. Select the Adobe Illustrator software from the list.

    Now, the Adobe Illustrator software will open the EMF file you selected.

    Final Words

    We have tried to provide you with the easiest ways to open EMF files in the Windows 10 operating system.

    In case you have any doubts, feel free to ask us by leaving a comment below.

  • How to open TGA files on Windows 10

    How to open TGA files on Windows 10

    If you’re new to the TGA format and want to know about how to open TGA files on Windows 10, then today we are here with a detailed article on the same.

    Also Read —> How to Open PES Files on Windows 10

    What is the TGA File Format?

    The TGA file extension stands for the “TrueVision Graphics Adapter” file and is a raster graphics format created by the company called TrueVision Inc (now belonging to Avid Technology).

    For the unaware, raster graphics refer to the technique that represents a 2D image as a square pixel grid or rectangular matrix, thus making it possible to view the image on a display such as a computer monitor.

    Files with the TGA file format are commonly used by people creating digital art as well as for texture details for 3-dimensional video games.

    The TGA file format is also known as TrueVision TGA, TARGA, Targa Graphic File, or as TrueVision Graphics Adapter image file.

    How to Open TGA Files on Windows 10?

    Now that we explained to you about TGA files, let us also take you through the different methods that you can follow to open TGA files on computers and laptops.

    Method 1: Use Adobe Photoshop to Open TGA Files on Windows 10

    Adobe Photoshop is one of the most commonly used software to open TGA files.

    Below is how you can open any file with TGA file format using Adobe Photoshop:

    1. Make sure that your computer already has the Adobe Photoshop software installed. Else, download Photoshop officially from here.
    2. Launch Adobe Photoshop on your computer.
    3. From the top menu bar, click on “File”.

      open-tga-files-on-windows-10-using-photoshop

    4. Now, from the drop-down that appears, click on “Open”.
    5. In the new window that pops up, select the “.TGA” file that you wish to open.

    And that’s all. Now the Adobe Photoshop window will show the TGA file.

    Method 2: Open TGA Files using TGA Viewer

    If you do not wish to edit the TGA file and all you need to do is view it, then you can use the TGA Viewer software instead of Adobe Photoshop.

    Below is how you can view TGA files using the TGA Viewer software for Windows for free.

    1. First of all, download and install the TGA Viewer software on your Windows computer from here.
    2. Once the installation is completed, launch the software on your computer.
    3. When the software launches, it will instantly ask you to pick the file to open.
    4. Select the TGA file and click on the “Open” button as shown in the screenshot below.

      open-tga-files-on-windows-10-using-TGAViewer

    5. Now, the software will open the TGA file that you selected above.

    As we mentioned, you can only view TGA files using this software. If you wish to edit the TGA files, you have to choose alternatives such as Adobe Photoshop.

    Final Words

    We hope you found this guide on how to open TGA files on Windows 10 easy to understand.

    If you wish to ask any questions about TGA files, feel free to get in touch with us by leaving a comment below.

  • How to open PES files on Windows 10

    How to open PES files on Windows 10

    If you are using an automated embroidery machine, then you must be using a file with the “.PES” file extension. For those among you looking to know more about PES files, including what is PES files and how to open PES files on Windows 10, today we bring a detailed article on the same.

    Also Read –> How to Open TIF (TIFF) File on Windows 10?

    What is PES File Format?

    Before we take you through the various easy methods to open PES files on Windows 10 systems, let us also tell you what the PES file format exactly means.

    PES stands for “Physics Editor Sheet” and is a file format that is used by the automated embroidery machines out there. The PES files consist of instructions such as “Start”, “Jump”, “Trim”, and “Stop”, which help the embroidery machine on how to proceed with the work.

    PES files also contain additional information that helps with the embroidery work such as the details about the color, length of stitching, density of stitching, etc.

    How to Open PES Files on Windows 10?

    Below are the various ways to follow to open PES files on any desktop/laptop running the Windows 10 operating system.

    how-to-open-PES-files-on-Windows-10

    Method 1: Use the Embird Machine Embroidery Software

    The Embird machine embroidery software is a popular choice to open PES files on Windows 10 systems.

    Apart from allowing users to open PES files easily, the Embird software also supports other popular embroidery file formats such as 9MM Pfaff, BRO Bits & Volts, CSD POEM, Singer EU, DST Tajima, etc.

    If you wish to download the Embird machine embroidery software for Windows, use the below links:

    The Embird Basic software is priced at $149 and apart from letting you open PES files, it offers the below functionalities as well:

    1. Edit, print, view, split and convert existing designs.
    2. Auto-tracing.
    3. Freehand digitizing.
    4. Create new designs.
    5. Create new cross-stitch designs.

    and more.

    Method 2: Use PREMIER+ 2 Software

    PREMIER+ 2 is another software that lets you design embroidery designs.

    The software also lets you open PES files, as it is one of the most common file formats used for embroidery designs.

    There are various versions of the PREMIER+ 2 software available, and you can select the one perfect for you depending on the use cases.

    Below are the different versions of PREMIER+ 2 software available currently:

    1. PREMIER+ 2 Software.
    2. The PREMIER+ 2 ULTRA.
    3. PREMIER+ 2 EXTRA.
    4. The PREMIER+ 2 EMBROIDERY.
    5. PREMIER+ 2 ECQ.

    One advantage of the PREMIER+ 2 software is that it is available for both Windows and macOS operating systems.

    You can find out more about the PREMIER+ 2 software by visiting their official site.

    Method 3: S & S Computing Embroidery Software

    Just like the other two methods mentioned in this article to open PES embroidery files on Windows 10, the S & S Computing embroidery software is also a very popular option for the task.

    This software will run smoothly on any Windows systems running on Windows XP Service Pack 3 and above. This means that the S & S Computing embroidery software will also work on systems running the Windows 10 operating system.

    You can find out more about the S & S Computing Embroidery Software by visiting their official website.

    Final Words

    We have tried to include some of the easiest methods and reliable tools to open PES files on Windows 10.

    If you need more help in opening PES files on Windows machines, do leave a comment below with your queries and we will help you out for sure.

  • How to open .TIF files on Windows 10

    How to open .TIF files on Windows 10

    Are you looking for a detailed guide on how to open .TIF files on Windows 10?

    Then today we are here with a well-explained guide on the same.

    Before we take you through the steps to open .TIF format files on Windows 10 systems, let us explain to you what .TIF format actually means.

    Also Read –> How to Open AVI Files on Windows 10

    What is .TIF File Format?

    The TIF image file format stands for “Tagged Image Format”, and is also known as TIFF (Tagged Image File Format).

    The TIF file format was initially created by the Aldus Corporation for image files that contain high-quality graphic images. The rights to the TIF file format were later acquired by Adobe.

    What makes the TIF format appealing is its ability to store both lossless picture data as well as lossy jpeg compression. The format is also capable of storing vector-based graphics data.

    TIF file format is mainly used to edit the images using the photo editing software tools. Thus, people such as photographers and graphic artists prefer to use the TIF (TIFF) format to edit their images.

    How to Open TIF Files on Windows 10?

    Now that we have explained to you about the TIF (TIFF) file format, let us now take you through the different methods to open TIF files on Windows 10 computer/laptop.

    Method 1: Open TIF File on any Windows 10 System using Windows Photo Viewer

    Windows Photo Viewer is the default application installed on all Windows 10 systems to open image files. Below are the steps to follow to open TIF files on any Windows 10 system using the Windows Photo Viewer tool.

    open-TIF-file-on-Windows-10

    1. Right-mouse-click on the TIF file that you wish to open with the Windows Photo Viewer tool.
    2. From the drop-down menu that appears, click on “Open With”.
    3. In the extended menu that appears, click on “Windows Photo Viewer”.

    If the Windows Photo Viewer option is not present as shown in the screenshot above, then click on the “Choose another app” option and select the Windows Photo Viewer option from the list of installed software on your computer.

    The only downside with opening TIF files using Windows Photo Viewer is that you won’t be able to edit the image file. If you wish to edit the TIF image file, then you can follow the same steps as above and then choose to open the image file using other pre-installed Windows software such as “Paint” or “Photos”.

    Method 2: Open TIF File on Windows 10 using Adobe Photoshop

    If you wish to edit TIF files, then Adobe Photoshop is a great tool to do so.

    Below are the steps to follow if you wish to open TIF files using Adobe Photoshop on Windows 10.

    1. Launch the Adobe Photoshop software on your computer.
    2. Click on the “File” option on the top taskbar of the Photoshop software window.
    3. From the drop-down menu that appears, click on “Open”.
    4. Now, select the TIF file that you wish to open using Photoshop software.
    5. From the pop-up menu that appears at the bottom of the Open menu, click on “Camera Raw”, and finally click on “Open”.

    The selected TIF file will now open on Adobe Photoshop. You can edit the image and overwrite the existing file or save it as a new one.

    Final Words

    We hope you found this article on how to open TIF on Windows 10 as informative and helpful.

    In case you have any doubts about the steps mentioned above, feel free to ask us by leaving a comment below.

  • How to Open AVI files on Windows 10 Using Inbuilt Media Player?

    How to Open AVI files on Windows 10 Using Inbuilt Media Player?

    For anyone seeking a detailed guide on how to open AVI files on Windows 10, then you’re at the right place. After our recent guide on how to open RTF files on Windows 10, lots of people asked about the easiest way to open AVI files on Windows 10. If you are among them, then below we are here with a detailed guide on the same.

    AVI is a file format developed by Microsoft and used primarily on the Windows operating system. The AVI file format has existed for over 2 decades and is a very popular video file format even in 2021.

    What is AVI File Format?

    As we described above, the AVI file format is used as an extension for video files.

    But do you know what AVI stands for?

    AVI stands for Audio Video Interleave.

    Commonly, the AVI file format is used on video files that also have audio content in them.

    How to Open AVI Files on Windows 10?

    play-avi-files-on-windows-10

    Now that you know about the AVI file format and its use, let us take you through the guide on how to open AVI files on Windows 10.

    Actually, there are various ways to open files with the “.AVI” file extension on the Windows 10 operating system. However, the easiest way to do so is using the Windows Media Player software.

    How to Install Windows Media Player on Windows 10?

    Windows Media Player is an audio & video playback software developed by Microsoft and is installed by default on the Windows 10 operating system.

    As Windows Media Player is developed by Microsoft, it also supports all the file formats that are also developed by Microsoft and also the ones that are supported on the Windows operating system.

    In case Windows Media Player is not already installed on your Windows 10 computer, follow the below steps to do the same.

    1. Launch the Settings window on your computer.
    2. Within the Settings window, click on “Apps”.
    3. Now, click on “Apps & Features”.
    4. In the next screen, click on “Optional features”.
    5. Now, click on “Add a feature” and in the next window, search for “Windows Media Player”.
    6. Select the “Windows Media Player” option from the results, and click on “Install”.

    Wait for the installation to complete. Once done, the Windows Media Player will be available on your Windows 10 computer.

    Steps to Open AVI Files on Windows 10 using Windows Media Player:

    If you have the Windows Media Player installed on your computer running Windows 10, all you have to do is open the file using the Windows Media Player to play AVI files.

    In case the AVI file(s) are opening via other video playback software tools installed on your PC, then follow the simple steps below to open the AVI file(s) using Windows Media Player.

    1. Navigate to the AVI file that you wish to launch using the Windows Media Player.
    2. Using your mouse, right-click on the file.
    3. From the drop-down menu that appears, click on “Open With”.
    4. In the side drop-down menu that appears, select “Windows Media Player”.

    And that is it. Now the AVI file will be launched using the Windows Media Player software.

    What Are the Alternatives to Windows Media Player to Open AVI Files on Windows 10?

    Not everyone is a fan of the Windows Media Player software.

    Moreover, if you’re running any operating system other than Windows, then you cannot use the Windows Media Player either.

    In such cases, you can try alternatives to Windows Media Player such as the VLC Player, JetVideo, KMPlayer, etc.

  • How to Open RTF Files in Windows 10 – Open/Convert RTF Files

    How to Open RTF Files in Windows 10 – Open/Convert RTF Files

    In today’s article, we will be taking you through a detailed guide on how to open RTF files in Windows 10.

    If you’re someone who handles a lot of documents on your computer, then you definitely might have come across files with the “.RTF” file extension.

    Have you ever wondered what RTF stands for?

    Also, Read –> How to fix the “Your PC did not start correctly” error on Windows 10?

    What is RTF File Format?

    Rich Text Format or RTF is a document format created by Microsoft back in 1987. The main purpose of the RTF file format is to act as a cross-platform document format, thus making it easier for the same document with the “.RTF” format to be read across multiple platforms and all popular document processing software.

    How to Open RTF Files in Windows 10?

    If you’re looking for ways on how to open RTF files in Windows 10, then below is the easiest way to open RTF files on Windows 10.

    1. Navigate to the document file with the “.RTF” file format on your Windows 10 computer.
    2. Using the mouse, right-click on the file.
    3. From the drop-down menu that appears, click on the “Open With” option.open-RTF-files-on-windows10
    4. In the next window that appears, select “WordPad”. Alternatively, if you have the “Microsoft Word” software installed on your computer, you can select that as well.open-RTF-files-on-windows10-using-wordpad
    5. Now, click on “Ok” to open the RTF file using either WordPad or Microsoft Word depending on your choice.

    If you wish to always open RTF files in Windows 10 using your selection of either WordPad or Microsoft Word, then check the box next to the “Always use this app to open .rtf files” option to set the application as the default for RTF files.

    How to Convert RTF Files to TXT File in Windows 10?

    Similar to the RTF file format, TXT is another commonly used file format. If you try to open the RTF files using a TXT document editor, then the contents of the document will be corrupted.

    You can convert the RTF file to TXT file format to easily open the same file on Windows 10 using a TXT file editor.

    Below are the steps to easily convert RTF files to TXT files.

    1. Click here to launch the Convertio RTF to TXT file converter tool.
    2. Now, upload the RTF file that you wish to convert to TXT file format. You can also upload multiple RTF files to convert all of them to TXT format at once.
    3. After uploading the file(s), click on the “Convert” button.
    4. Wait until the document conversion is completed.
    5. Once done, click on the “Download” button.

    And that is it. The converted TXT file will be downloaded to your computer now.

    How to Convert RTF Files to PDF Files in Windows 10?

    Many of us also use the PDF file format to share documents across platforms. If you wish to convert RTF files to PDF file format, follow the below steps.

    1. Launch the online RTF to PDF file converter by clicking here.
    2. Select the RTF file(s) that you wish to convert to PDF.
    3. After selecting the files, click on the “Convert” button.
    4. Wait for the file conversion to complete.

    Now, the PDF file will be automatically downloaded to your computer.

    Final Words

    We hope you found this article on how to open RTF files in Windows 10, convert RTF to TXT in Windows 10, and convert RTF files to PDF in Windows 10 as informative and easy to follow.

    Got any questions?

    Feel free to ask us in the comments below.

  • How to Install Windows 10 on a Laptop the Easiest Way

    How to Install Windows 10 on a Laptop the Easiest Way

    Are you wondering about how to install Windows 10 on a laptop?

    The Windows 10 operating system is the latest version from Microsoft.

    For anyone looking out for a stable, feature-rich, and highly functional Windows version, Windows 10 is the way to go.

    A simple Google search can help you find all the features and functionalities offered by the Windows 10 operating system.

    However, the feature that I am impressed the most about is the fact that anyone can now download & install Windows 10 on their system without needing a license key.

    Well, yeah, Windows is still a paid operating system and you are still asked for a license key when you install it.

    But, the restrictions are lighter than previous Windows versions and you can install Windows 10 on a laptop/PC and then later choose to upgrade to the premium Windows version by purchasing a license key.

    If you’re wondering about how to install Windows 10 on a laptop, then today we are here with a detailed step-by-step guide on the same.

    Also Read –> How to Create a Windows 10 Recovery USB

    How to Install Windows 10 on a Laptop?

    install-windows-10-on-laptop

    Before we take you through the steps to follow to install Windows 10 on a new laptop, take a look at the prerequisites.

    Windows 10 Prerequisites

    It is important that you make sure that the laptop you’re trying to install Windows 10 on meets at least the minimum required specifications to ensure that the operating system works smooth enough for hassle-free use.

    Below are the minimum specs required to install Windows 10 on a laptop:

    • If an OS already exists on the laptop, then it should be either Windows 7 SP1 or Windows 8.1.
    • At least 1GHz process.
    • A minimum of 1GB RAM for 32-bit Windows 10 or 2GB RAM for 64-bit Windows 10.
    • At least 16GB free disk space for 32-bit installation or 20GB free hard disk space for 64-bit installation.
    • DirectX 9 graphics driver or later with support for WDDM 1.0 driver.
    • 800×600 display resolution.

    Prerequisites to Install Microsoft Windows 10 on a Laptop

    Below are the prerequisite steps you need to complete before attempting to install Windows 10 on a laptop.

    • Download the official Windows 10 installation media creation tool from here.
    • Make sure to have a USB pen drive with at least 16GB of free storage space. If possible, format the pen drive to avoid any complications.
    • Download the official Microsoft Windows 10 ISO file from here.
    • You will need another computer in hand to copy the files to the pen drive (in case you’re trying to install Windows 10 on a PC without any OS currently).

    Steps to Install Latest Windows 10 on a Laptop

    Once you are sure that your laptop meets the minimum specs required to install Windows 10, below is the step-by-step guide to install the latest Windows 10 on a laptop.

    Procedure 1: Create Windows 10 Bootable USB Flash Drive

    1. Connect your pen drive to the computer and launch the Windows 10 media creation tool.
    2. On the Windows media creation tool window, click on the “Accept” button when prompted.
    3. Now, select the “Create installation media (USB flash drive, DVD, or ISO file) for another PC” option and then click on the “Next” button.
    4. Now, select the Windows 10 edition you wish to install as well as the preferred language and system architecture. If you aren’t aware of the details, tick the checkbox labeled as “Use the recommended options for this PC”.
    5. On the next screen, select the USB flash drive you connected to the PC and continue.
    6. Now the pen drive will be converted into a bootable Windows 10 installation disk.
    7. Wait for the procedures to complete.
    8. Remove the pen drive and proceed to the new laptop where you wish to install Windows 10.

    Procedure 2: Change Boot Order of Laptop to Boot from USB

    Before you can install Windows 10 from the pen drive, you need to change the boot order of the new laptop to boot from a USB pen drive. Below is how you can do that:

    1. Boot into the BIOS setup utility of your laptop. The method to boot into BIOS depends on the laptop manufacturer. Usually, tapping on the “Esc”, “F11”, or “F9” keys during the initial boot should boot the device into BIOS.
      You can search Google with your laptop manufacturer’s name and model name to know how to boot your laptop into BIOS.
    2. In the BIOS setup utility mode, set to boot from USB as the first priority (first in the order).

    Procedure 3: Install Official Microsoft Windows 10 from Bootable USB Drive

    Follow the below steps to boot from the USB and install the Microsoft Windows 10 OS.

    1. Connect the pen drive you had in step 1 above to the new laptop.
    2. Reboot your laptop.
    3. In case you are asked which disk to boot from, select the USB drive.
    4. Wait for a few minutes.
    5. The Windows 10 installation wizard will now launch.windows-10-installation-screen
    6. Follow the on-screen instructions and make appropriate selections to install Windows on your laptop.format-partition-windows-10
    7. During the installation, you will need to pick a drive partition where you wish to install Windows 10 (C: drive). Format the drive before proceeding. You can also delete existing partitions and create new ones on this screen.
    8. Wait for the installation to finish successfully.

    And that is all. After the installation completes successfully, your laptop will boot and load the Windows 10 operating system. Once the installation finishes and Windows 10 successfully loads up, you can remove the pen drive from the laptop.

    Final Words

    As we mentioned earlier, you can comfortably work on Windows 10 even without a license key.

    If you’re asked for a license key during the installation of Windows 10, simply skip this step. The limitations you experience without a license key are mostly cosmetic and do not affect security or functionality in any way.

    However, upgrading to a valid Windows 10 license is recommended to enjoy full benefits. You can also add a new license key after the installation as well.

  • Top 3 Methods to Open WMV File on Windows 10

    Top 3 Methods to Open WMV File on Windows 10

    Are you looking for ways to open WMV files on Windows 10?

    Then today we are here with a detailed guide that will take you through the steps to open files in the WMV file format on Windows 10.

    Just like the ways to open AVI files on Windows 10, there are also several ways to open WMV files.

    Before we begin, let us explain to you what the WMV file format actually is.

    What is WMV File Format?


    WMV stands for Windows Media Video and is a file format for video playback that is developed by Microsoft for the Windows operating system.

    The WMV file format is used for video files only and if you see any file with the “.WMV” extension, then it means that only media playback software tools that support the WMV extension can playback the file.

    How to Open WMV File on Windows 10?

    As we mentioned above, only media playback software tools that support the WMV file format can be used to playback video files that have the “.WMV” extension.

    Below are some of the best software tools to successfully playback the WMV files on computers running the Windows 10 operating system.

    Method 1: Open WMV File on Windows 10 Using Windows Media Player

    Windows Media Player is the standard audio/video playback software that comes bundled with the Microsoft Windows operating system.
    Windows Media Player 12 is the latest version that supports the Windows 10 operating system.
    The Windows Media Player 12 software comes pre-loaded with the standard installation of Windows 10. However, in certain Windows 10 versions, the software comes as an optional feature that can be enabled/disabled.

    If Windows Media Player 12 isn’t available by default on your Windows 10 computer, below are the steps to enable the same:
    1. Click on the “Windows” icon located in the left corner of your taskbar.
    2. Now, click on the “Settings” gear icon.

      Launch-Settings-from-Taskbar-Windows10

    3. Within the Settings window that loads up, click on “Apps” and then click on “Apps & Features”.

      Launch-Apps-Menu-from-Settings

    4. Now, click on “Optional features”, and then click on “Add a feature”.

      Optional-Features-in-Windows-10

    5. Search for “Windows Media Player”.

      Install-Windows-Media-Player-Windows-10

    6. Select “Windows Media Player” and then click on the “Install” button.

    And that is it. You have now installed the Windows Media Player software on your Windows 10 computer.

    Method 2: Use KMPlayer

    KMPlayer is a third-party video playback software that you can use to play video files in the most commonly used file formats, including the WMV file format.

    Moreover, you have several controls over the video file itself including the ability to change playback aspect ratio, zoom into the video, add subtitle files, etc.

    You can officially download KMPlayer by clicking here.

    Method 3: Use VLC Media Player

    VLC Media Player has to be one of the most popular video player software tools out there. Almost everyone who set up a new computer will definitely install the VLC Media Player and set it as their default video player.

    You can play almost every known video file format using VLC Media Player including WMV file format. Also, you get several functional controls over the video playback, which makes it one of the best video player software for Windows 10.

    You can officially download VLC Media Player for Windows 10 from here.

    Final Words

    We hope you found this article on how to open WMV file format videos on Windows 10 as helpful and easy to follow.

    The solutions mentioned above to play WMV files are absolutely easy and completely free.

    In case you know of better software tools to playback WMV files on Windows 10, feel free to mention them in the comments below.