ByVince TopskyJuly 8, 2022Customizing Windows 11: How to Change Default Apps Microsoft’s desktop OS gains some fantastic new features and beautiful design upgrades with the latest version of the…
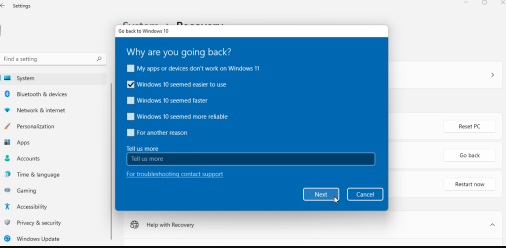
ByVince TopskyJuly 8, 2022How to Downgrade From Windows 11 to Windows 10 Windows 11 is the latest version of the operating system by Microsoft for computers and the new operating…
ByVince TopskyJuly 7, 2022How to Use Safe Mode to Diagnose a Problem in Windows 10 or Windows 11 Do you have a Windows powered computer that frequently freezes, crashes, or issues in performance? It may be…
ByVince TopskyJuly 7, 202210 Big Reasons Not to Upgrade to Windows 11 Don’t upgrade to Windows 11 if you don’t want to buy a new computer or give up your…
ByVince TopskyJuly 7, 2022How to Connect Your Android Phone to Your Windows 11 PC You take a photo using your phone and want to see it on a larger screen. You receive…
ByVince TopskyJuly 5, 2022How To Make Windows 11 Look Like Windows 7 Windows 11 is the latest version of the operating system by Microsoft and the same power millions of…
ByVince TopskyJuly 5, 2022How To Use Remote Desktop In Windows 11 The Remote Desktop software in Windows is not well known, although it would almost likely be significantly more…
ByVince TopskyJuly 4, 2022How To Maintain Windows 11 On Your PC With Its Free Tools When did you initially receive your computer? Right, it seemed quick and responsive. How about right now? Most…
ByVince TopskyJuly 4, 202220 Tips And Tricks For Windows 11 Just like every new version of the Windows operating system the latest windows 11 is welcomed with a…
ByVince TopskyJuly 4, 20227 Things You Never Knew You Could Do With Windows 11 Microsoft is back with Windows 11 operating system and that is having a roaring enthusiasm to deliver a…
ByVince TopskyJuly 3, 2022How To Get The Best Out Of Accessibility Features In Windows 11 When you consider accessibility features of any kind, you might assume that they are solely for those who…
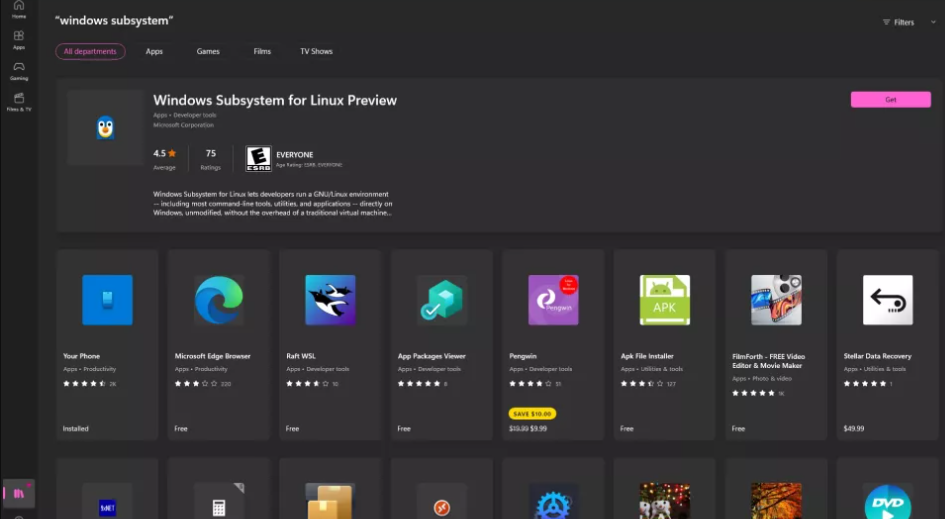
ByVince TopskyJuly 3, 2022How To Install A Linux Operating System Such As Ubuntu In Windows 11 Using a virtualization tool like VirtualBox made it possible to run Ubuntu and other Linux distributions inside of…