The Windows 11 Installation Assistant is a useful tool for upgrading your compatible Windows 10 computer to the latest Windows 11 operating system and if you are an hour about the tool then we will showcase how to use this tool to upgrade to Windows 10 in this article. Additionally, you can try the method described in this post to fix Windows 11 Installation Assistant if it keeps closing or stops functioning on your computer.
Last year Microsoft introduced Windows 11 along with Windows 11, three installation and upgrade tools, including Windows 11 Installation Assistant, Windows 11 Media Creation Tool, and Windows 11 Disk Image (ISO) Download, were made available.
The Windows 11 Installation Assistant is a tool for installing Windows 11 on the Windows 10 computer you’re currently using. It does not, however, support ARM64-based devices.
That is, if Windows 11 does not currently appear in Windows Update, using the Windows 11 Installation Assistant is your best option for installing Windows 11.
How Do I Upgrade to Windows 11 Using the Windows 11 Installation Assistant?
1. See whether your computer can run Windows 11 Installation Assistant.
Your device needs to meet the following specifications in order to run Windows 11 Installation Assistant and upgrade your computer to Windows 11:
1.1 Windows 10 is licenced to you.
1.2 Your computer is running a version of Windows 10 from 2004 or later.
1.3 The minimal hardware and operating system requirements for Windows 11 are met by your device.
1.4 To download Windows 11, you should have 9 GB of free disc space on your device.
2. Download the Windows 11 Installation Assistant.
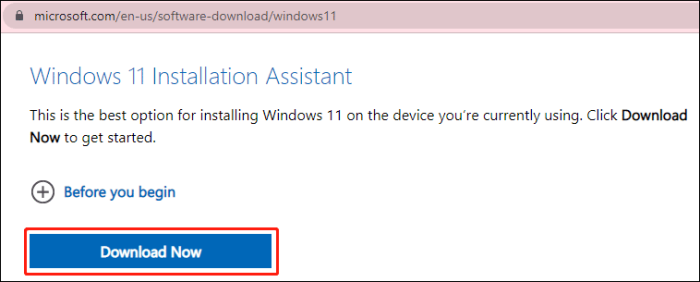
2.1 Visit the Windows 11 software download page.
2.2 Under the Windows 11 Installation Assistant, select the Download Now button. The download path for this tool will be used.

3. Start the Windows 11 Installation Assistant to upgrade to Windows 11
3.1 Launch the Windows 11 Installation Assistant that you downloaded.
3.2 If the User Account Control interface appears, select Yes.
3.3 To proceed, click Accept and Install when you see the following interface.
3.4 The tool starts downloading and installing Windows 11 on your computer. The entire process will take some time. You can use your device normally during the process.
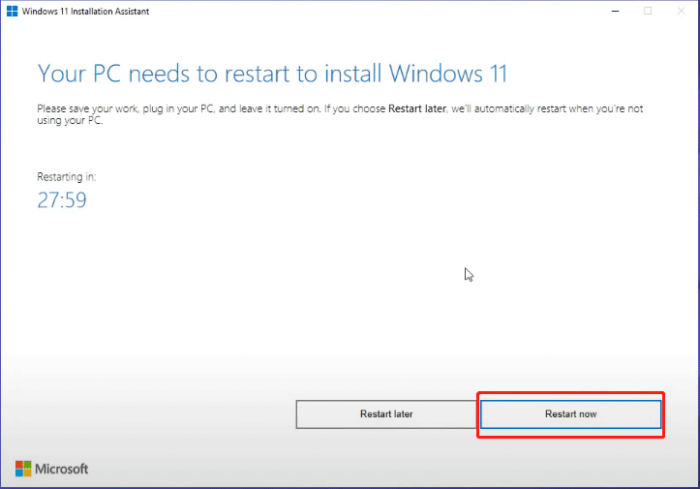
3.5 You should save your work when you see the interface below. Then press the Restart now button. You must still connect your computer and keep it turned on.

3.6 Your computer starts updating. It will restart several times. You must be patient until the entire process is completed.
3.7 Following these steps, Windows 11 will be successfully installed on your computer.
4. Troubleshoot Windows 11 Installation Assistant Issues
When upgrading from Windows 10 to Windows 11, the Windows 11 Installation Assistant is used. Windows 11 Installation Assistant will not work or open if you are currently running a Windows 11 Insider preview build in the Dev Channel.
The specific performance is as follows: when you launch Windows 11 Installation Assistant, it will appear on the screen for one second before disappearing/closing. The results are consistent no matter how many times you try. If you are in the Dev Channel of the Windows Insider Program, closing or crashing Windows 11 Installation Assistant is normal.
Since you already have Windows 11, it doesn’t apply to you. But if you still want to use it, try the following procedures to activate the Windows 7 compatibility mode.
4.1 Right-click the downloaded Windows 11 Installation Assistant and choose Properties.
4.2 Go to the Compatibility section now.
4.3 Check Run this programme in compatibility mode and choose Windows 7 from the drop-down menu under Compatibility mode.
4.4 Apply by clicking.
4.5 Click OK.
The aforementioned technique will typically work to resolve Windows 11 Installation Assistant closing issues. To install Windows 11 on your computer, you can also use the Windows 11 Media Creation Tool or a Windows 11 ISO download if the problem continues.
Now that you understand how to use Windows 11 Installation Assistant to upgrade your Windows 10 computer to Windows 11, you can move on. You can simply turn on the Windows 7 compatibility mode to make this tool function normally if it keeps closing and disappearing. You can let us know in the comments if you still have any relevant problems that need to be resolved.

Leave a Reply