
The Remote Desktop software in Windows is not well known, although it would almost likely be significantly more widely utilised if it were. In a nutshell, Remote Desktop allows you to control your Windows 11 machine from a remote location.
While this feature is primarily intended for commercial and technical users, such as remote working or providing remote support, it may also be used for easier tasks such as operating your upstairs computer from your laptop downstairs.
With Windows 11, you can connect to and control another pc remotely over the internet from a different device or location. To make a connection or grant access to another, you must first activate remote desktop and make changes to several built-in options.
With the latest Windows 11 operating system, you can utilise Remote Desktop Protocol (RDP), and the same is akin to the previous version. This particular feature’s settings enable you to manage another person’s computer or server without really being there. Once enabled, you can use the “Remote Desktop store app” or the “old Remote Desktop Connection app” to remotely control an external computer. To control other devices on a Local Area Network (LAN) or over the internet, you can use the Remote Desktop software on Windows 11. The app, however, may only be a piece of the puzzle depending on where the computer is placed because other configurations are required to make the connection work.
So without making any further delay let’s get into the guide to get started with Remote Desktop in Windows 11.
First of all, you need to open the Settings application in your computer and the same can be done by hitting the Start button, then Settings, or by using the Windows + I keyboard shortcut. After that, navigate to the System area on the left and then select Remote Desktop on the right side of the screen.
Now you need to toggle the Remote Desktop toggle to the On position to enable Remote Desktop in the computer which is running on Windows 11. You will get a pop-up asking if you want to authorise the function; just click Confirm to continue.
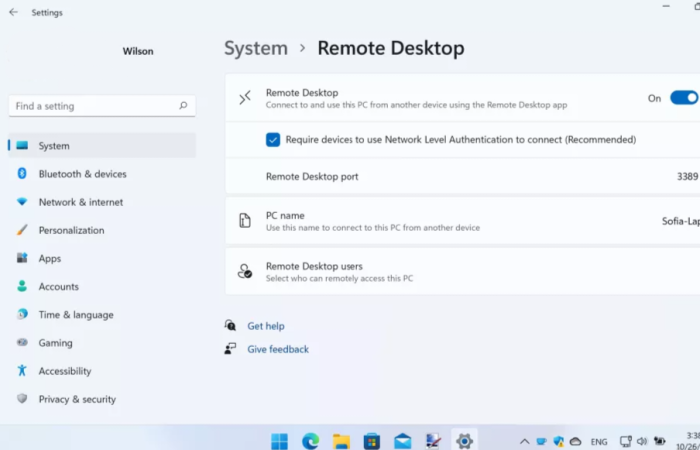
You will notice a small button with a downward-pointing arrow is located to the right of the toggle. Additional options will show if you click this particular button, but you shouldn’t modify these settings unless you have a specific need to.
By default, Remote Desktop requires devices to use Network Level Authentication in order to connect, but if this proves difficult or if you have a complicated network arrangement, you can display it by unchecking the option box. Windows displays the port number used by Remote Desktop below this in case you need to make a note of it.
Now you will see a new setup when Remote Desktop is enabled, displaying the name of your computer. You will need this information later on to make a connection.
It’s possible that you selected the name of your computer or that you already know it, and that name is also used to identify it on your home network. If you need to alter the name for any reason, go back to the System section of Settings, click the Rename link in the upper right corner of the window, type a new name, and then click Next. When prompted, restart Windows when you have finished.
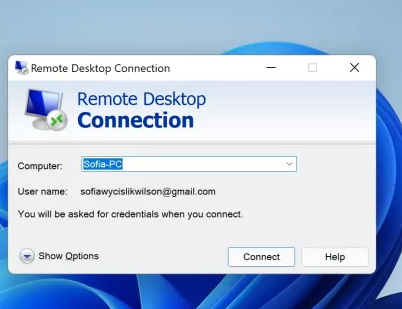
Now that you’ve enabled Remote Desktop, you can connect to and control your computer remotely using a variety of programmes. Windows has its own Remote Desktop Connection software, which can be accessed in the Start menu, so we’ll start there.
Launch the software from a second computer’s Start menu and enter the name of the machine you want to connect to. You can now proceed by clicking the Connect button, or you can configure extra parameters as explained in the following step.
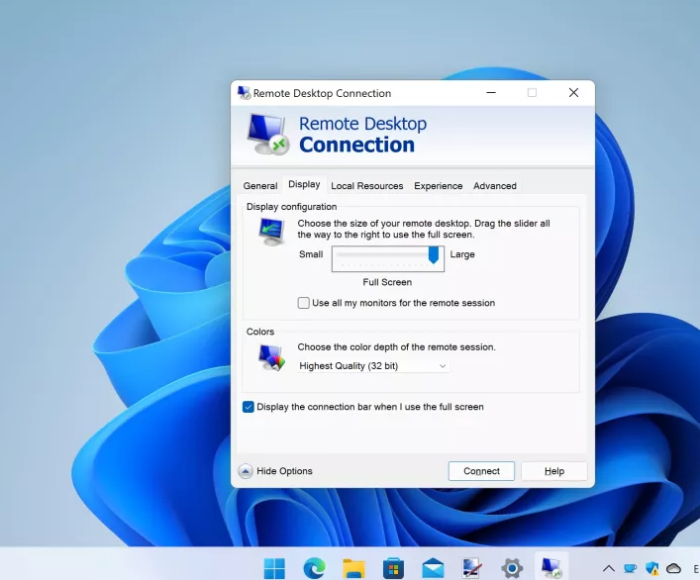
The username you want to connect with can be entered by clicking the arrow next to Show Options. Choosing the size of your remote session window and the appropriate colour depth may both be done using the slider on the Display tab.
On the Local Resources tab, you can specify what resources—such as printers and clipboard contents—should be shared between devices as well as how audio should be handled between remote and local sessions. Use the Experience tab to scale back the visual choice if your connection is sluggish. To establish a connection, select Connect.
The login information for the computer you are attempting to connect to must be entered; this is simply your Windows login password. After doing so, click OK.
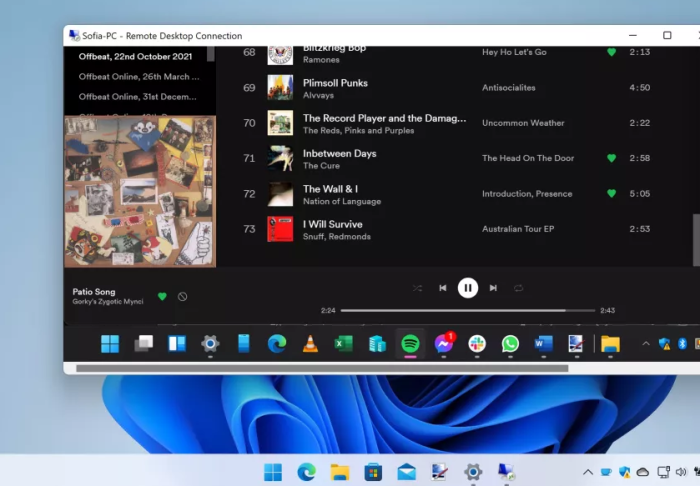
You should now be logged into your second PC and ready to run Windows 11 within a window.
Simply click the close symbol to end remote access, and a dialogue box will appear asking you to confirm that you want to end the session.
The connection will end once you click OK.
It is worth mentioning that Microsoft’s Remote Desktop programme is also available for mobile devices, so you may operate your PC from your smartphone or tablet if you like.
Both the Android and iOS (opens in new tab) versions of the software are free to download and operate in the same manner as the PC app that we have already analyzed.
So this is how you can able to use a remote desktop on Windows 11 computer and if you find any doubts then do let us know in the comments section below.
Leave a Reply