
When you purchase a new laptop or desktop for yourself, you must check the capability to upgrade which means you need to check RAM slots, PCIe SSD slots, or an HDD slot. This will enable you to add extra memory in the future and makes your device a future proof. Adding memory to the device will also help you to get the best performance according to your workload. I believe now you got the point of the importance of having the additional slots on your device and the in this article, we will check out the way to check the available RAM slots in Windows 11.
There are multiple ways to check the available RAM slots in Windows 11 powered computer. You guys can check out the same using the built-in tools such as the Task Manager, Command Prompt, and third-party software. Apart from that, you can also check out the same by physically as well. So without making any further delay let’s dive into the article to check out the ways to know the available slots.
Using Task Manager to check the available RAM Slots in Windows 11
It is one of the easiest way to check the available RAM on your computer and the same can be done by following the steps which are listed below.
- You need to open the task manager on your device and the same can be done using the keyboard shortcut “Ctrl+Shift+Esc” or by clicking the start menu and searching for the task manager.
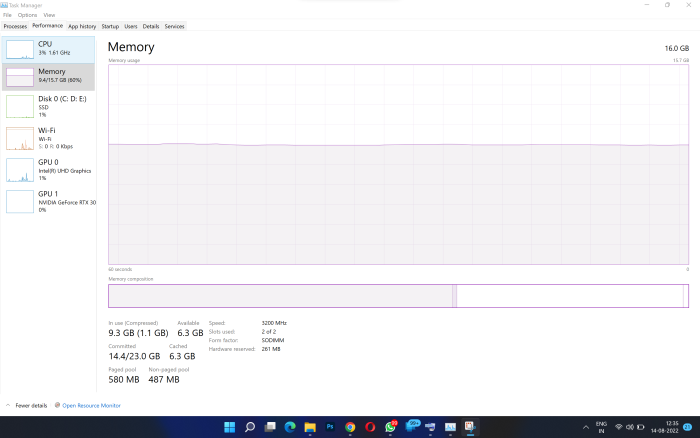
- Now you need to open the task manager and then you need to switch to the “Performance” tab on the screen.
- After that, you can able to see the used RAM slots in the “Slots used” section. So this will provide you with the answer to having the available slots in your device.
Check RAM Slots in Windows 11 using Command Prompt
It is another method to check the available slots on your computer and the same is pretty straight forward as well. You can check out the step by step guide below.
First of all, press the Windows key and type “Command Prompt” and choose “Run as administrator” to open a Command Prompt to get the power of the administrator.
You can able to check the total number of RAM slots by using the command: wmic Memphysical get MemoryDevices
After that, you can able to see the memory slots and you can able to view the current RAM slot which you are using by entering the command: wmic MemoryChip get BankLabel, DeviceLocator, Capacity
Check the memory slots using third party software
You can use the CPU-Z software which is known for monitoring the CPU temperature but the same is also capable to know you the information about the available RAM slots as well as the RAM type. You can able to download the application without spending any amount which makes it is available for free of cost and the same will provide all kinds of software information.
After downloading and installing CPU-Z, you need to select the “Memory” tab to find information about your installed RAM and that includes the memory type and size.
Now you need to move to the “SPD” tab at the top and under the “Memory slot selection” option, you need to select the drop-down menu to get the information about the available RAM slots,
You can also check the available RAM using system information
You need to open system information by searching the same in the search bar after clicking the Windows button. After you finding the same you need to open “System Information“.
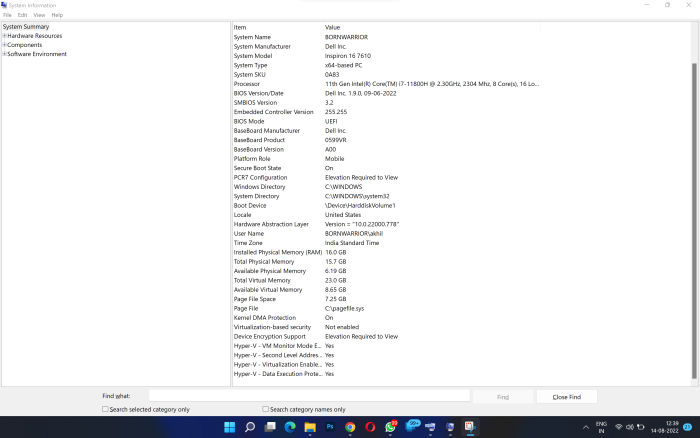
After that, you need to click on ”System Summary” in the left sidebar and scroll down in the right pane. You will be able to find the total installed physical memory (RAM) along with the information about the available virtual memory as well.
So this is how you can able to check ram slots in Windows 11 and if you find any problems then do let us know in the comments section below. We recommend you to browse our website for more tips and tricks to use Windows operating system comfortably.
Leave a Reply