You’ve just performed a fresh installation of Windows, but nothing works correctly. Your screen resolution is stuck at a low setting, and most importantly, you can’t connect to the internet. It’s the ultimate digital catch-22: you need the internet to download drivers, but you need drivers—specifically the network driver—to get on the internet.
Don’t worry, this is a very common and solvable problem. This guide will show you exactly how to install drivers without internet access by using another device and a simple USB drive. I’ve guided many people through this exact process, and it’s the fundamental first step to getting any new Windows installation up and running.
The entire process is broken down into two main phases: gathering the necessary drivers and then installing them on your offline computer.
Phase 1: Gathering the Drivers (Using a Device with Internet)
For this phase, you will need two things:
- A separate device with internet access (another computer, a laptop, or even your smartphone).
- A USB flash drive to transfer the files.
Step 1: Identify Your Hardware on the Offline PC To download the right drivers, you need to know the make and model of your computer’s motherboard (for a desktop) or your laptop’s model number.
- For a Laptop: This is easy. The exact model number is almost always printed on the bottom of the laptop chassis (e.g., “Dell XPS 15 9530,” “HP Spectre x360 14-eu0097nr”). Write this down precisely.
- For a Desktop PC: You need to identify your motherboard model.
- If you built the PC: You should know the model from the box or your purchase receipt (e.g., “ASUS ROG STRIX B650-E GAMING WIFI,” “MSI MAG B760 TOMAHAWK WIFI”).
- If it’s a pre-built PC (from Dell, HP, etc.): Look for a model number on the case itself (e.g., “Dell OptiPlex 7010”).
- If you can’t find it: You can open the PC case (when it’s turned off and unplugged). The motherboard model is usually printed in large letters directly on the board itself.
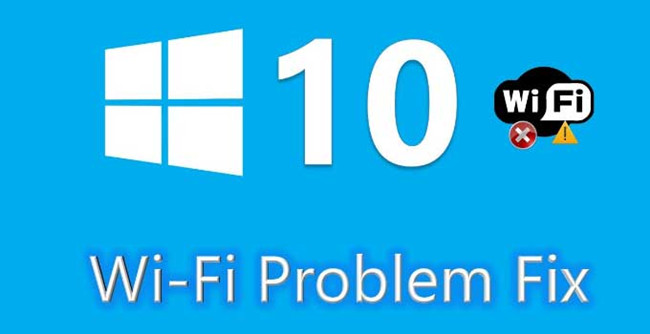
The most important driver you need to get is the Network/LAN/Wi-Fi driver. This is the key to getting your PC online so it can download the rest automatically.
Step 2: Download the Drivers on Your Second Device Now, use your internet-connected device to download the drivers.
- Open a web browser and go to the support website for your laptop or motherboard manufacturer (e.g., Dell Support, HP Support, ASUS, MSI, Gigabyte).
- Navigate to their “Support” or “Downloads” section.
- Enter the exact model number you wrote down in the previous step.
- Find the “Drivers & Downloads” page for your model. You will likely need to select your version of Windows (e.g., Windows 11, 64-bit).
- Look for the following driver categories and download them:
- CRITICAL: Network / LAN / Ethernet / Wi-Fi. Whatever it’s called, download this first. There might be several options (Intel, Realtek); if you’re unsure, it’s safe to download them all.
- Highly Recommended: Chipset. These drivers are crucial for communication between all your system components. Always install these.
- Recommended: Graphics / VGA. While Windows might provide a basic display driver, getting the official one from the manufacturer (Intel, NVIDIA, or AMD) will ensure your screen resolution and performance are correct.
- Save these downloaded files (they are often in .zip or .exe format) to a specific folder.
Step 3: Transfer Drivers to a USB Drive
- Plug your USB flash drive into the internet-connected computer.
- Copy the folder containing all your downloaded driver files onto the USB drive.
- Safely eject the USB drive.
- Alternative: If you don’t have a USB drive but have a smartphone and its USB cable, you can download the files on your phone, connect it to the offline PC via USB, and enable “File Transfer” mode to access the phone’s storage.
Phase 2: Installing the Drivers on the Offline PC
You’re now ready to bring the drivers to your offline machine.
Step 1: Copy and Extract the Files
- Plug the USB drive into your offline Windows PC.
- Open File Explorer (Windows key + E) and navigate to your USB drive.
- Copy the folder with your drivers from the USB drive to your desktop for easy access.
- If any of the drivers are in a .zip file, right-click on the file and select Extract All….
Step 2: Run the Installer (The Easy Method) This works for drivers that come with a setup program.
- Open the folder for the driver you want to install. Start with the Network/LAN driver.
- Look for a file named Setup.exe, Install.exe, or something similar.
- Double-click this file to run the installer and follow the on-screen instructions.
- After the installation is complete, it’s a good idea to restart your computer.
- Once the network driver is installed, try connecting to the internet. If it works, you’ve solved the main problem!
Step 3: Manually Install via Device Manager (If No Setup.exe) Sometimes, drivers come as a collection of .inf, .sys, and .cat files without a setup program. You need to install these manually using Device Manager.
- Right-click on the Start Menu and select Device Manager.
- Look for devices with a yellow exclamation mark next to them. These are the ones without drivers. Your network adapter will likely be under “Other devices” and be called “Ethernet Controller” or “Network Controller.”
- Right-click on the problem device and select Update driver.
- In the new window, choose Browse my computer for drivers.
- Click the Browse… button and navigate to the folder on your desktop where you extracted the driver files. Make sure the “Include subfolders” box is checked.
- Click Next. Windows will now search that folder for the correct driver files and install them.
- Once it’s finished, close the window and restart your PC.
What to Do After You’re Online
Once you have successfully installed the network driver and connected to the internet, your job becomes much easier. You can now run Windows Update (Settings > Update & Security > Windows Update), which will automatically find and install most of the remaining generic and official drivers for your system. However, for the best performance, it’s still recommended to manually install the Chipset and Graphics drivers you downloaded.