Microsoft introduced the latest Windows 11 operating system last year and the company made a massive change on the board. The latest Windows 11 is coming with a complete makeover in every section and the most highlighting element of the operating system is the support for the Android applications. The operating system now features a new search box from Microsoft and the same sits above the desktop background in the centre of the screen which means it will be available in the taskbar as Microsoft has made the same available at the centre position of the screen but you can take it to the left corner of the screen by making a small change in the settings.
Clicking on the search box, it will allow you to conduct a general search. The Windows Search experience is identical to what you might have previously encountered in the Start menu.
Searching for files, apps, Windows settings, and other things is a breeze with Windows Search. Microsoft’s goal in placing a Windows Search box in the centre of the Desktop screen is to encourage users to use their own web browser and search engine (Bing) (Microsoft Edge).
In Windows 11, the Desktop search bar displays on the desktop outside of the Widgets panel. It allows you to obtain web search results without having to open a browser. As of now, the feature is only offered to a select group of people, so it may not be available to everyone right now.
If you have Windows 11 Build 25120 and are unable to use this function, you must manually enable it. To do so, download ViveTool and enable its experimental hidden desktop search function. Lets find out how to use the Desktop Search Bar in Windows 11. This article will demonstrate how to activate and deactivate Windows 11’s new Desktop Search Bar.
How to Enable the Windows 11 Desktop Search Bar
You must first download the ViveTool in order to test the new desktop search bar feature on your Windows 11 computer screen. Here’s how to do it:
• first of all, you need to download Vivetool and the same is available on Github.
• Unzip the file after downloading it.
• The path to the extracted folder should be copied.
• As an administrator, launch Command Prompt.
• “C:Usersusername>DownloadsViVeTool-v0.2.1” should be pasted into the Command Prompt.
• Replace the path in the above command line with the one you copied previously.
• To run the command, press the Enter key.
• To enter into force, restart your computer.
If you require further explanation of the preceding actions, please see the section below:
To begin, you must first download the Vivetool from Github. To do so, launch a web browser and go to the ViveTool Github website. You must then save the ViVeTool zip file to your computer.
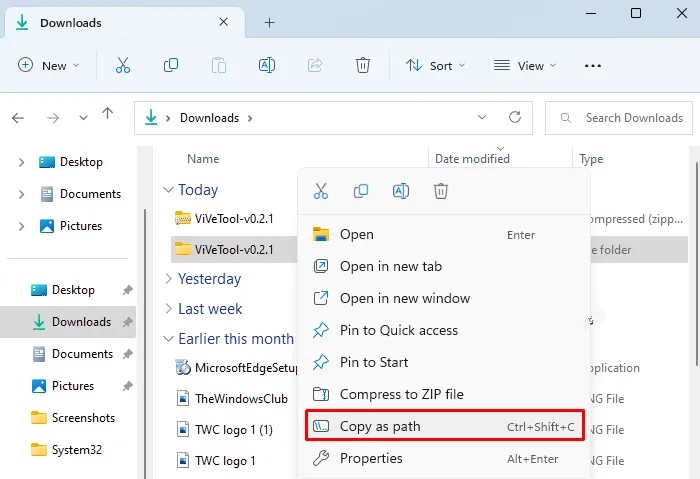
When the download is finished, use Windows key + E to launch File Explorer and navigate to the downloaded folder. Right-click the ViveTool ZIP file on this page and select Extract All from the context menu.
When you’ve finished extracting the folder, right-click on it and choose Copy as path. The Command Prompt must now be run as an administrator.
To do so, hit Windows + R to bring up the Run dialogue box. Then, in the text field, type cmd and press Ctrl+Shift+Enter. If the UAC window appears on the screen, click Yes to proceed.
When the command prompt window appears, type cd space> followed by the copied path. Press the Enter key to execute the command.
When you’re finished, close the Command Prompt window and restart your computer.
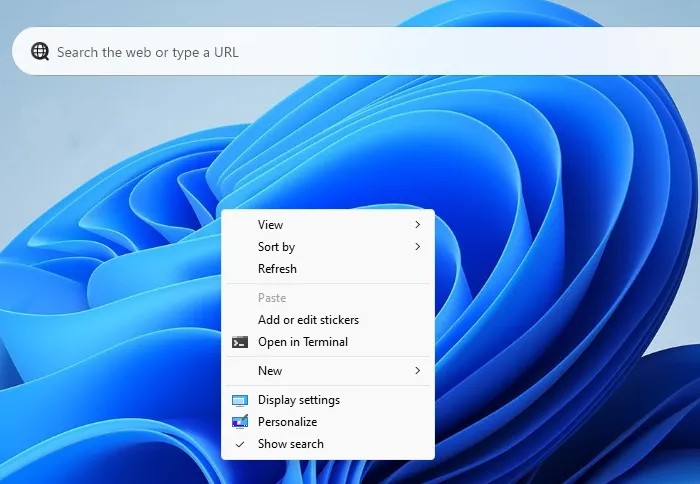
Right-click the desktop and choose Show more options from the context menu after your computer restarts, then choose Show search.
How to Disable the Desktop Search Bar in Windows 11
Only the Bing search engine and the Edge browser are used to obtain online results. Additionally, it is bothersome that you cannot alter the default search engine or browser that results are displayed on. Even though it ranks among the top search engines, Bing still lags behind Google in terms of usability and accuracy. Additionally, more consumers favour Google Chrome and Firefox over Microsoft Edge as their browser of choice.
As a result, the majority of users might not find this new desktop search box useful and may even consider it to be extra desktop clutter.
If you don’t want the desktop search bar, you can disable it in Windows 11. To do so, take these steps:
• To open the File Explorer window, press Windows key + E.
• Navigate to the location where the extracted ViVeTool folder was saved.
• When you’ve found the folder, right-click it and select Copy as Path from the menu that appears.
• Now, as an administrator, launch the command prompt.
• Enter cd space> and paste the copied path into the command field. Then, to complete the command, press the Enter key.
cd “C:\ViVeTool-v0.2.1”
• Following that, enter the following command:
vivetool delconfig 37969115 2
• Restart the computer after closing the Command Prompt window.
If you activated the Desktop search bar in Windows 11 in the past but no longer want to use it, you can disable it in this way.
Desktop users may rapidly carry out checks across a variety of file formats and types of data with Windows Search.
An efficient built-in search feature is included with the Windows 11 operating system. But you can check out FileSearchy if you’re seeking for more features and possibilities. This free software offers many ways for searching for particular files on your computer.
We believe now you can able to easily enable and disable desktop search bar in Windows 11 operating system. If you find any doubts then do let us know in the comments section below and we will be happy to help you.
Leave a Reply