Are you looking for an easy guide on how to change the Windows clock format from 24 hours to 12 hours?
In this article, we will take you through the steps to change the Windows clock format from 24 hours to 12 hours, or vice versa, depending on your preference.
How to Change Windows Clock Formatd?
There are different ways to change the Windows Clock Format from 24 hours to 12 hours depending on the version of the Windows operating system that runs on your computer.
However, a common method that you can follow on any Windows version is by changing the clock format using the Control Panel.
We will be following the method to change time format in Windows using the Control Panel, as it’s relatively easy to follow in comparison to other methods.
Moreover, the steps are common across all the Windows versions starting from Windows 7 onwards.
- The first step is to launch the “Control Panel” on your computer. This can be done by searching for “Control Panel” in the Start menu or by going to the Settings menu and selecting “Control Panel”.
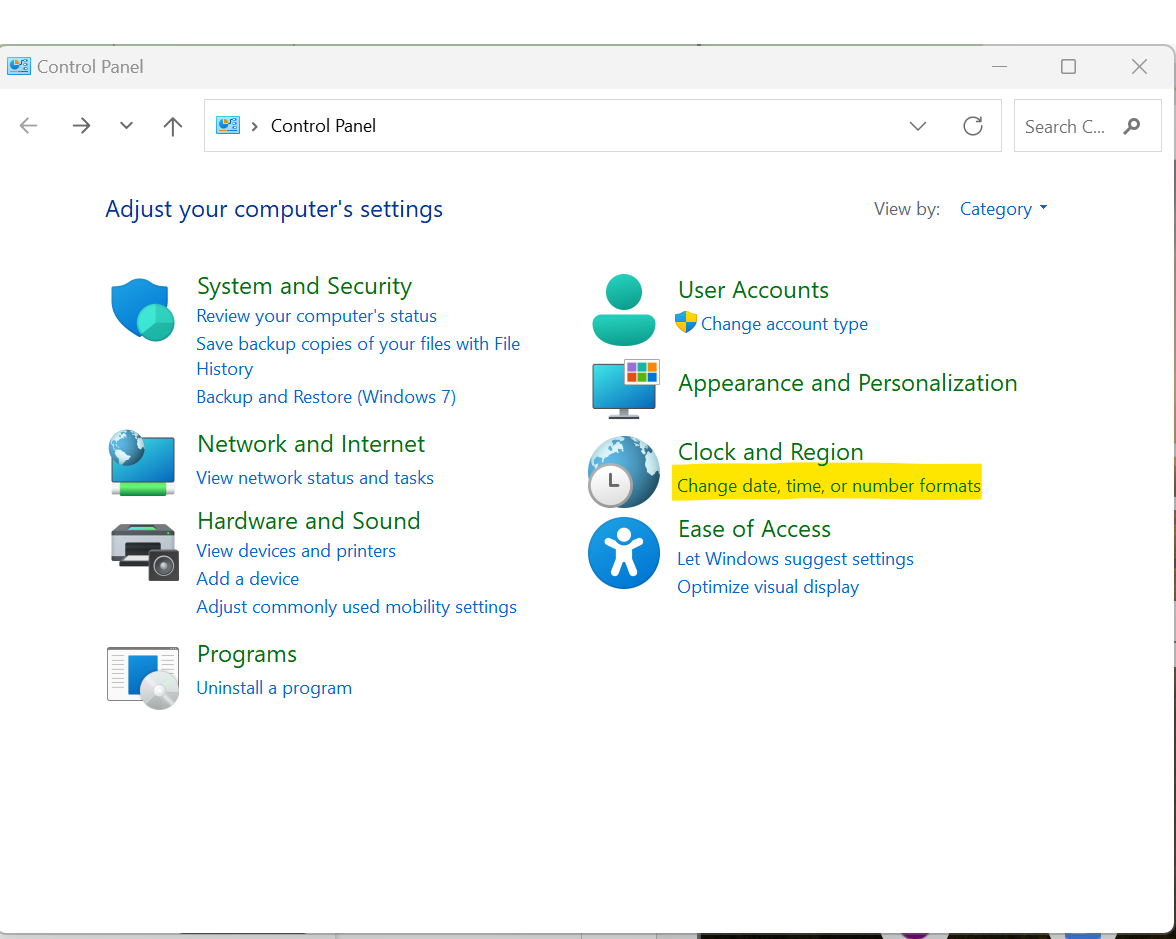
- Within the Control Panel window, you can see the “Change date, time, or number formats” option under the “Clock and Region” title. Click on this.
- A new window will now open.
- In this window, under the “Date and time formats” option, you can see the “Short time” and “Long time” options.
- The “Short time” and “Long time” options will have drop-down options beside them.
- Select the option for “hh:mm tt” from this menu. Once you have selected the “hh:mm tt” option, click “OK” to save your changes.
You can make the change as mentioned in step 5 above for the “Short time” or “Long time” clocks as per your need.
All changes will be visible in the same window to verify before making the actual change.
The clock on your Windows computer should now be displayed in the 12-hour format.
To change the clock format from 12 hours to 24 hours, you need to select “HH:mm:ss”
And that’s it. You have now successfully changed the time format on your computer.
Final Words
We have listed the steps above based on the options and titles as seen on the Windows 11 operating system.
If you’re running an older version, the steps are the same.
The only difference will be the actual text that represents the options we have showcased.
In case you have any queries, feel free to reach out to us and we’re more than happy to help.