Blog

  • How to Install Windows 11 Without TPM

    How to Install Windows 11 Without TPM

    When Microsoft launched Windows 11, one major sticking point for users was the requirement for a Trusted Platform Module (TPM) 2.0. While intended to bolster security, many otherwise capable PCs lacked this chip or had it disabled. If you’re staring at a “This PC can’t run Windows 11” message, don’t worry—there are ways around it.

    Disclaimer: These methods bypass official hardware checks. Microsoft warns that unsupported PCs may not receive full updates and could run into compatibility issues. Proceed at your own risk.

    Why the TPM Requirement Exists TPM 2.0 enables hardware-based security features like BitLocker encryption and Windows Hello. But for many users, especially with older PCs, it’s simply a roadblock.

    What You Need

    • Windows 11 ISO file
    • Rufus utility
    • 8GB+ USB drive
    • Internet access
    • Basic BIOS/UEFI navigation skills

    Method 1: Use Rufus to Create TPM-Free Installer (Recommended)

    1. Download ISO: Get it from Microsoft’s official site.
    2. Download Rufus: Visit rufus.ie.
    3. Create USB Installer:
      • Launch Rufus and select your USB drive.
      • Load the Windows 11 ISO.
      • Choose “Extended Windows 11 Installation (no TPM/no Secure Boot)”.
      • Click START and wait until complete.
    4. Install Windows 11:
      • Boot from USB.
      • Optional: Disable Secure Boot in BIOS.
      • Install as normal. Rufus bypasses TPM automatically.

    Method 2: Registry Edit During Setup (Advanced)

    1. Create a standard bootable USB.
    2. Start installation, reach the “This PC can’t run…” screen.
    3. Press Shift + F10 > type regedit.
    4. Go to HKEY_LOCAL_MACHINE\SYSTEM\Setup > right-click > New Key: LabConfig.
    5. Create DWORDs:
      • BypassTPMCheck = 1
      • BypassSecureBootCheck = 1
      • (Optional) BypassRAMCheck = 1
    6. Close Registry Editor and return to the installer. Click Back > Next.

    Method 3: Replace appraiserres.dll File

    1. Mount both Windows 10 and 11 ISOs.
    2. Copy appraiserres.dll from Windows 10 (sources folder).
    3. Paste and replace the same file in Windows 11 ISO’s sources folder.
    4. Create bootable USB from modified ISO.
    5. Boot and install.

    After Installation: A Few Notes

    • Updates: May be limited or absent.
    • Drivers: Older hardware may lack support.
    • Stability: Not guaranteed on unsupported setups.
    • Future Updates: May reintroduce checks.

    Summary For most users, the Rufus method is the easiest and safest workaround. However, understand the trade-offs. Installing Windows 11 without TPM is possible, but staying informed about risks and limitations is crucial.

  • How to Allow Apps Through Windows Firewall

    How to Allow Apps Through Windows Firewall

    The Windows Firewall is one of those behind-the-scenes heroes on your computer. It keeps out intruders, blocks shady connections, and basically makes sure your system isn’t wide open to the world. But every now and then, it can be a little too good at its job. You might notice an app just won’t connect, or a game refuses to join a lobby. Chances are, it’s the firewall playing gatekeeper. That’s why knowing how to let the right apps through is such a handy skill.

    Why You Might Need to Allow Apps Through

    There are plenty of situations where you’ll need to do this:

    • Software Connectivity: Tools like Zoom, Google Drive, or even your email client sometimes get caught in the firewall’s net.
    • Gaming: Multiplayer titles are particularly touchy. They often need specific ports or full access to connect properly.
    • File Sharing: Streaming a movie to your TV or accessing shared folders on your network? Yeah, the firewall might block that too.
    • Troubleshooting: When something isn’t working and you’re scratching your head, the firewall should be one of the first places you check.
    • New Installs: Freshly installed apps might not automatically get a pass. That means you’ll need to manually greenlight them.

    Understanding Firewall Profiles

    Windows doesn’t treat all networks the same. It uses profiles to manage what gets through:

    • Private Network: Think home or small office networks. These are relatively open, and you can share files and devices easily.
    • Public Network: This is for coffee shops, airports, or anywhere you don’t fully trust the Wi-Fi. Very locked down.
    • Domain Network: If you’re in a corporate setting, IT controls this. Best to leave it alone unless you know what you’re doing.

    If you’re at home and things aren’t working, make sure your network profile isn’t mistakenly set to Public.

    Method 1: Letting Apps Through via “Allow an App Through Windows Firewall” (Recommended)

    This is the more user-friendly way, and honestly, it works for most situations.

    1. Open Windows Security: Click Start, type “Windows Security,” and hit Enter. Or, right-click the shield icon in the system tray.
    2. Go to Firewall & Network Protection: You’ll see this on the left-hand side.
    3. Choose “Allow an app through firewall”: It might also be labeled “Allow an app through Controlled folder access.”
    4. Click “Change Settings”: You’ll likely need admin privileges here. Click “Yes” if prompted.
    5. Find the App: Scroll through. If it’s there, tick “Private” and/or “Public” depending on where you use it. For home networks, “Private” is usually enough.
    6. Add it Manually (if it’s missing):
      • Click “Allow another app…”
      • Hit “Browse…” and find the .exe file (typically under C:\Program Files or C:\Program Files (x86)).
      • Select it, click “Open,” then “Add.”
      • Don’t forget to tick the correct network boxes.
    7. Click OK: And that’s it.

    Method 2: Creating a Rule in Advanced Settings (For More Control)

    If you need to open a specific port or set up something really custom, this is the route to take.

    1. Open Advanced Firewall Settings: Start > Type “Windows Defender Firewall with Advanced Security” > Enter.
    2. Pick Inbound or Outbound Rules: Most apps need inbound access.
    3. Click “New Rule…”
    4. Select Rule Type: Choose “Program” or “Port,” depending on what you’re after.
    5. Specify Program or Port:
      • Program: Browse for the .exe.
      • Port: Choose TCP or UDP, enter the port numbers (e.g., 443, 8080).
    6. Set the Action: Select “Allow the connection.”
    7. Pick Profiles: Usually, just check “Private.”
    8. Name the Rule: Something like “GameName – Inbound Access” helps for later reference.

    Troubleshooting Tips

    • Check Your Network Profile: If it’s set to Public at home, apps may get blocked unnecessarily.
    • Temporarily Disable Firewall (Caution!): Only do this in a secure, controlled environment. Turn it back on immediately after testing.
    • Look for Conflicting Rules: Sometimes an old “Block” rule is overriding your new “Allow” one.
    • Third-Party Firewalls: If you have antivirus software, check its settings too. It may be managing network access separately.
    • Restart Things: Changes sometimes don’t take until you reboot the app or your PC.

    A Quick Personal Story

    I once spent nearly an hour trying to join a multiplayer game with friends. Everything looked fine—no error messages, nothing crashing—just no connection. I tried reinstalling, even rebooted the router. Eventually, a friend said, “Hey, check your firewall.” And sure enough, Windows had blocked the game’s .exe. I allowed it through, checked both “Private” and “Public,” and bam—I was in. Total facepalm moment, but a good reminder to always start with the firewall when something seems inexplicably broken.

    Final Thoughts

    Letting apps through Windows Firewall might sound technical, but it’s actually quite doable. Whether you stick with the beginner-friendly interface or dive into the advanced rules, the goal is the same: make sure your trusted apps can talk to the internet without compromising your security. Just take your time, double-check which networks you’re connected to, and you’ll be fine.

  • How to Sort and Group Files by Tags in Windows Explorer

    How to Sort and Group Files by Tags in Windows Explorer

    Organizing files on your PC can be overwhelming, especially with large folders or mixed file types. Fortunately, tags in Windows Explorer offer a smart way to group and sort files. This step-by-step guide shows you how to use tags effectively to streamline file management.

    Step 1: What Are Tags in Windows?

    Tags are metadata you can add to supported file types, like documents, images, and media. Tags help you categorize files and make them easier to find or organize in File Explorer.

    Note: Tagging is supported primarily by file types such as .docx, .xlsx, .jpg, .mp4. Formats like .txt or .pdf usually don’t support native tagging.

    Step 2: How to Add Tags to Files

    Method A: Add Tags via File Properties

    1. Right-click a file.
    2. Click Properties.
    3. Go to the Details tab.
    4. Find the Tags field under the Description section.
    5. Enter your tags (separate multiple tags with semicolons).
    6. Click Apply, then OK.

    Method B: Add Tags in the Details Pane

    1. Open File Explorer.
    2. Select a file.
    3. Go to View > Details pane (top menu).
    4. In the right-hand pane, find the Tags field.
    5. Click to edit and add tags.

    Step 3: Show the Tags Column in File Explorer

    To sort or group files by tags, you need to display the Tags column:

    1. Navigate to your folder.
    2. Right-click a column header (e.g., Name, Date Modified).
    3. Select More.
    4. Check the box for Tags.
    5. Click OK.

    Step 4: Sort Files by Tags

    1. Click the Tags column header.
    2. Click again to reverse the order.

    Sorting works best with consistent tagging (e.g., “Work”, “Finance”, “2024”).

    Step 5: Group Files by Tags

    1. Right-click inside the folder (not on a file).
    2. Hover over Group by.
    3. Select Tags.

    This creates visual groupings in File Explorer based on your tags.

    Pro Tip: Combine Group by and Sort by Tags for advanced organization.

    Troubleshooting and Tips

    • Unsupported formats: Tags don’t work natively with .txt, .pdf, etc.
    • Batch tagging: Select multiple files > Right-click > Properties > Details > Add tags.
    • Be consistent: Stick to a uniform tagging system to avoid clutter.

    Using tags in Windows Explorer is an efficient way to organize your files, especially across large folders or mixed content. With minimal setup, you can improve your file search, grouping, and sorting workflows.

  • How to Disable Background Apps in Windows 10

    How to Disable Background Apps in Windows 10

    When you’re working on your Windows 10 computer, you may not realize how many background apps are running silently. These apps consume system resources like CPU, RAM, and battery power, even when you’re not using them directly. In my own experience troubleshooting slow systems, disabling unnecessary background apps can significantly improve performance and battery life, especially on laptops and older machines. In this detailed guide, I’ll walk you through multiple ways to disable background apps in Windows 10, including from Settings, Task Manager, and Group Policy Editor. Everything is explained in plain language with practical insights based on real-world usage.

    Why Disable Background Apps in Windows 10?

    Before getting into the steps, it helps to understand the benefits:

    • Free up system resources (RAM, CPU)
    • Improve battery life on laptops
    • Reduce background data usage
    • Minimize system startup delays
    • Enhance overall responsiveness

    Background apps can include built-in programs like Weather, Mail, Maps, Skype, and Xbox Game Bar, as well as third-party apps installed from the Microsoft Store.

    Step 1: Disable Background Apps Using Windows Settings

    This is the most straightforward method for most users.

    Steps:

    1. Click the Start button and select the Settings gear icon.
    2. Navigate to Privacy.
    3. Scroll down and click on Background apps from the left-hand panel.
    4. You will see two options:

      • Let apps run in the background (toggle switch at the top)
      • Individual app toggles below it

    Option 1: Disable All Background Apps

    • Toggle off the master switch: Let apps run in the background.
    • This will prevent all apps from running in the background.

    Option 2: Disable Specific Apps Only

    • Keep the master switch ON.
    • Scroll down and turn off the apps you don’t want running in the background.

    Tip: I usually disable apps like Weather, Xbox Game Bar, Tips, and Skype on personal devices unless I use them regularly.

    Step 2: Disable Startup Apps Using Task Manager

    Some apps run in the background as soon as Windows starts, even if you don’t open them.

    Steps:

    1. Press Ctrl + Shift + Esc to open Task Manager.
    2. Click the Startup tab.
    3. Review the list of apps and check the Startup impact column.
    4. Right-click on any app you don’t need at startup and choose Disable.

    This doesn’t prevent background activity after startup, but it helps speed up boot time and reduce initial load.

    Examples to disable: Spotify, OneDrive (if you don’t use it), Adobe Updater, Steam Client Bootstrapper (unless used daily).

    Step 3: Disable Background Services via System Configuration

    For more advanced users, msconfig lets you manage background services.

    Steps:

    1. Press Windows + R, type msconfig, and press Enter.
    2. Go to the Services tab.
    3. Check Hide all Microsoft services to avoid disabling critical system services.
    4. Review third-party services.
    5. Uncheck services that are not essential and click Apply, then OK.
    6. Restart your PC.

    This method can prevent auto-running services that drain memory and processing power.

    Step 4: Use the Group Policy Editor (For Windows 10 Pro or Enterprise)

    If you’re using Windows 10 Pro, Enterprise, or Education, you can permanently disable background apps via Group Policy.

    Steps:

    1. Press Windows + R, type gpedit.msc, and press Enter.
    2. Navigate to: Computer Configuration > Administrative Templates > Windows Components > App Privacy
    3. Double-click on Let Windows apps run in the background.
    4. Set the policy to Enabled, then under Options, select Force Deny.
    5. Click Apply, then OK.

    This prevents all Microsoft Store apps from running in the background for all users.

    Step 5: Use Registry Editor (For Windows 10 Home Users)

    If you’re on Windows 10 Home, the Group Policy Editor isn’t available. You can achieve the same result through the Registry Editor.

    Warning:

    Editing the registry can cause issues if not done carefully. Always create a backup first.

    Steps:

    1. Press Windows + R, type regedit, and press Enter.
    2. Navigate to:
      HKEY_CURRENT_USER\Software\Microsoft\Windows\CurrentVersion\BackgroundAccessApplications
    3. If the key doesn’t exist, you can create it manually.
    4. Add or modify a DWORD (32-bit) value:

      • Name: GlobalUserDisabled
      • Value: 1 (to disable), 0 (to enable)
    5. Exit Registry Editor and restart your PC.

    This disables all background apps for the current user.

    Step 6: Turn Off Background App Permissions per App (For Store Apps)

    Some apps offer permission toggles specific to their background use.

    Steps:

    1. Go to Settings > Apps > Apps & Features.
    2. Click on any Store app.
    3. Choose Advanced options.
    4. Under Background apps permissions, choose:

      • Always
      • Power optimized (recommended)
      • Never

    Choose Never to stop the app from running in the background completely.

    Step 7: Use Battery Saver to Temporarily Block Background Apps

    If you’re on a laptop and want a quick solution:

    Steps:

    1. Click the battery icon in the system tray.
    2. Drag the slider to Best battery life.
    3. Or go to Settings > System > Battery.
    4. Enable Battery saver and set thresholds for activation.

    Battery Saver mode limits background activity to extend battery life.

    When Not to Disable Background Apps

    While disabling background apps improves performance, some apps need to run in the background to work properly:

    • Mail app: To receive new emails
    • Calendar: For timely notifications
    • Alarms & Clock: To trigger alarms
    • Messaging apps: Like Skype or Teams for calls

    Always review whether an app is necessary before turning it off.

    Final Thoughts

    Disabling background apps in Windows 10 is one of the most effective ways to optimize system performance, save battery life, and reduce unnecessary resource usage. From casual users to power users, managing background tasks has real benefits—especially on mid-range or older hardware.

    Personally, I’ve helped several clients improve boot times and reduce lag simply by limiting what runs in the background. Whether you prefer using the Settings app, Task Manager, Group Policy, or Registry Editor, the choice depends on your comfort level and system version.

  • how to run Linux on Windows using WSL

    how to run Linux on Windows using WSL

    If you’re a developer, system admin, or just someone who wants to try out Linux on Windows, you’re in luck. Microsoft has made it possible to run a full-fledged Linux distribution inside Windows using WSL—the Windows Subsystem for Linux. I’ve personally used WSL for web development, running scripts, and testing server setups—all without needing a separate Linux machine or dual-boot setup. It’s fast, efficient, and deeply integrated into Windows.

    This guide will walk you through how to run Linux on Windows using WSL, step by step, based on verified and practical knowledge.

    What Is WSL?

    WSL (Windows Subsystem for Linux) is a compatibility layer that allows Windows to run Linux binaries natively. It lets you install a Linux distribution like Ubuntu, Debian, or Kali Linux directly from the Microsoft Store.

    There are two versions:

    • WSL 1 – Initial version, good for simple tasks, uses a translation layer
    • WSL 2 – Full Linux kernel via a lightweight virtual machine, supports Docker, faster file system access, and better compatibility

    For most users today, WSL 2 is the recommended version.

    Benefits of Using WSL

    • Run Linux commands alongside Windows apps
    • Access bash shell, apt, and Linux packages
    • Use it for web development, server-side testing, automation, and scripting
    • Avoid dual boot setups or full virtual machines
    • Easy integration with VS Code, Docker, and other dev tools

    System Requirements for WSL

    To use WSL 2, you need:

    • Windows 10 version 2004 or later (Build 19041+)
    • Or Windows 11 (any version)
    • Virtualization enabled in BIOS
    • An internet connection to download Linux distributions

    Step-by-Step Guide to Install and Use Linux with WSL

    Step 1: Enable WSL Feature

    Open PowerShell as Administrator to enable WSL.

    Command:

    powershell

    CopyEdit

    wsl –install

    This command installs everything required, including:

    • WSL 2
    • Virtual Machine Platform
    • Ubuntu (default Linux distro)

    If this doesn’t work or you’re using an older version of Windows 10, you can enable it manually.

    Alternate Manual Method:

    powershell

    CopyEdit

    dism.exe /online /enable-feature /featurename:Microsoft-Windows-Subsystem-Linux /all /norestart

    dism.exe /online /enable-feature /featurename:VirtualMachinePlatform /all /norestart

    Then restart your computer.

    Step 2: Set WSL 2 as the Default Version

    Once WSL is installed, set WSL 2 as default.

    Command:

    powershell

    CopyEdit

    wsl –set-default-version 2

    This ensures any future Linux distributions you install will use WSL 2.

    Step 3: Install a Linux Distribution

    You can now install a Linux distro from the Microsoft Store.

    Common options:

    • Ubuntu (most popular and beginner-friendly)
    • Debian
    • Kali Linux
    • Fedora Remix
    • openSUSE

    Steps:

    1. Open Microsoft Store
    2. Search for Ubuntu (or any other distro)
    3. Click Get to download and install

    After installation, launch the distro from the Start Menu.

    Step 4: Complete Initial Linux Setup

    The first time you launch your Linux distribution, it will take a few moments to set up.

    You’ll be prompted to:

    • Create a new UNIX username
    • Set a password (for the Linux environment)

    Once set, you’ll land in the Linux terminal, ready to use commands.

    Step 5: Update and Upgrade Your Linux Distro

    To ensure your environment is up to date:

    Run:

    bash

    CopyEdit

    sudo apt update && sudo apt upgrade -y

    This updates all installed packages to the latest versions. I do this as the first step after setting up any new system.

    Step 6: Install and Use Linux Tools

    You can now install any Linux command-line tools.

    Examples:

    bash

    CopyEdit

    sudo apt install git

    sudo apt install python3

    sudo apt install build-essential

    You can also clone repos, write shell scripts, and run node apps—all inside your Windows system.

    Step 7: Access Windows Files from Linux

    WSL mounts your Windows file system automatically.

    To access your Windows files:

    bash

    CopyEdit

    cd /mnt/c

    This command takes you to your C:\ drive. You can navigate, copy, and edit files seamlessly between Windows and Linux.

    Example:

    bash

    CopyEdit

    cd /mnt/c/Users/YourUsername/Desktop

    I use this daily when working on cross-platform projects.

    Step 8: Run Windows Commands from Linux and Vice Versa

    WSL allows interoperability.

    From Linux terminal, you can run a Windows app:

    bash

    CopyEdit

    notepad.exe

    From Command Prompt or PowerShell, you can run Linux commands:

    powershell

    CopyEdit

    wsl ls -la

    This is great for integrating tools from both environments in your workflow.

    Step 9: Customize Your Terminal

    For a better experience, install Windows Terminal from the Microsoft Store. It allows you to:

    • Use tabs for multiple shells
    • Change color schemes and fonts
    • Switch between PowerShell, CMD, and Linux easily

    After installing, set your preferred Linux distro as the default profile.

    Step 10: Use WSL with Visual Studio Code

    Install VS Code and then the Remote – WSL extension.

    Steps:

    1. Open VS Code
    2. Click the Extensions icon
    3. Search and install Remote – WSL
    4. Open a folder inside WSL using the command palette: Ctrl + Shift + P → “Remote-WSL: New Window”

    This lets you run your code inside the Linux environment while editing with Windows tools.

    Bonus: Export and Import WSL Distributions

    You can export a WSL instance to back it up or transfer it.

    Export:

    powershell

    CopyEdit

    wsl –export Ubuntu ubuntu_backup.tar

    Import:

    powershell

    CopyEdit

    wsl –import UbuntuNew D:\WSL\UbuntuNew ubuntu_backup.tar

    This is useful for creating consistent environments across multiple machines.

    Troubleshooting Common WSL Issues

    • Virtualization not enabled: Check BIOS settings and enable Intel VT-x or AMD-V
    • WSL version not updating: Use wsl –set-version <distro name> 2
    • Permission errors: Run terminal as Administrator
    • Microsoft Store not installing distro: Download manually from command line using wsl –install -d <distro>

    Conclusion

    Running Linux on Windows using WSL gives you the best of both worlds—access to powerful Linux tools without leaving your familiar Windows setup. Whether you’re coding, testing, or learning Linux, WSL makes it accessible and efficient.

    From my experience, WSL has become an essential part of my daily development environment. It’s easy to set up, fast to use, and integrates beautifully with Windows apps and tools.

    With just a few commands, you can install a full Linux distro and begin using bash, Python, Git, and more—all without rebooting or switching systems.

  • How to Dual Boot Windows and Linux on the same PC

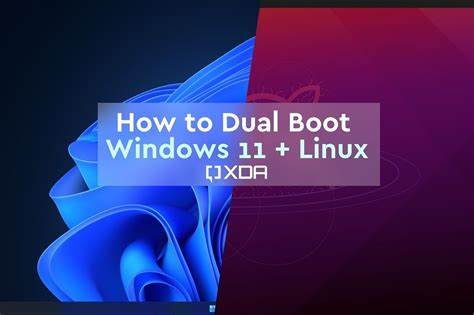
    How to Dual Boot Windows and Linux on the same PC

    Dual booting Windows and Linux on a single PC lets you enjoy the benefits of both operating systems. This setup is ideal if you want to use Windows for everyday tasks and Linux for development, privacy, or learning. This article will walk you through the entire process in a clear, detailed manner, based on current practices and my personal experience.

    What Is Dual Booting?

    Dual booting means installing two operating systems on one computer and choosing which one to start during boot. Both OSes remain independent, and you can switch between them by rebooting.

    Step 1: Prepare Your PC

    Before you start:

    • Back up important data to an external drive or cloud.
    • Ensure your PC has enough free disk space (at least 20-30 GB recommended for Linux).
    • Confirm your system uses UEFI firmware (most modern PCs do) and check if Secure Boot is enabled.

    Step 2: Create Space for Linux

    Linux needs its own partition on your hard drive.

    • Boot into Windows.
    • Open Disk Management: Press Windows + X, then select Disk Management.
    • Find your primary drive and right-click the largest partition (usually C:).
    • Select Shrink Volume and reduce size by at least 20-30 GB.
    • This frees unallocated space for Linux installation.

    Step 3: Download Linux Distribution

    Choose a Linux distribution that suits you. Popular beginner-friendly options include:

    • Ubuntu
    • Linux Mint
    • Fedora

    Download the ISO file from the official website.

    Step 4: Create a Bootable USB Drive

    Use software like Rufus (on Windows) to create a bootable USB.

    • Insert a USB drive (minimum 8 GB).
    • Open Rufus.
    • Select the downloaded Linux ISO.
    • Choose GPT partition scheme (for UEFI systems).
    • Click Start and wait until the process finishes.

    Step 5: Disable Fast Startup and Secure Boot (If Necessary)

    Windows Fast Startup can cause issues during dual boot:

    • Open Control Panel > Power Options > Choose what the power buttons do.
    • Click Change settings that are currently unavailable.
    • Uncheck Turn on fast startup.
    • Save changes.

    For Secure Boot:

    • Restart your PC and enter BIOS/UEFI settings (usually by pressing F2, DEL, or ESC during boot).
    • Navigate to Secure Boot settings and disable it if your Linux distro requires it.
    • Save and exit.

    Step 6: Boot From USB and Start Linux Installation

    • Restart your PC and boot from the USB drive.
    • On most PCs, press a key like F12 during startup to select the boot device.
    • Choose the USB device.
    • The Linux live environment will load; select Install Linux.

    Step 7: Choose Installation Type

    When asked about installation type:

    • Select Install Linux alongside Windows Boot Manager if available.
    • If not, choose Something else for manual partitioning.

    If manual:

    • Select the unallocated space created earlier.
    • Create a new partition for Linux root / (ext4 filesystem) with about 20 GB.
    • Optionally, create a swap partition (equal to your RAM size) for memory management.
    • You may create a separate /home partition for user files.

    Step 8: Install the Bootloader (GRUB)

    Linux uses GRUB as a bootloader to manage OS selection.

    • Make sure GRUB installs to the primary drive (usually /dev/sda).
    • The installer will automatically detect Windows and add it to the boot menu.

    Step 9: Complete Installation and Reboot

    • Follow the on-screen instructions to finish installation (timezone, username, password).
    • After installation, reboot your PC.
    • You will see the GRUB menu with options to boot into Linux or Windows.

    Step 10: Post-Installation Tips

    • Boot into both OSes to confirm everything works.
    • Update Linux via the terminal: sudo apt update && sudo apt upgrade (for Ubuntu-based distros).
    • Adjust boot order or timeout in GRUB if needed (via editing /etc/default/grub).
    • Install drivers or tools needed for hardware support on Linux.

    Troubleshooting Common Issues

    • Windows Doesn’t Boot: Use Windows recovery tools or check boot order in BIOS.
    • Linux Not Showing in Boot Menu: Boot repair tools like Boot-Repair can fix GRUB.
    • Disk Space Problems: Use partition managers like GParted in live Linux mode.

    Conclusion

    Dual booting Windows and Linux provides flexibility and maximizes your PC’s capabilities. By following these steps carefully, you can set up a reliable dual boot system. The key is to back up data, allocate disk space correctly, and install GRUB properly.

  • How to Find Windows Product key using CMD

    How to Find Windows Product key using CMD

    Your Windows product key is a unique 25-character code essential for activating your Windows operating system. Whether you need to reinstall Windows or verify your license, knowing how to locate this key is important.

    This guide explains how to find your Windows product key using Command Prompt (CMD) without overwhelming you with technical commands.

    Why Use CMD to Find Your Product Key?

    Using the Command Prompt to retrieve your product key is quick, safe, and does not require installing any additional software. It accesses the key stored in your system’s hardware or registry and displays it directly.

    Step 1: Open Command Prompt as Administrator

    First, you need to open the Command Prompt with administrative privileges:

    • Click on the Start menu or search bar.
    • Type cmd or Command Prompt.
    • Right-click on Command Prompt and select Run as administrator.
    • If asked by User Account Control, click Yes to allow.

    Step 2: Use the Built-in Windows Tool to Retrieve Your Key

    Once the Command Prompt window opens:

    • You will enter a system command that tells Windows to look for your original product key embedded in your device’s firmware or registry.
    • After running this, the product key will be shown on the screen.

    The displayed key will be a series of letters and numbers grouped in five sets of five characters each.

    Step 3: Save Your Product Key

    After your product key appears:

    • Carefully write down or copy the key exactly as shown.
    • Store it in a safe place, such as a password manager or a secure physical note, to avoid losing it.

    What to Do if the Product Key Does Not Appear?

    If your product key does not show up or the command returns nothing:

    • Your copy of Windows may be using a digital license or digital entitlement instead of a traditional key.
    • The key might not be stored in the system due to the way Windows was installed (for example, upgraded from a previous version without a key).
    • You might need to use alternative methods like checking the original purchase documentation, the Windows packaging, or contacting Microsoft support.

    Alternative Methods to Find Your Product Key

    If CMD does not reveal your key, you can:

    • Use Windows Settings if your system is linked to your Microsoft account, which automatically activates Windows.
    • Use official Microsoft tools or trusted third-party utilities designed specifically to retrieve product keys.
    • Consult documentation or emails if you purchased Windows digitally.

    Important Notes

    • Do not share your product key with others as it grants access to your licensed Windows copy.
    • Always keep a backup of your product key in case you need to reinstall or troubleshoot.
    • Be cautious of websites or software offering to retrieve keys with unknown reliability.

    Conclusion

    Finding your Windows product key using the Command Prompt is a safe and direct way to access your license information. This method requires opening CMD with admin rights and running a simple system query that displays your key on screen. If the key does not appear, it’s likely your license uses a different activation method. By following this guide, you can securely locate and save your Windows product key without technical hassle.

  • How to Create a Guest Account on Windows 11

    How to Create a Guest Account on Windows 11

    Creating a guest account on Windows 11 is a useful way to let others use your PC without giving them access to your personal files or system settings. While Windows 11 does not offer a built-in “Guest” account like older versions, you can create a limited user account that functions similarly. This guide explains how to set up such an account, why it’s important, and how to manage it effectively.

    Why Create a Guest Account on Windows 11?

    A guest account allows someone else to use your computer temporarily with restricted permissions. The guest user cannot install apps, change system settings, or access other users’ files. This protects your data and keeps your system secure while providing convenience.

    Important Considerations

    • Windows 11 removed the traditional Guest account for security reasons.
    • You will create a local standard user account with limited privileges to mimic a guest account.
    • If you want, you can restrict access further using parental controls or group policy.
    • Creating a Microsoft account for the guest is optional but not necessary.

    Step-by-Step Guide: How to Create a Guest Account on Windows 11

    Step 1: Open Windows Settings

    1. Click on the Start menu or press the Windows key.
    2. Select the Settings gear icon, or press Windows + I shortcut.

    Step 2: Navigate to Accounts Settings

    1. In the Settings window, click on Accounts from the left sidebar.
    2. Select Family & other users from the options.

    Step 3: Add a New User

    1. Under Other users, click Add account.
    2. A Microsoft sign-in window appears. Instead of entering an email, click I don’t have this person’s sign-in information.
    3. On the next page, select Add a user without a Microsoft account.

    Step 4: Create a Local Account

    1. Enter a username for the guest account, for example, “Guest” or “Visitor”.
    2. Leave the password fields blank if you want no password (not recommended for security) or set a simple password.
    3. Click Next to finish account creation.

    Step 5: Change Account Type to Standard User

    By default, new accounts are standard users, which is suitable for guests.

    1. In Settings > Accounts > Family & other users, locate the newly created account.
    2. Click on it and select Change account type.
    3. Ensure the account type is set to Standard User (not Administrator).
    4. Click OK.

    Step 6: Customize Guest Account Restrictions (Optional)

    If you want to restrict access further, you can:

    • Use Parental Controls under Family accounts to set time limits or content restrictions.
    • Use Local Group Policy Editor (for Windows Pro editions) to limit apps and features.
    • Manually configure folder permissions to block access to certain directories.

    How to Switch to the Guest Account

    1. Press Windows + L to lock your screen.
    2. Click on the guest account name on the login screen.
    3. Enter the password if set, or simply press Enter if none.

    How to Delete or Manage Guest Account

    To remove or manage the guest account later:

    1. Go to Settings > Accounts > Family & other users.
    2. Select the guest account.
    3. Click Remove to delete the account and its data.
    4. Alternatively, click Change account type to promote or restrict privileges.

    Troubleshooting Common Issues

    Issue 1: Guest Account Cannot Access Internet or Apps

    • Ensure network permissions are allowed.
    • Check if parental controls or firewall are blocking access.
    • Verify the account is set as Standard User.

    Issue 2: Guest User Cannot Save Files

    • Guest accounts typically have limited write permissions.
    • To allow saving files, create a shared folder with write permissions for the guest user.

    Issue 3: Account Password Problems

    • If the guest user forgets the password, the administrator can reset it in Settings > Accounts > Family & other users.

    My Experience Creating Guest Accounts on Windows 11

    I needed to let a family member use my PC without risking my data. Creating a local standard user account as a guest worked well. I avoided Microsoft account sign-in for simplicity. Setting no password made access easy but less secure. Later, I added some folder restrictions manually to protect sensitive data. This setup balances convenience with security.

    Summary

    Though Windows 11 does not provide a dedicated guest account, you can easily create a local standard user account to serve as a guest. This allows others to use your PC safely without affecting your personal files or settings. Follow these steps:

    • Open Settings > Accounts > Family & other users.
    • Add a user without a Microsoft account.
    • Set account type to Standard User.
    • Optionally restrict further via parental controls or permissions.

    This approach keeps your PC secure while providing guest access.

  • How to Split Screen on Windows 10 and 11

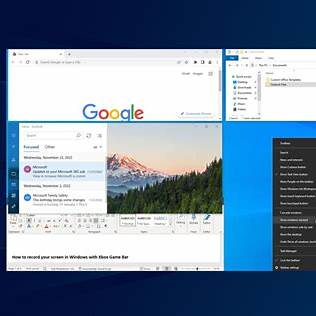
    How to Split Screen on Windows 10 and 11

    Multitasking efficiently is crucial in today’s digital age. Both Windows 10 and Windows 11 offer built-in features to split your screen, allowing you to view and work on multiple applications simultaneously. This guide provides a comprehensive walkthrough on how to utilize these features effectively.

    Understanding Split Screen Functionality

    The split screen feature, known as Snap Assist in Windows 10 and enhanced as Snap Layouts in Windows 11, enables users to organize open windows by snapping them to different areas of the screen. This functionality is particularly beneficial for tasks that require referencing multiple documents or applications side by side.

    Enabling Snap Features

    Before utilizing split screen, ensure that the snap features are enabled:

    1. Open Settings: Press Windows + I to open the Settings menu.
    2. Navigate to Multitasking:
      • Windows 10: Go to System > Multitasking.
      • Windows 11: Go to System > Multitasking.
    3. Enable Snap Windows: Toggle the switch to turn on Snap windows.

    Using Split Screen on Windows 10

    Method 1: Drag and Snap

    1. Select a Window: Click and hold the title bar of the window you wish to snap.
    2. Drag to Screen Edge: Move the window to the left or right edge of the screen until a translucent outline appears.
    3. Release to Snap: Release the mouse button to snap the window into place.
    4. Choose Another Window: Snap Assist will display other open windows; click one to snap it to the opposite side.

    Method 2: Keyboard Shortcuts

    1. Select a Window: Click on the window you want to snap.
    2. Use Shortcuts:
      • Snap Left: Press Windows + Left Arrow.
      • Snap Right: Press Windows + Right Arrow.
    3. Snap to Corners: After snapping left or right, press Windows + Up Arrow or Windows + Down Arrow to move the window to a corner.

    Method 3: Task View

    1. Open Task View: Press Windows + Tab to open Task View.
    2. Drag Windows: Drag windows to different parts of the screen to arrange them side by side.

    Using Split Screen on Windows 11

    Windows 11 introduces Snap Layouts, offering more flexibility:

    Method 1: Snap Layouts via Maximize Button

    1. Hover Over Maximize: Place your cursor over the maximize button of an open window.
    2. Select Layout: A menu with layout options will appear; click on your preferred layout.
    3. Assign Windows: Click on other open windows to fill the remaining spaces in the layout.

    Method 2: Keyboard Shortcuts

    1. Select a Window: Click on the window you want to snap.
    2. Use Shortcuts:
      • Snap Left: Press Windows + Left Arrow.
      • Snap Right: Press Windows + Right Arrow.
      • Snap Up: Press Windows + Up Arrow.
      • Snap Down: Press Windows + Down Arrow.

    Method 3: Snap Assist

    1. Drag to Edge: Click and drag a window to the edge or corner of the screen.
    2. Snap Assist Prompt: Release the mouse button; Snap Assist will suggest other open windows to fill the remaining space.
    3. Select Windows: Click on the suggested windows to complete the layout.

    Advanced Tips

    • Resizing Windows: Hover over the divider between snapped windows; click and drag to adjust their sizes.
    • Snap Groups: In Windows 11, hover over a taskbar icon to see snap groups and quickly switch between them.
    • Multiple Monitors: Snap features work across multiple monitors, allowing for efficient multitasking setups.

    Troubleshooting

    • Snap Not Working: Ensure that Snap windows is enabled in Settings.
    • Layouts Not Appearing: In Windows 11, make sure you’re hovering over the maximize button, not clicking it.
    • Performance Issues: Close unnecessary applications to free up system resources.

    Conclusion

    Utilizing the split screen features in Windows 10 and 11 can significantly enhance your productivity by allowing you to manage multiple applications simultaneously. Whether you’re comparing documents, monitoring data, or multitasking across different programs, these tools provide a seamless experience for efficient workflow management.

  • How to Troubleshoot Audio Issues in Windows 11

    How to Troubleshoot Audio Issues in Windows 11

    Experiencing audio issues on Windows 11 can be frustrating, especially when you’re unsure of the cause. Whether it’s a sudden loss of sound, distorted audio, or issues with specific applications, this comprehensive guide will walk you through step-by-step solutions to troubleshoot and resolve common audio problems in Windows 11.

    1. Check Physical Connections and Hardware

    Before diving into software settings, ensure that your hardware is functioning correctly.

    • Verify Connections: Ensure that speakers, headphones, or external audio devices are properly connected to the correct ports. For wired devices, check for loose cables or damaged connectors.
    • Power and Volume: Confirm that your audio devices are powered on and that their volume controls are set appropriately. Some speakers have independent volume controls that need to be adjusted.
    • Try Alternative Devices: If possible, test your audio output with a different set of speakers or headphones to rule out hardware malfunctions.
    1. Confirm Audio Output Device Settings

    Windows 11 may sometimes default to an incorrect audio output device.

    • Select the Correct Output Device:
      1. Click on the Speaker icon in the taskbar.
      2. Click the arrow next to the volume slider to view available audio devices.
      3. Select the appropriate output device (e.g., speakers, headphones).
    • Set as Default Device:
      1. Right-click the Speaker icon and choose Sound settings.
      2. Under Output, select your preferred device and click Set as default.
    1. Check Volume Levels and Mute Settings

    It’s essential to ensure that volume levels are appropriately set and that devices aren’t muted.

    • Adjust Volume:
      1. Click the Speaker icon in the taskbar.
      2. Ensure the volume slider is not at the minimum.
    • Volume Mixer:
      1. Right-click the Speaker icon and select Open volume mixer.
      2. Ensure that none of the applications are muted and that their volume levels are adequate.
    1. Run the Windows Audio Troubleshooter

    Windows 11 includes a built-in troubleshooter to detect and fix common audio issues.

    1. Press Windows + I to open Settings.
    2. Navigate to System > Troubleshoot > Other troubleshooters.
    3. Under Playing Audio, click Run and follow the on-screen instructions.
    1. Update or Reinstall Audio Drivers

    Outdated or corrupted drivers can lead to audio problems.

    • Update Drivers:
      1. Right-click the Start button and select Device Manager.
      2. Expand Sound, video and game controllers.
      3. Right-click your audio device and choose Update driver.
      4. Select Search automatically for drivers.
    • Reinstall Drivers:
      1. In Device Manager, right-click your audio device and select Uninstall device.
      2. Restart your computer; Windows will attempt to reinstall the driver automatically.
    1. Disable Audio Enhancements

    Audio enhancements can sometimes interfere with sound output.

    1. Right-click the Speaker icon and select Sound settings.
    2. Under Output, click on your audio device.
    3. Scroll down and click Advanced.
    4. Toggle Audio enhancements to Off.
    1. Restart Windows Audio Services

    Restarting audio services can resolve underlying issues.

    1. Press Windows + R, type services.msc, and press Enter.
    2. In the Services window, locate Windows Audio.
    3. Right-click it and select Restart.
    4. Repeat the process for Windows Audio Endpoint Builder.
    1. Check Application-Specific Settings

    Sometimes, the issue might be isolated to a specific application.

    • In-App Audio Settings: Ensure that the application isn’t muted and that it’s configured to use the correct audio output device.
    • Browser Tabs: For web-based applications, right-click the browser tab and ensure the site isn’t muted.
    1. Update Windows 11

    Keeping your operating system up to date can resolve compatibility issues.

    1. Press Windows + I to open Settings.
    2. Navigate to Windows Update.
    3. Click Check for updates and install any available updates.
    1. Perform a System Restore

    If audio issues began after recent changes, restoring your system to a previous state might help.

    1. Press Windows + R, type rstrui, and press Enter.
    2. Follow the prompts to choose a restore point before the issue began.

    Conclusion

    By systematically following these steps, you can identify and resolve most audio issues in Windows 11. Regularly updating your system and drivers, along with routine checks of your audio settings, can prevent future problems. If issues persist after trying all the above methods, it may be advisable to consult with a professional technician or contact your device manufacturer’s support.