Are you wondering about how to use and customize the Windows 11 Quick Settings panel?
With Windows 11, Microsoft introduced the “Quick Settings” panel that replaces the “Action Centre” panel found in Windows 10.
Quick Settings in Windows 11 works like the “Control Center” feature found on systems running Apple’s macOS.
To put it simply, the “Quick Settings” panel allows you to easily access the most frequently used features in your Windows 11 computer.
For example, by adding the “WiFi” toggle to the Quick Settings menu, you don’t have to go through several windows and options to turn ON/OFF WiFi or connect to a particular network.
Also Read -> Open NEF Files in Windows 10
Where to Find Quick Settings Feature in Windows 11?
Quick Settings does look like a nice feature to have in a Windows PC.
Well, this feature does help you save a lot of time and effort which otherwise would’ve been spent in finding and tweaking features that you commonly use on a regular basis.
So, where can you find the Quick Settings feature in Windows 11?
Windows 11 Quick Settings feature is available in the right corner of the taskbar.
This is the same place that housed the Action Centre feature in Windows 10.
Clicking the set of icons that represent WiFi, battery percentage, speaker sound, etc. the Quick Settings window will appear.
Alternatively, if you press the “Windows” key + “A” key, the Quick Settings window will appear.
Again, this is the same shortcut used to launch the Action Centre feature in Windows 10.
How to Use and Customize the Windows 11 Quick Settings?
Now that you know about the Windows 11 Quick Settings, let us explain to you how you can customize this feature.
- Press the “Windows” key + “A” key to launch Quick Settings.
- Within the Quick Settings menu, right-mouse-click on any shortcut.
- From the pop-up options that appear, click on “Edit Quick Settings” option.
- Now, you can either add or remove icons from the Quick Settings list.
- Once you setup the Quick Settings menu, exit the edit option by clicking on “Done”.
- You can also rearrange the icons as per your preference.
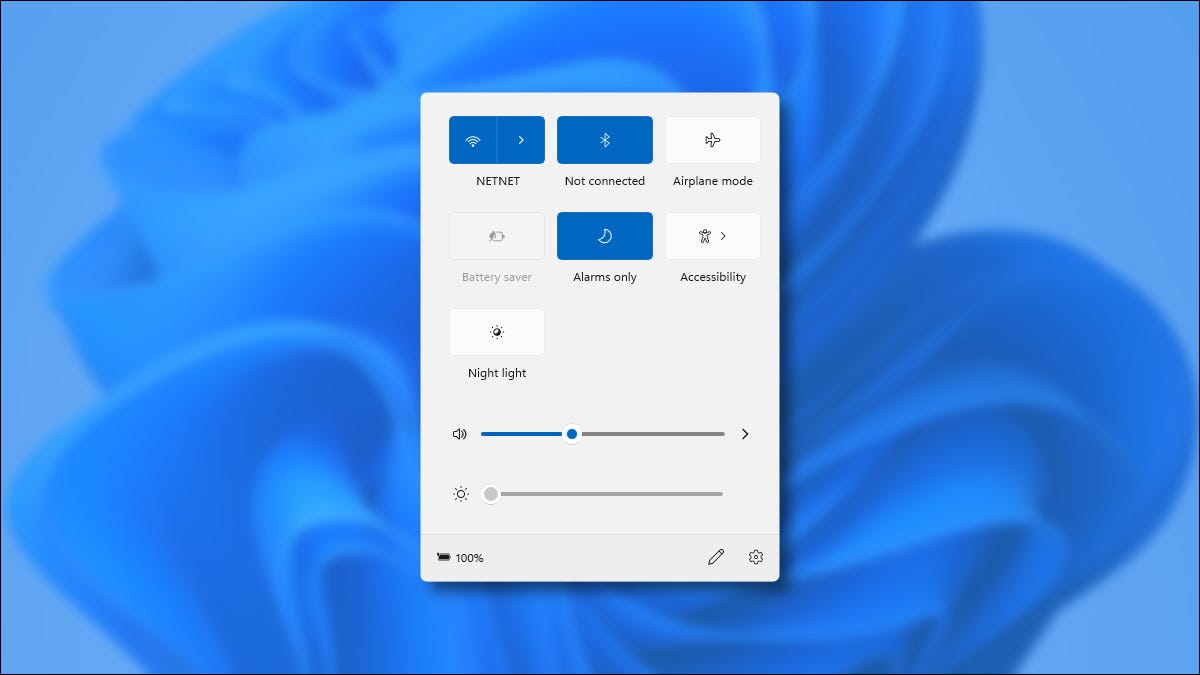
What Are the Options Available in Quick Settings?
Let us now look at the various options that are available to toggle within the Quick Settings feature.
- WiFi: You can power ON/OFF the WiFi feature and also connect to a network of your choice.
- Airplane Mode: You can turn ON/OFF airplane mode.
- Bluetooth: Turn ON/OFF bluetooth feature.
- Volume Controls: Increase/decrease the volume of your system. You can also mute the volume completely.
- Accessibility: Control accessibility features available within Windows 11 such as narrator, magnifier, mono audio, sticky keys, and color filters.
- Battery Saver: Switch ON or OFF the battery saver mode on your Windows 11 computer.
- Brightness: You can control the brightness level with this option from the Quick Settings menu itself.
- Focus Assist: Toggle between the various focus assist modes of Windows 11 such as Alarm only, Priority mode, etc.
Final Words
We hope you found this article on how to use & tweak the Windows 11 Quick Settings feature as informative and helpful.
Don’t hesitate to reach out to us in case of any doubts.