This post is a step by step guide with pictures to help you boot into safe mode in Windows 10. Safe Mode in Windows 10 is a part of the advanced startup or diagnostic startup feature of Windows. With this you get almost all the troubleshooting options of Windows 10 at one place. Booting into safe mode is a rather convenient choice if:
- You wish to remove a faulty device driver
- need to troubleshoot a specific problem related to apps and programs
- To make sure your core Windows installation is working fine
- & a lot of other troubleshooting stuff
Safe Mode in Windows comprises of just the most basic system files & device drivers, the ones most essential for Windows to start. This mode helps you diagnose most of the problems associated with Windows, that might not let your PC start correctly.
How to boot Windows 10 safe mode:
Scenario 1: Through Lock Screen OR Start Menu
- Press & Hold the Shift key on your keyboard
- While Holding the shift key, Click on Restart
- Now, from the menu Click on Troubleshoot
- From the menu that follows, Click on Advanced Options
- Now, from the menu that comes,
- Click on Startup Settings
- And, Click on Restart
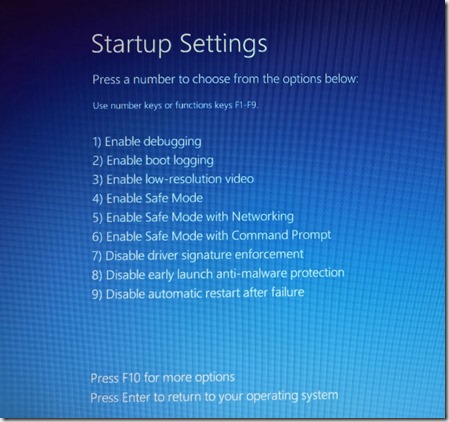
- Now, you will get a screen with options just like in the screengrab below
- Press 4 on your keyboard
- Your Windows 10 is now booting into safe mode
- Enter your Account Password, when prompted
- After the booting completes, your desktop will change to a black wallpaper
- The screen should look something like this
Scenario 2: Through bootable media | Recovery Drive
In this scenario, most of the options remain exactly the same as mentioned above, the only thing that changes is the way you get to the troubleshoot Screen
- Insert your Recovery or Installation DVD/USB into the drive/slot
- Boot from the said media
- When prompted, Select your keyboard layout
- From the screen that follows,
- Click on Troubleshoot & follow the steps as mentioned above


