This post is specifically intended for Windows 10 users. This post will help you Create restore point & Restore Windows 10. By default, System restore is not enabled in Windows 10. Though, its a very useful feature, there are other diagnostics and recovery options built in to Windows 10 that normally does the work just fine. But just in case, System Restore sometimes is a life saver. So, this post is a step-by-step tutorial with pictures to help you out in turning system restore on, setting a restore point and if needed, restoring your computer to an earlier date in Windows 10 where everything used to work fine.
Follow the steps below To turn System Restore ON:
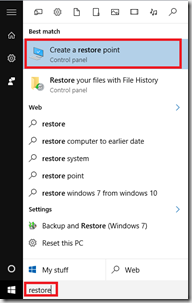
- Click on Cortana search or start menu
- Type Restore
- Click on Create a restore point
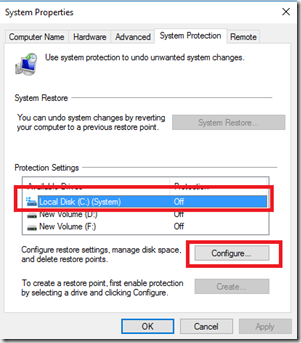
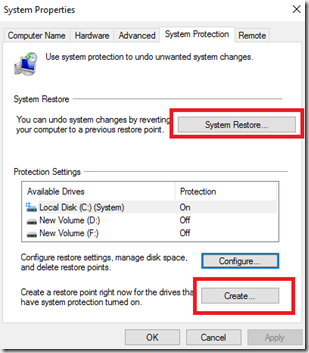
- Now, as you will see system restore is OFF on all drives.
- Click on Local Disk (C: ) or any other drive that says SYSTEM in front of it
- Click on Configure
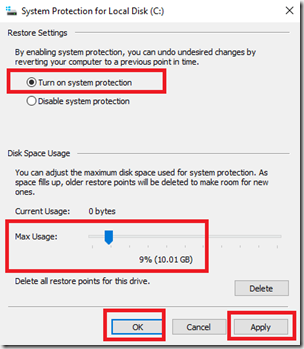
- Now, Click on Turn on system protection
- Specify the amount of space you wish to allocate to system restore, typically 10% should do.
- Click on Apply & OK
This Turns your System Restore on.
To create a Restore Point:
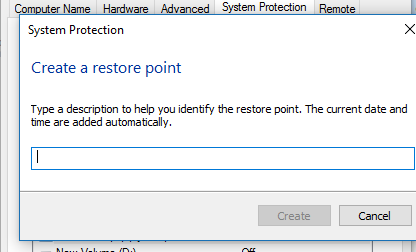
- Click on Create
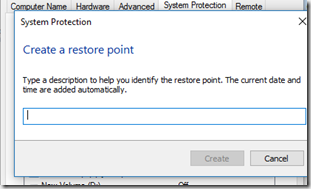
- Now, Specify a name
- Click on create
- You will see something like in the screenshot below
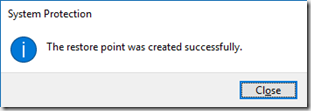
- and then a confirmation
- Click on Close
Now, If you wish to Restore your computer to an earlier time.
- Click on System Restore
- Follow the method described here (Click Here)

